
This applies to the following countries
- All countries
Add user
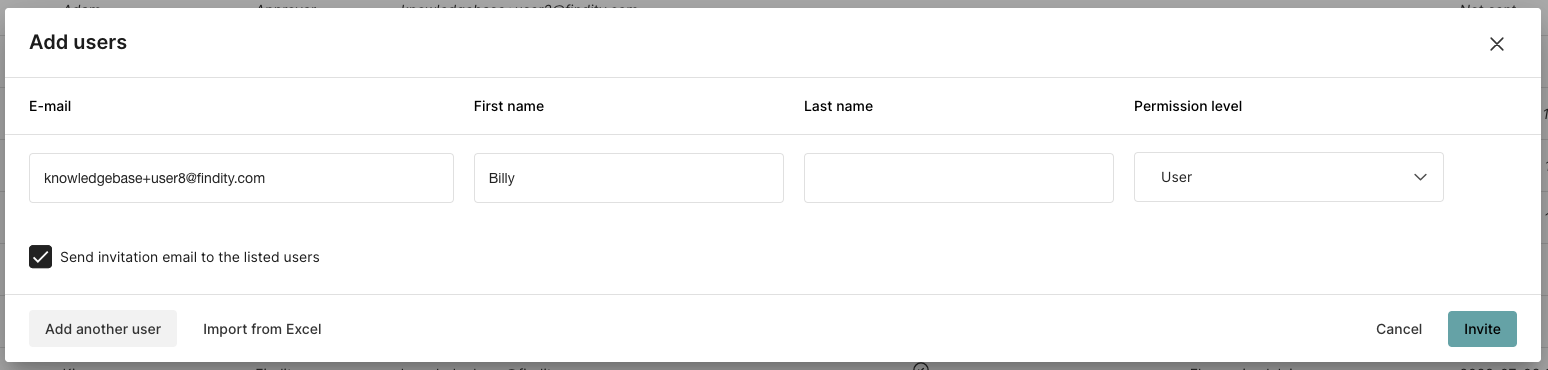
Click on Add users to invite a new user.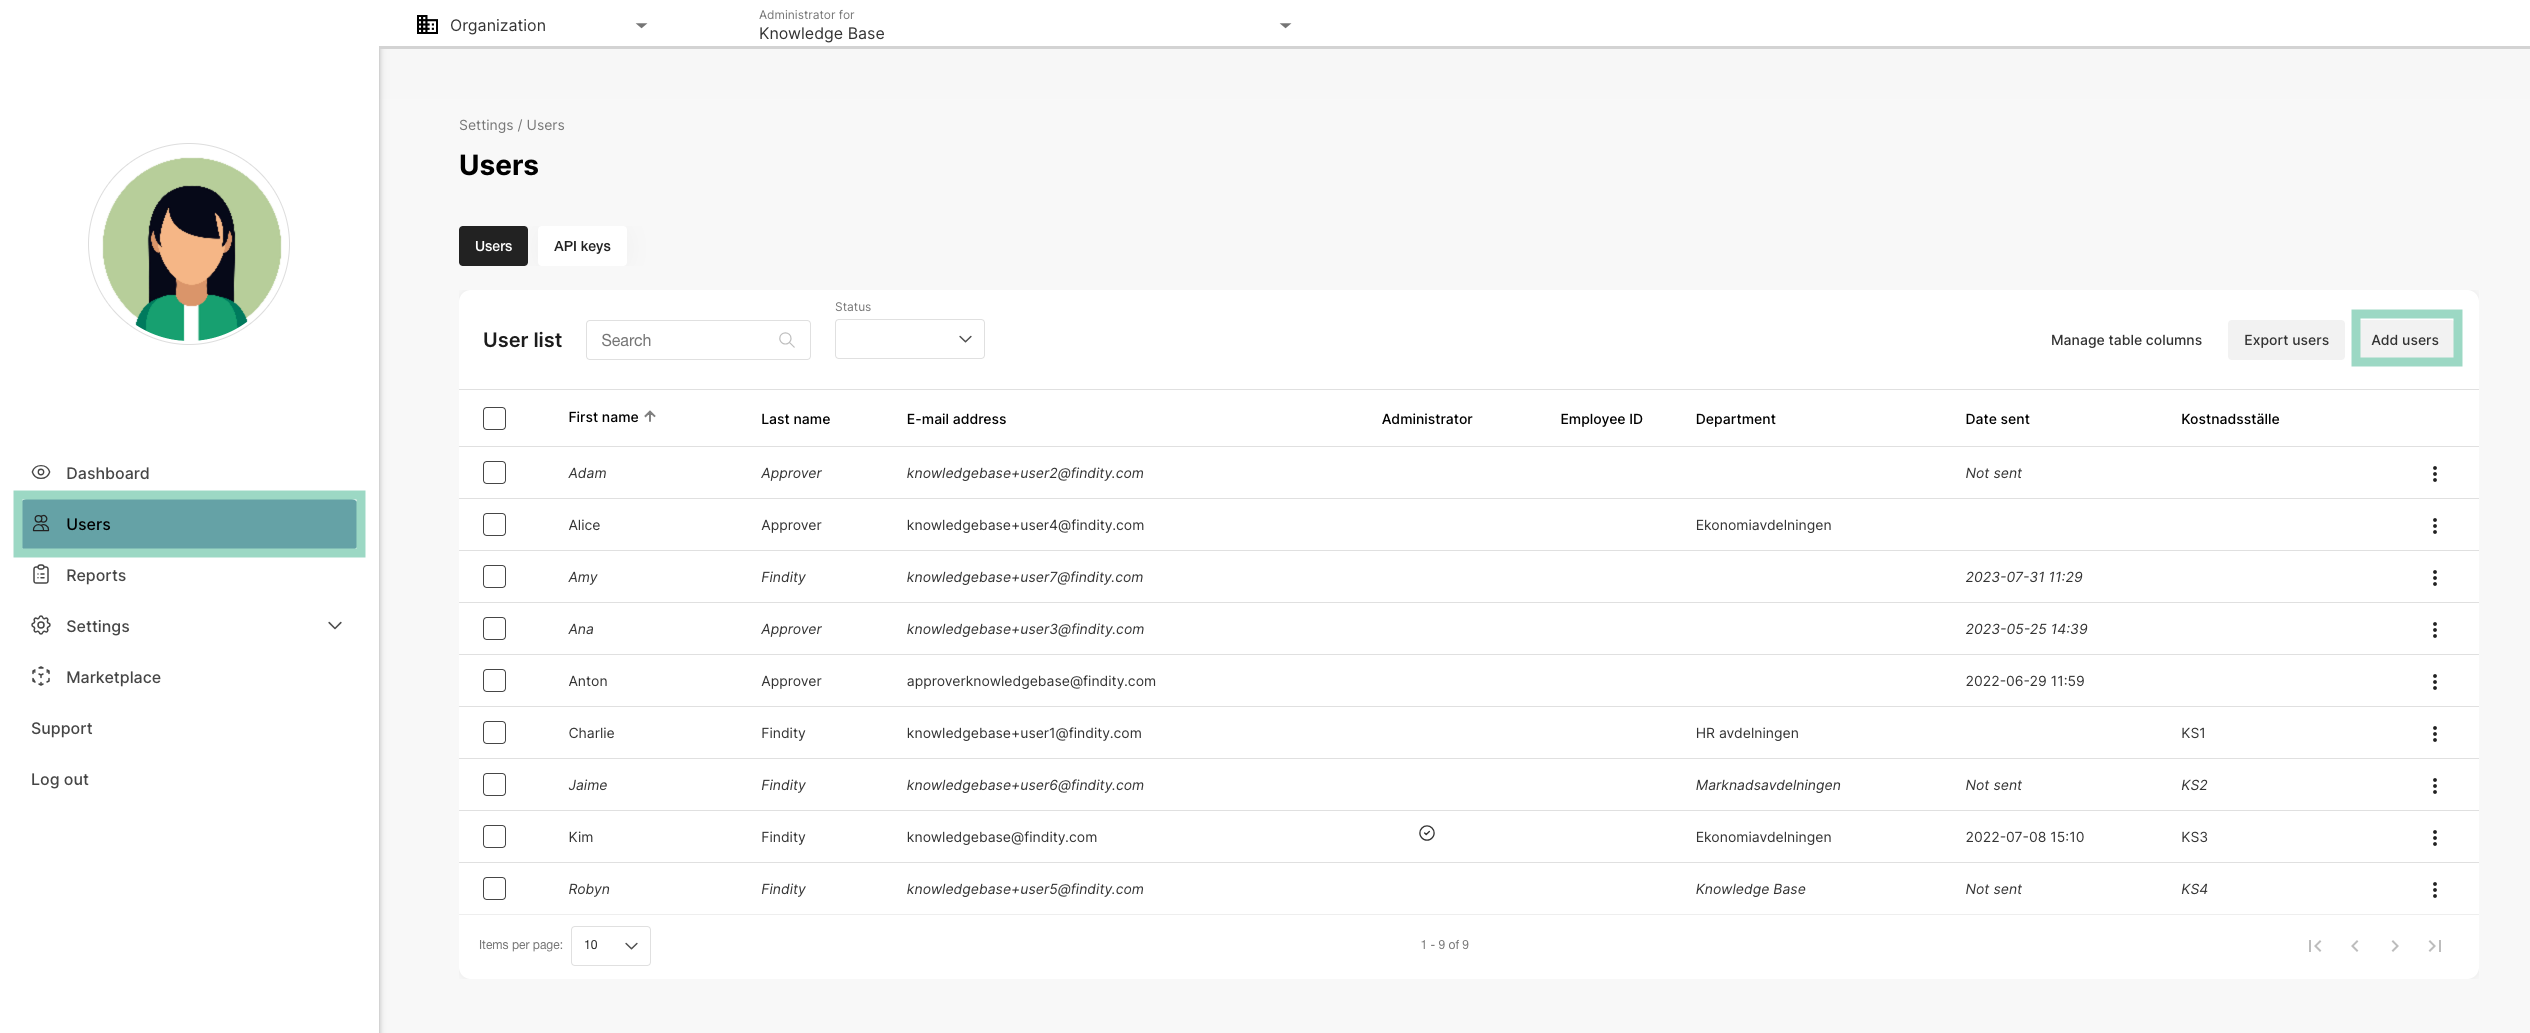
Add administrator
If you want to add a new user who you also want to make an administrator, do the same steps as when you add a new user, but instead choose Permission level - Administrator.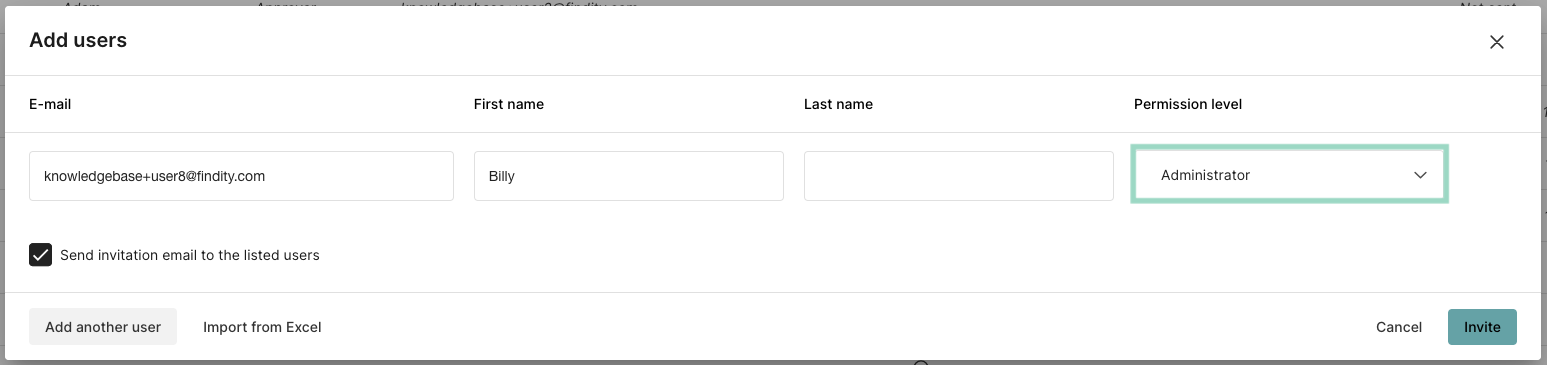
Delete users
You can also delete existing users by clicking on “the three dots” on the right side of the user that you want to delete. Deleting a user is a non-reversible action. Note that all not submitted expenses will be deleted on the user.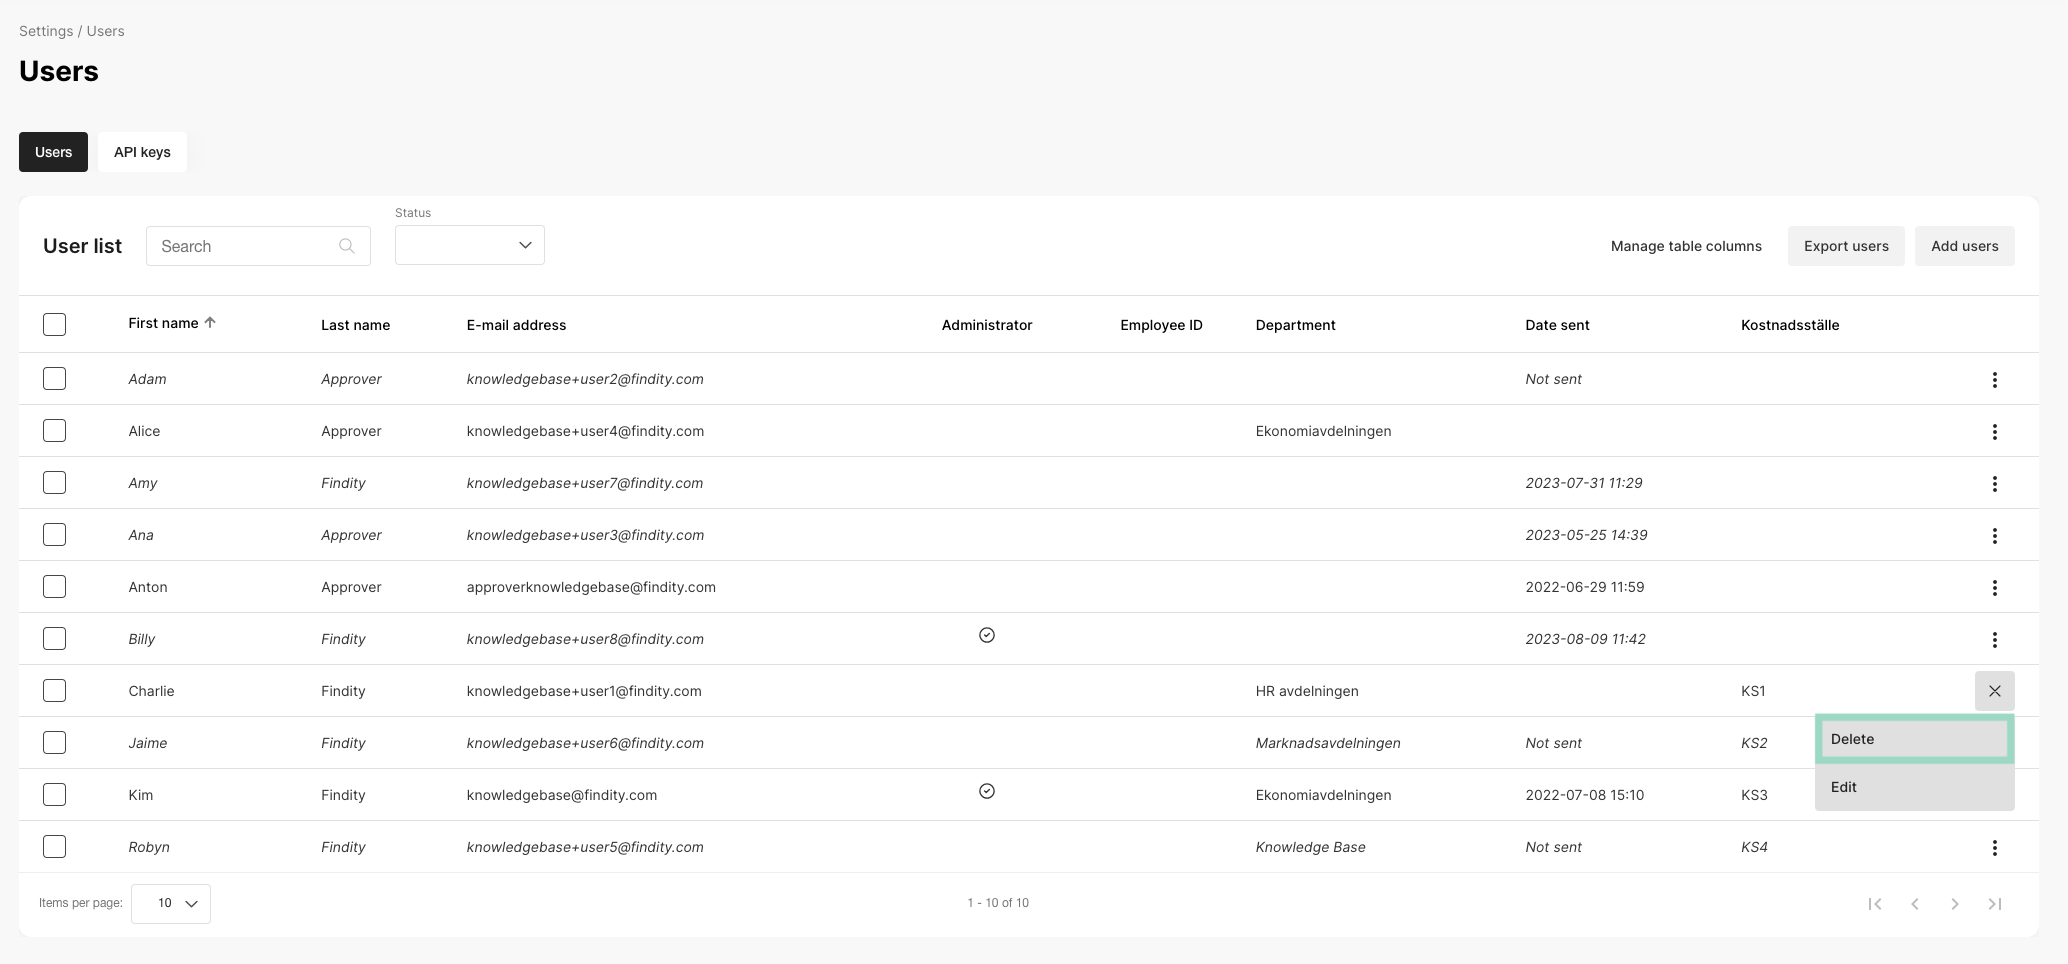
Edit users
By clicking on a user, you can manage their Department and Employee ID. You may also make the user an Administrator, or Allow them to register expenses for others. The number of fields to edit might vary due to the settings on your organisation.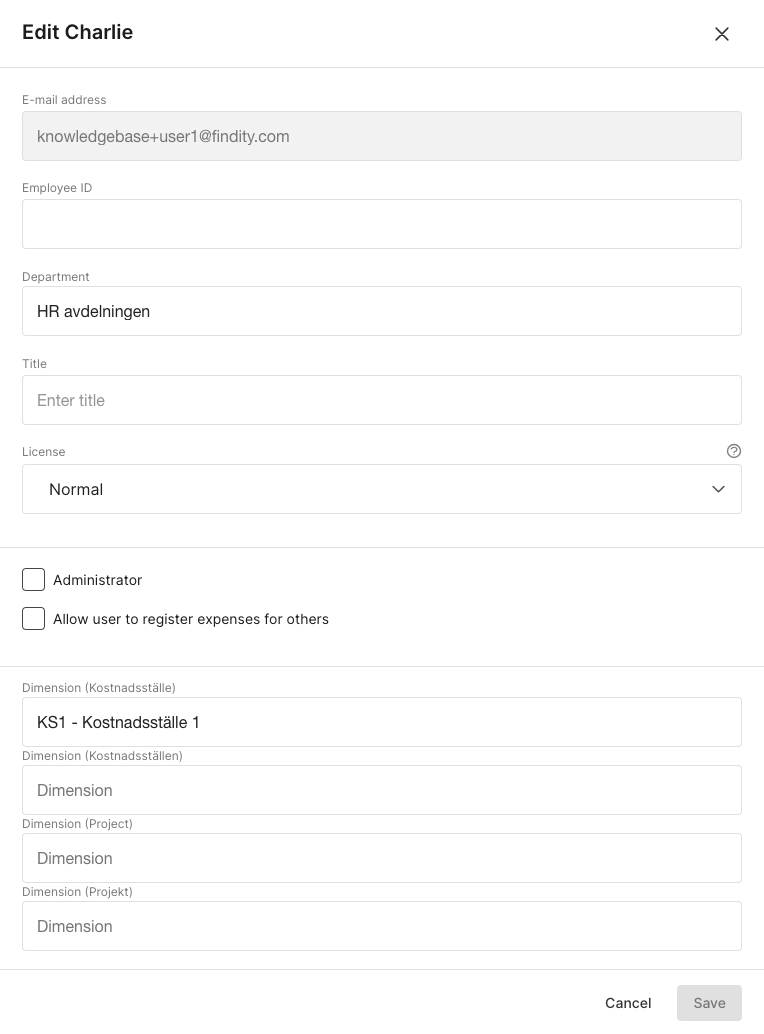
Overview of the tab Users
If you click on Manage table columns you can choose which columns you want to show in the view.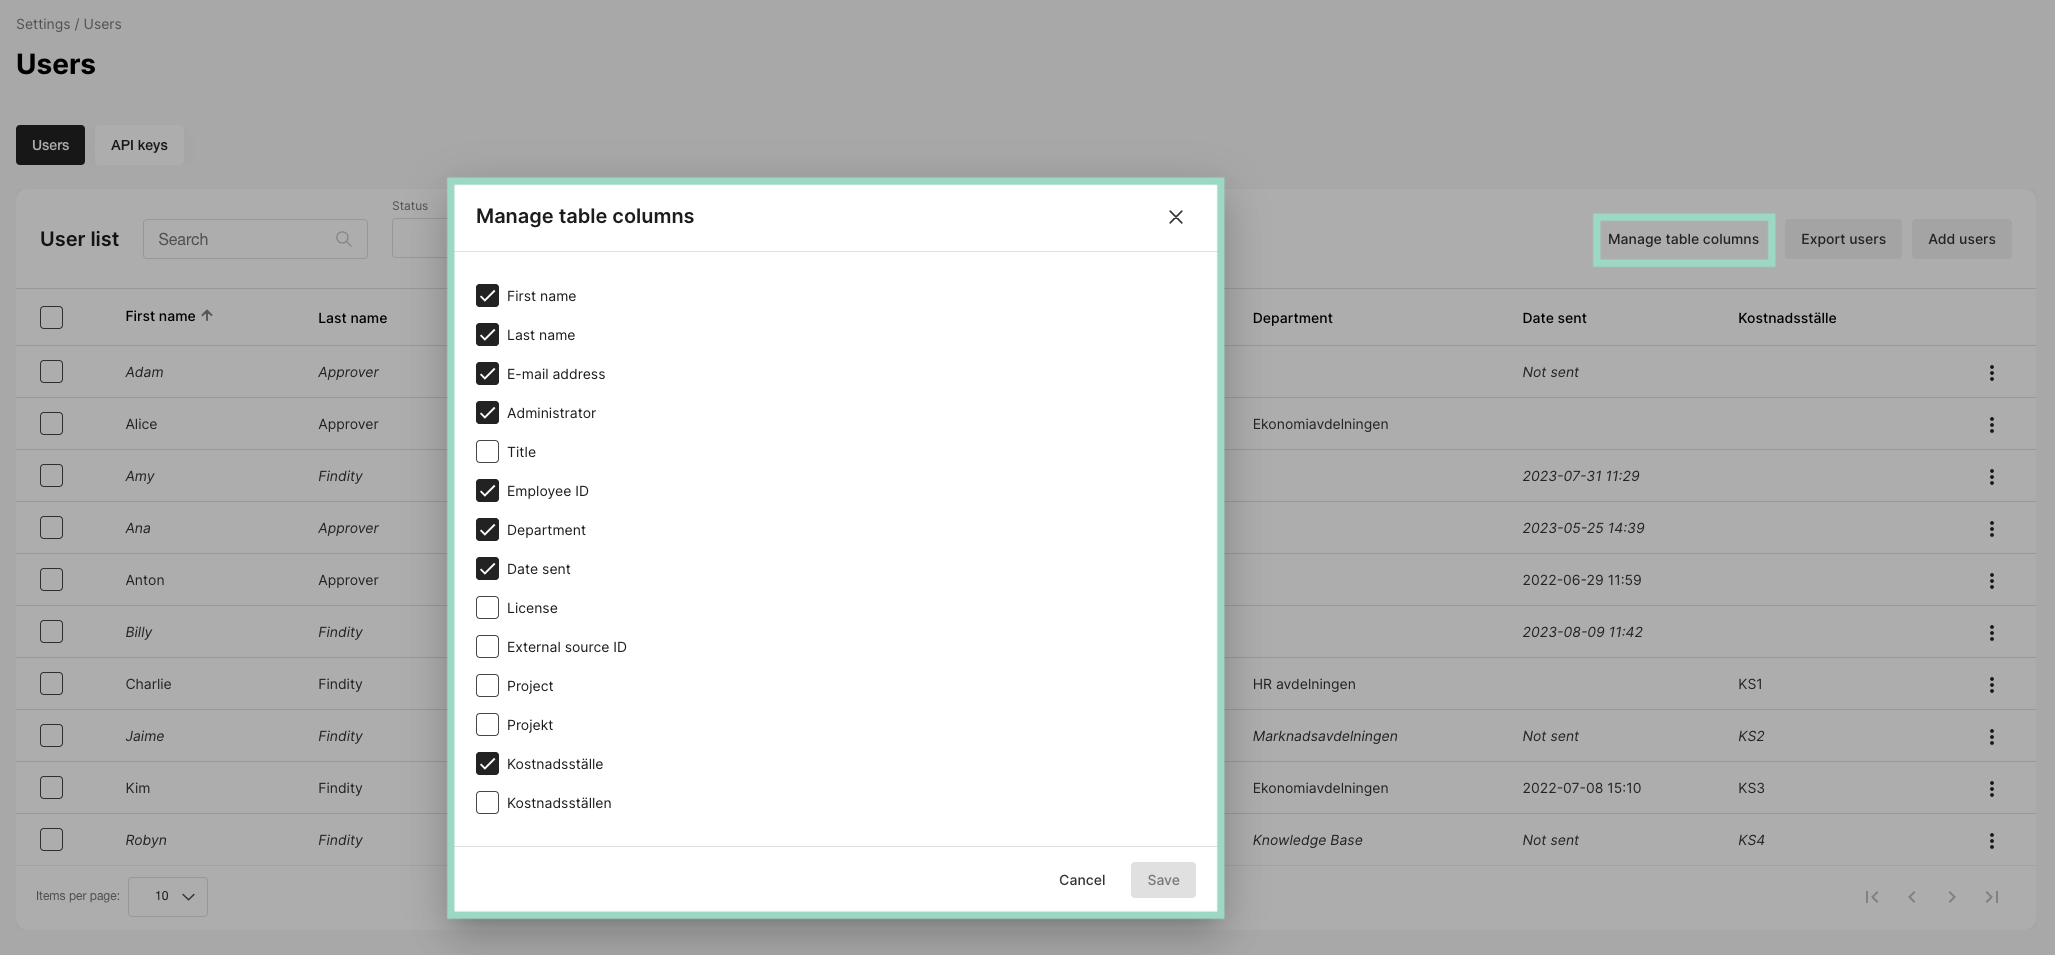
Send or resend the invitation to an already existing user in the list
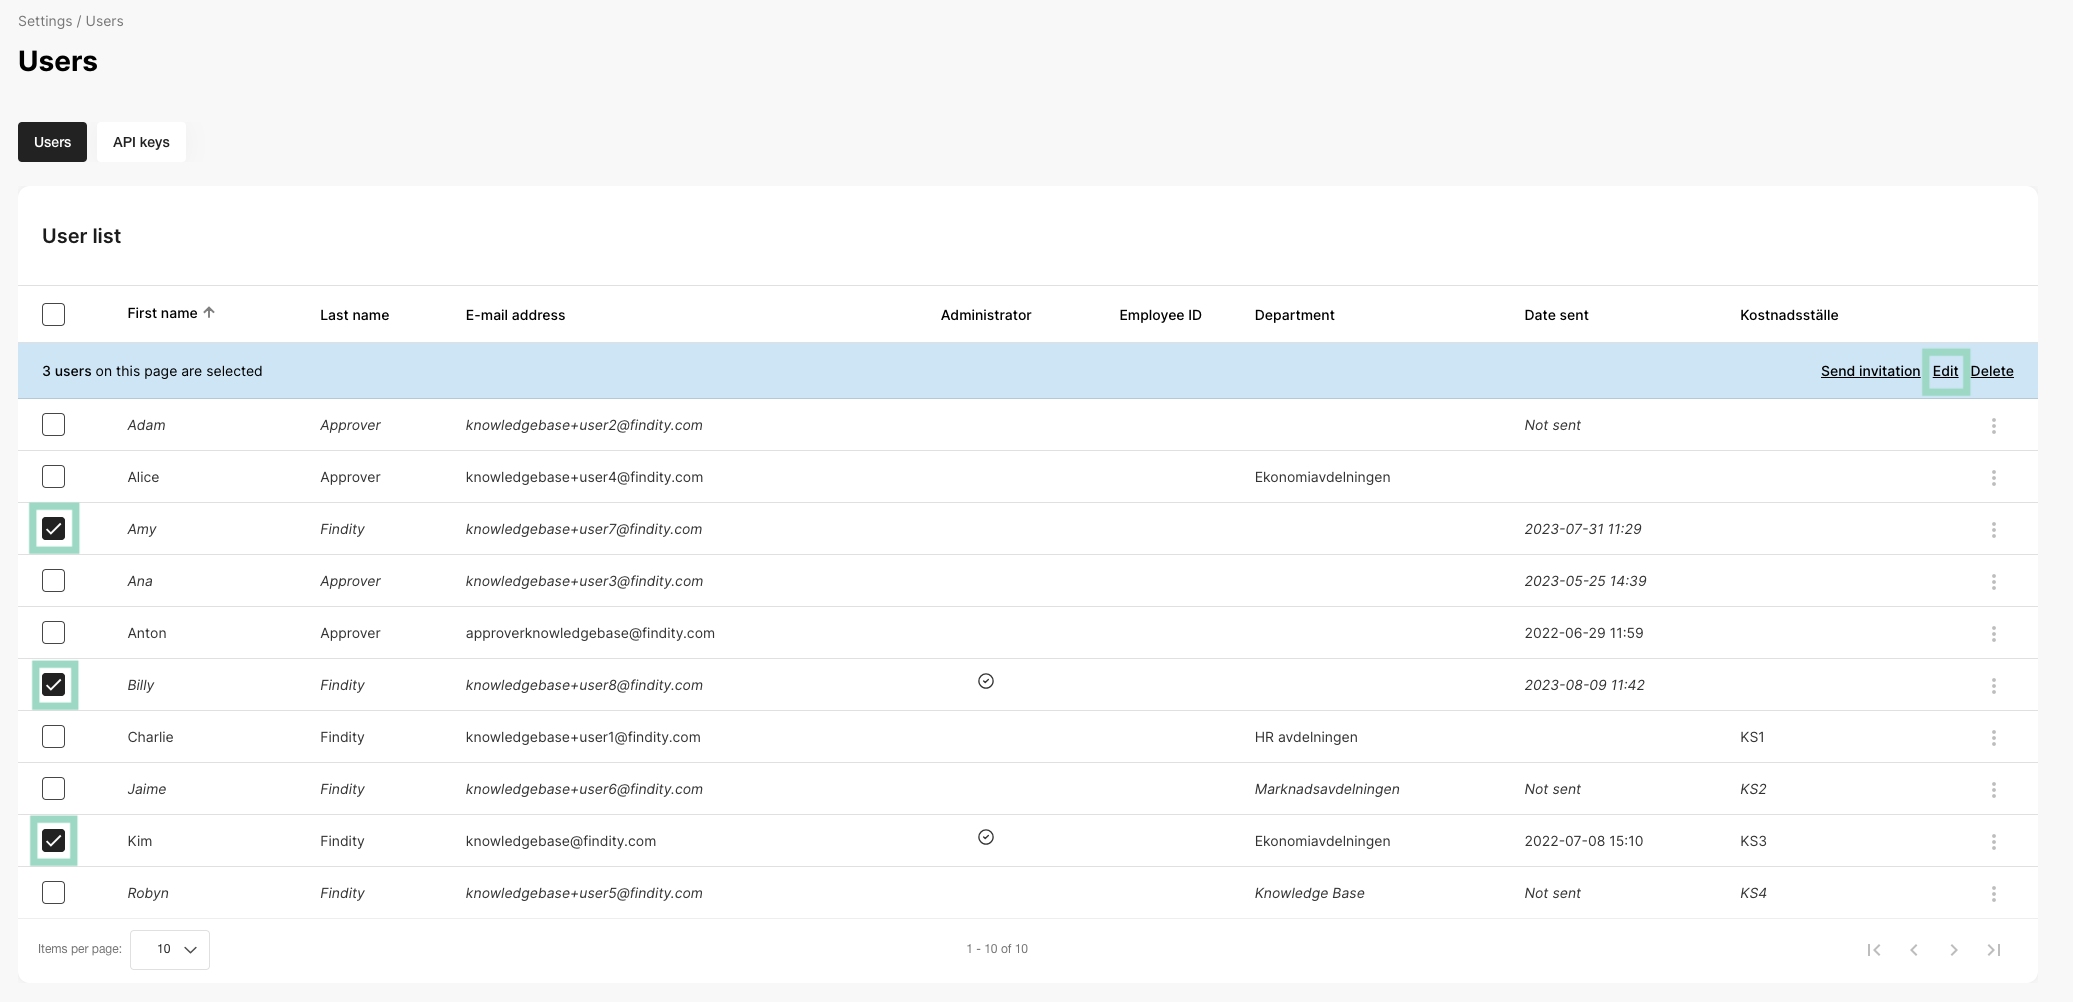
If you have a user that you haven’t invited yet or that you want to resend an invitation to, then select the user or users that you wish to send the invitation to and then select Send invitation in the blue menu bar that appears at the top of the user list.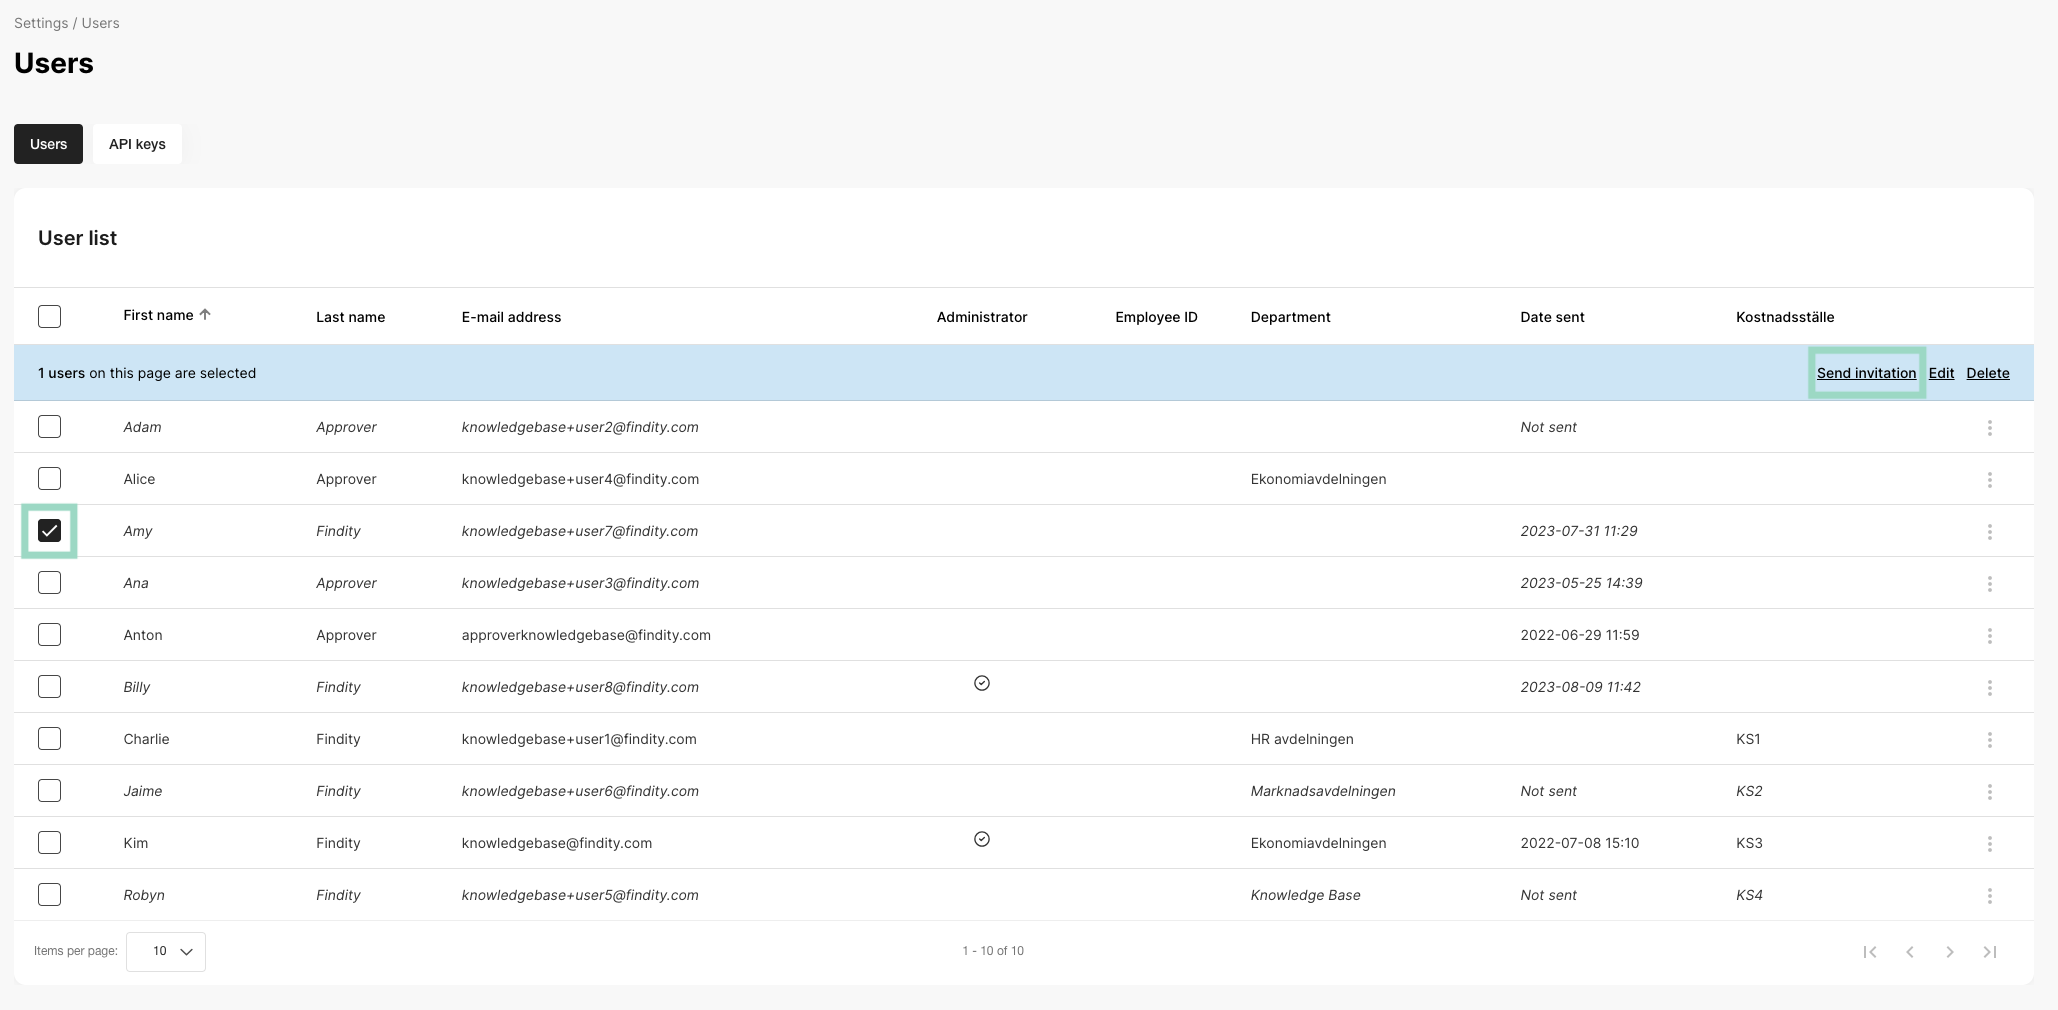
Edit multiple users
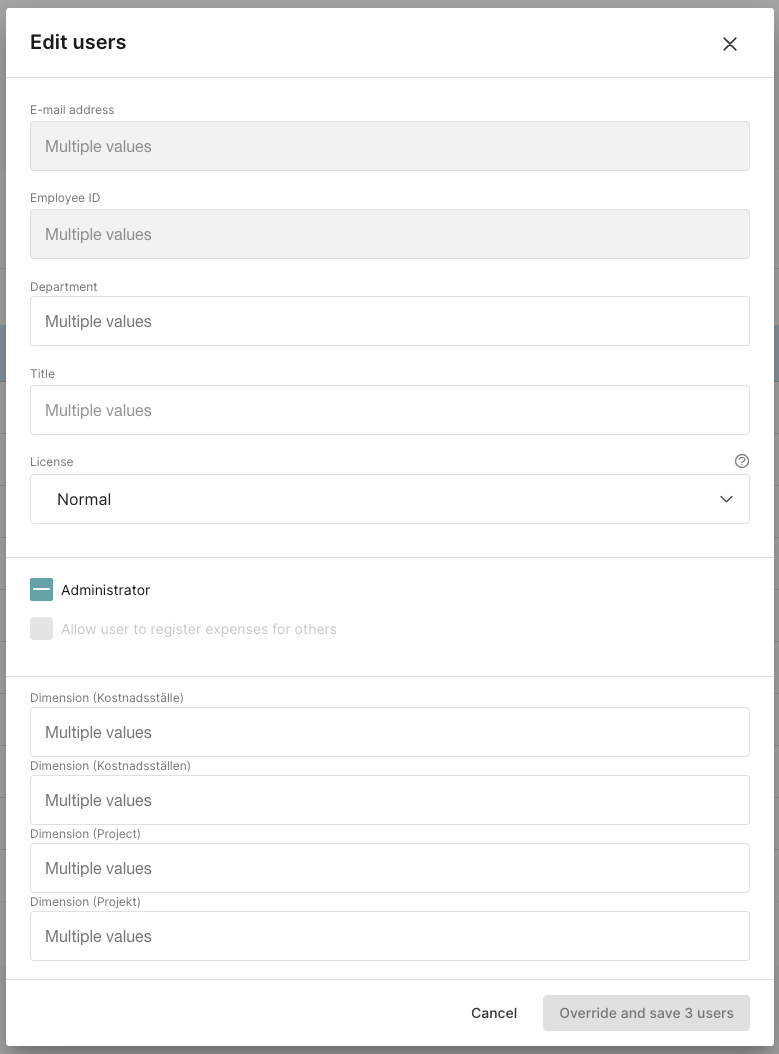
If you want to edit or delete several users at the same time, you can choose to select these users and then click on Delete or Edit in the blue menu bar that appears at the top of the user list. If you choose to Edit several users, a new box will open where you can make changes for all selected users, however, you can only edit some of the values (the values that are not grayed out are editable).