

This article applies to the following countries
- All countries
Before you start
- You make purchases with a business card connected to Findity.
- You receive digital receipts, either directly from the card transaction or from a connected email inbox (Gmail or Outlook).
- Your organisation has not turned off AI features. See For administrators.
- You have turned on Auto-submit in your settings. See Turn on auto-submit.
How it works
Auto-submit works in the background and combines several AI features:1
The receipt arrives
A digital receipt arrives from the card transaction or from your connected email inbox. The expense appears in the To-do tab with a Digital receipt label.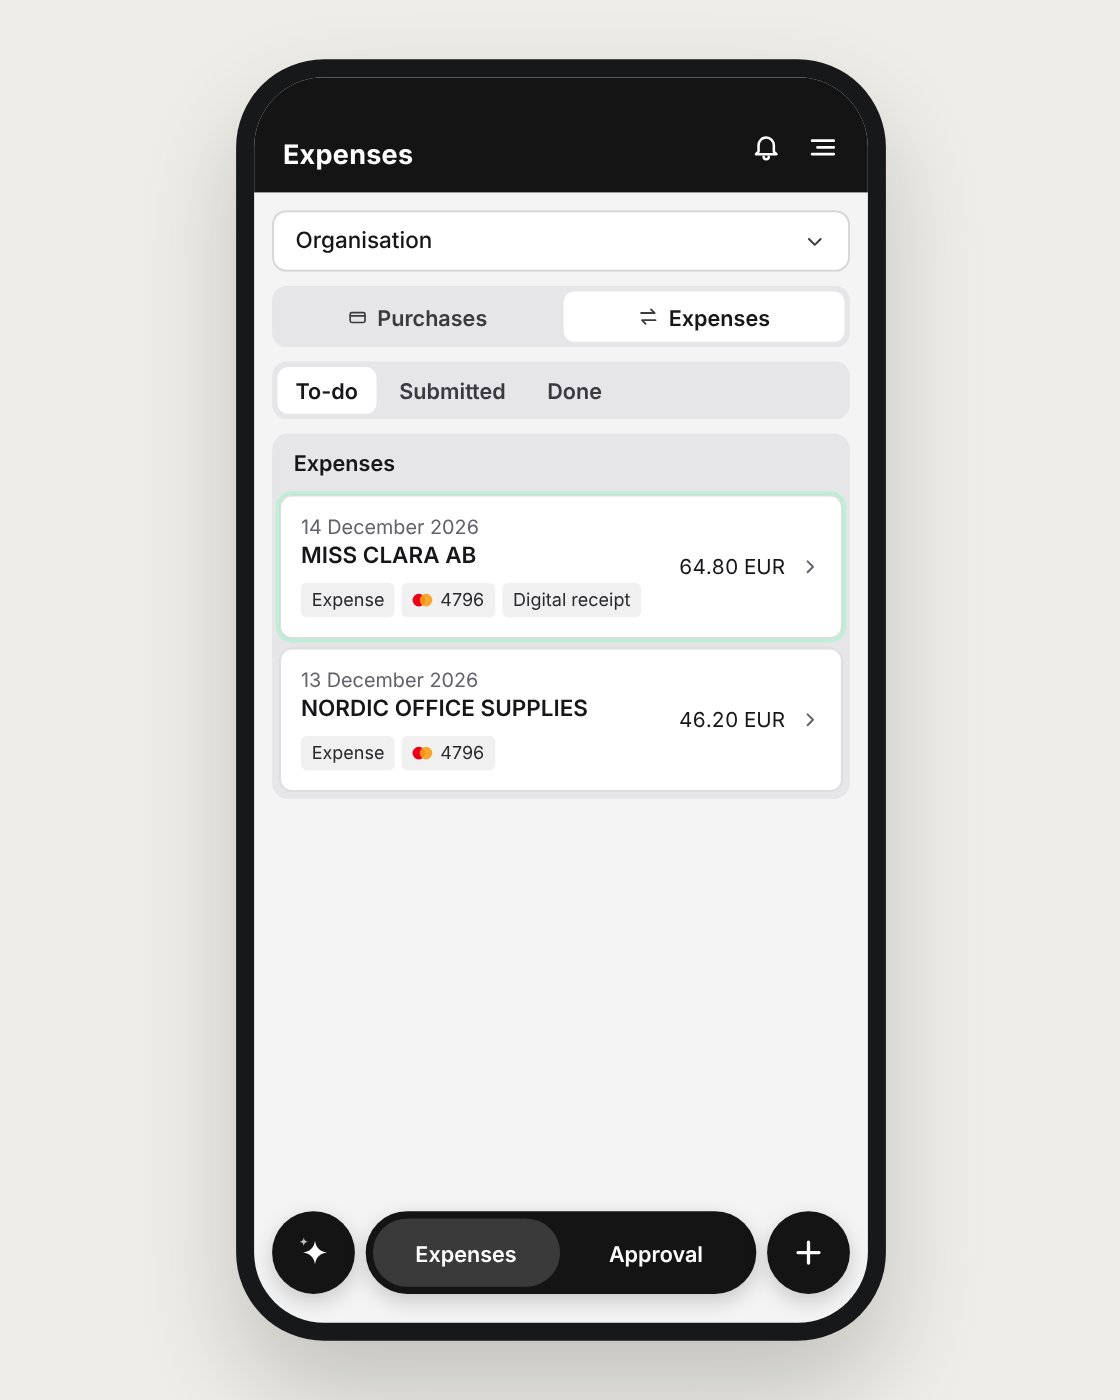
2
The receipt is matched
The receipt is matched to the right business card transaction based on amount, merchant, and time.
3
The fields are filled in
The AI writes a description and fills in fields such as category and cost center, based on the receipt, the transaction, and your previous expenses. In the example, the merchant name is replaced by the description “Lunch for two at Miss Clara”.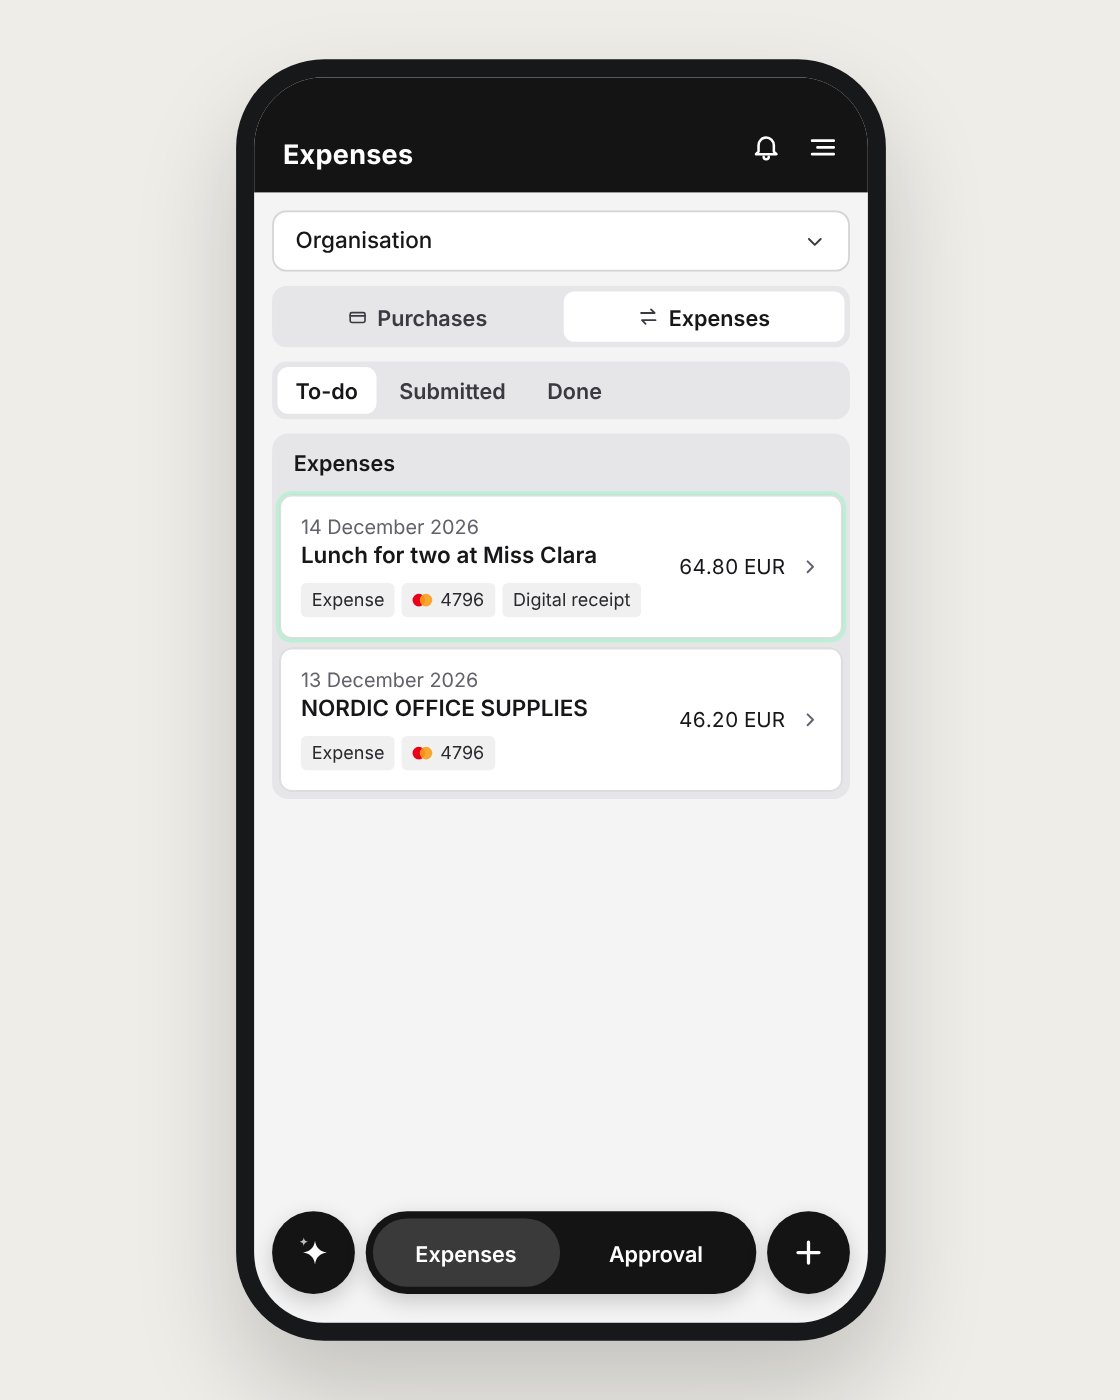
4
The expense is checked
The service checks that all required fields are filled in and that the expense has no errors.
5
The expense is submitted
If everything is complete and there are no errors, the expense moves from draft to submitted without you doing anything. You get a notification that the expense was submitted automatically, with the digital receipt attached.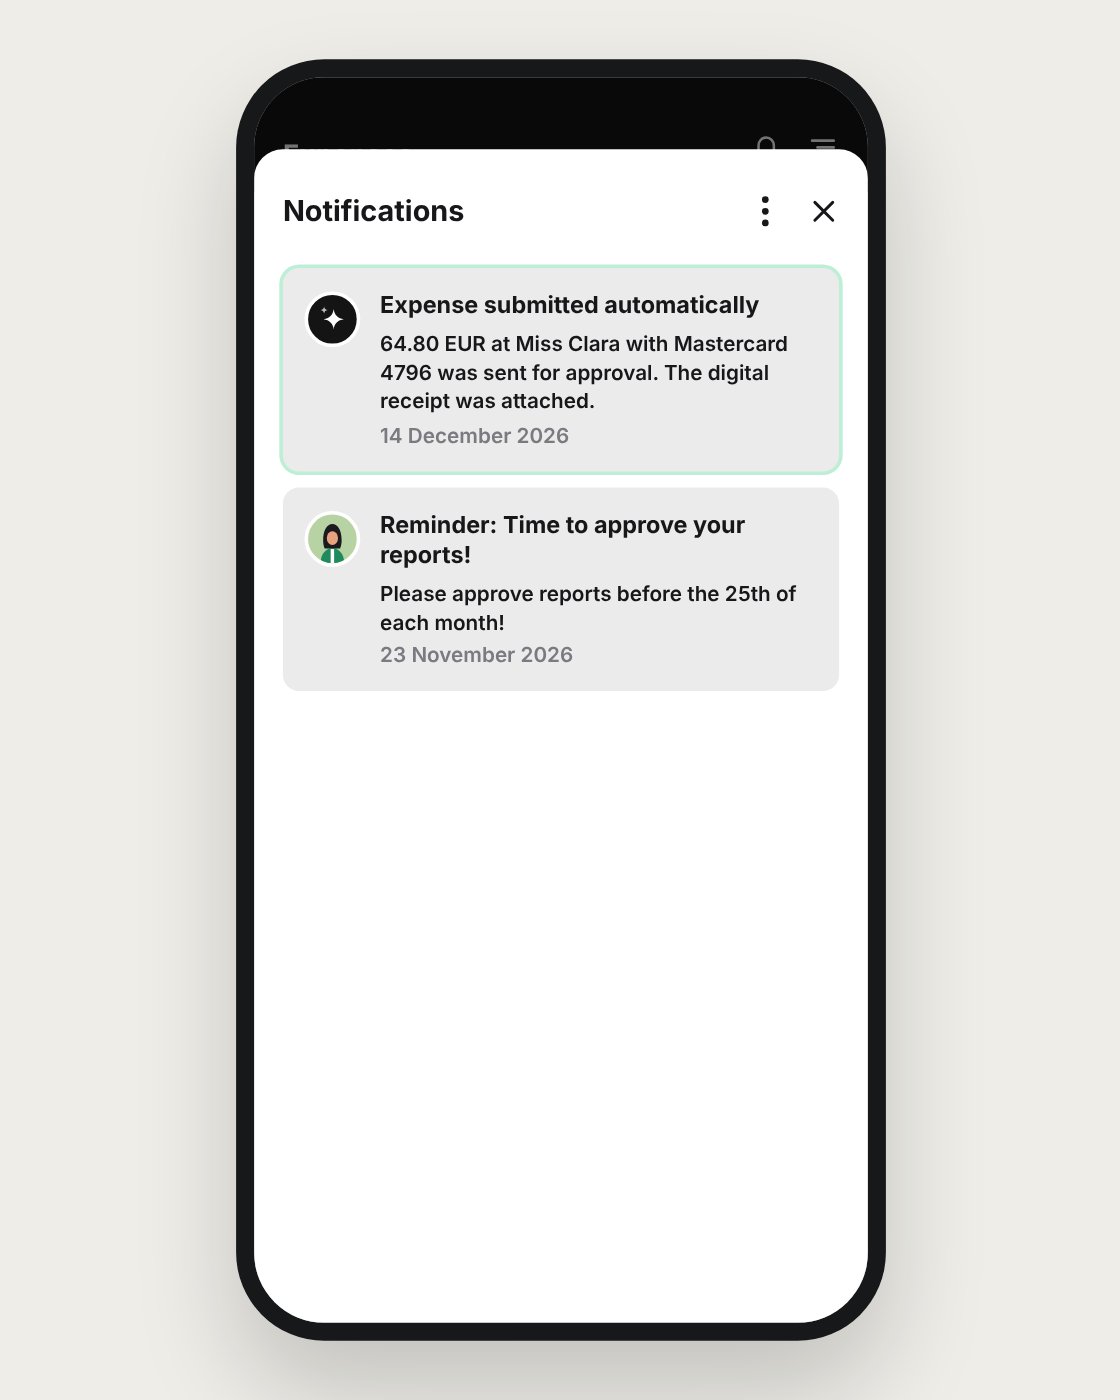
When an expense is not submitted automatically
An expense stays as a draft in the To-do tab if:- the receipt could not be matched to a card transaction
- a required field is missing
- the expense has an error
Turn on auto-submit
1
Open your settings
Go to Menu → Settings and select Automation.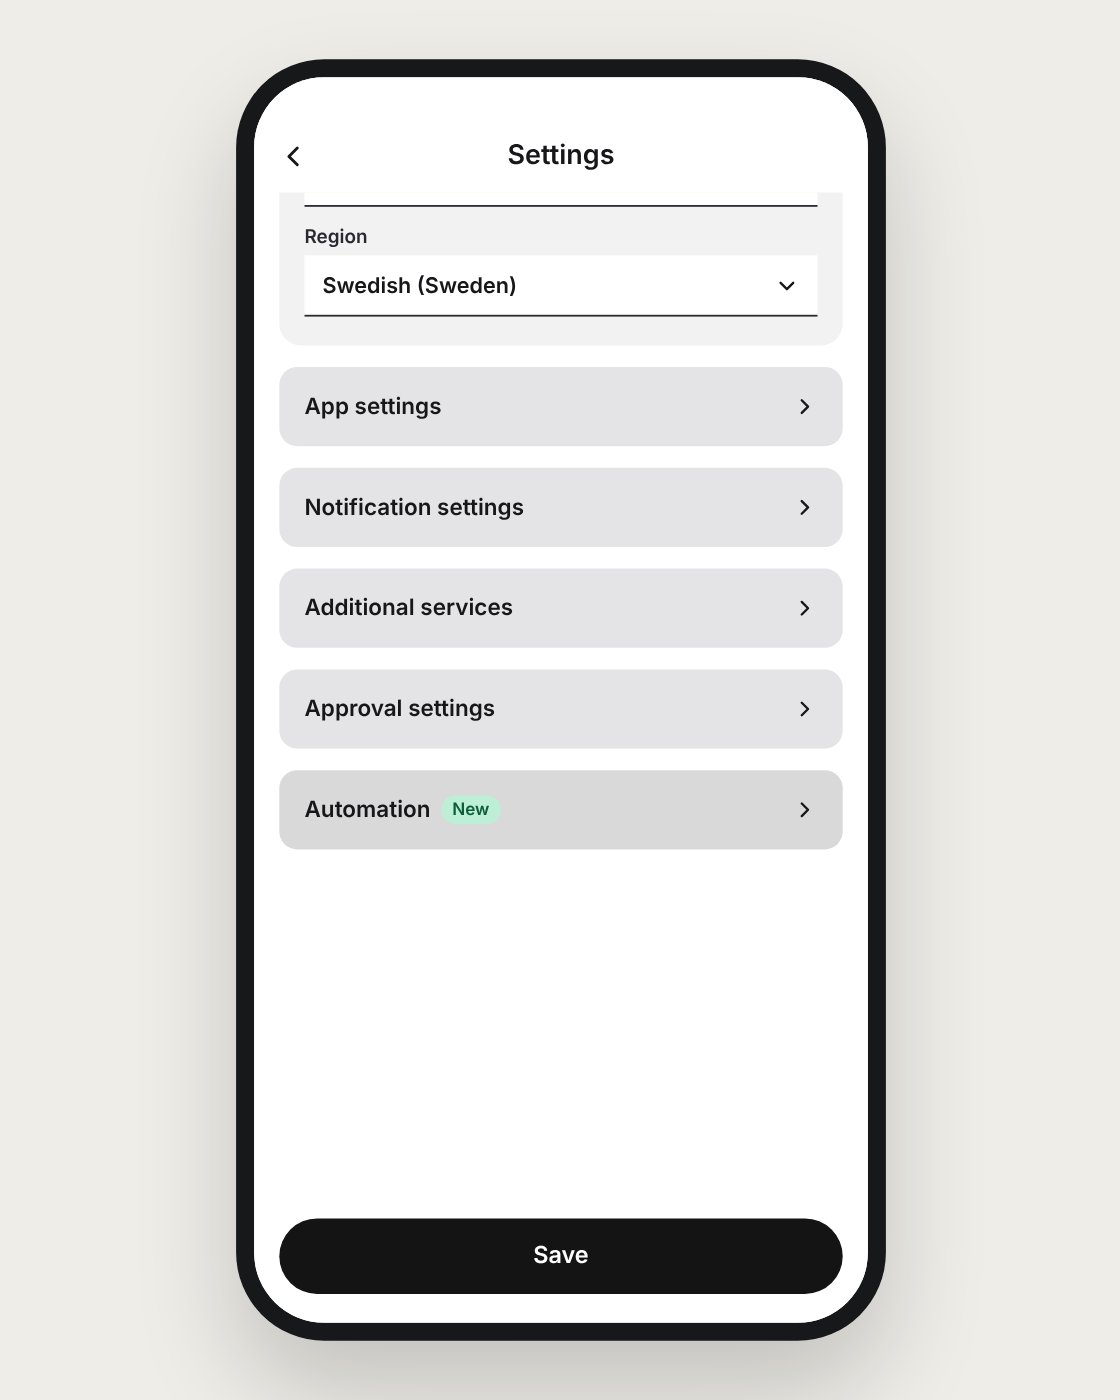
2
Turn on the setting
Turn on the Auto-submit switch. Auto-submit requires a connected company card.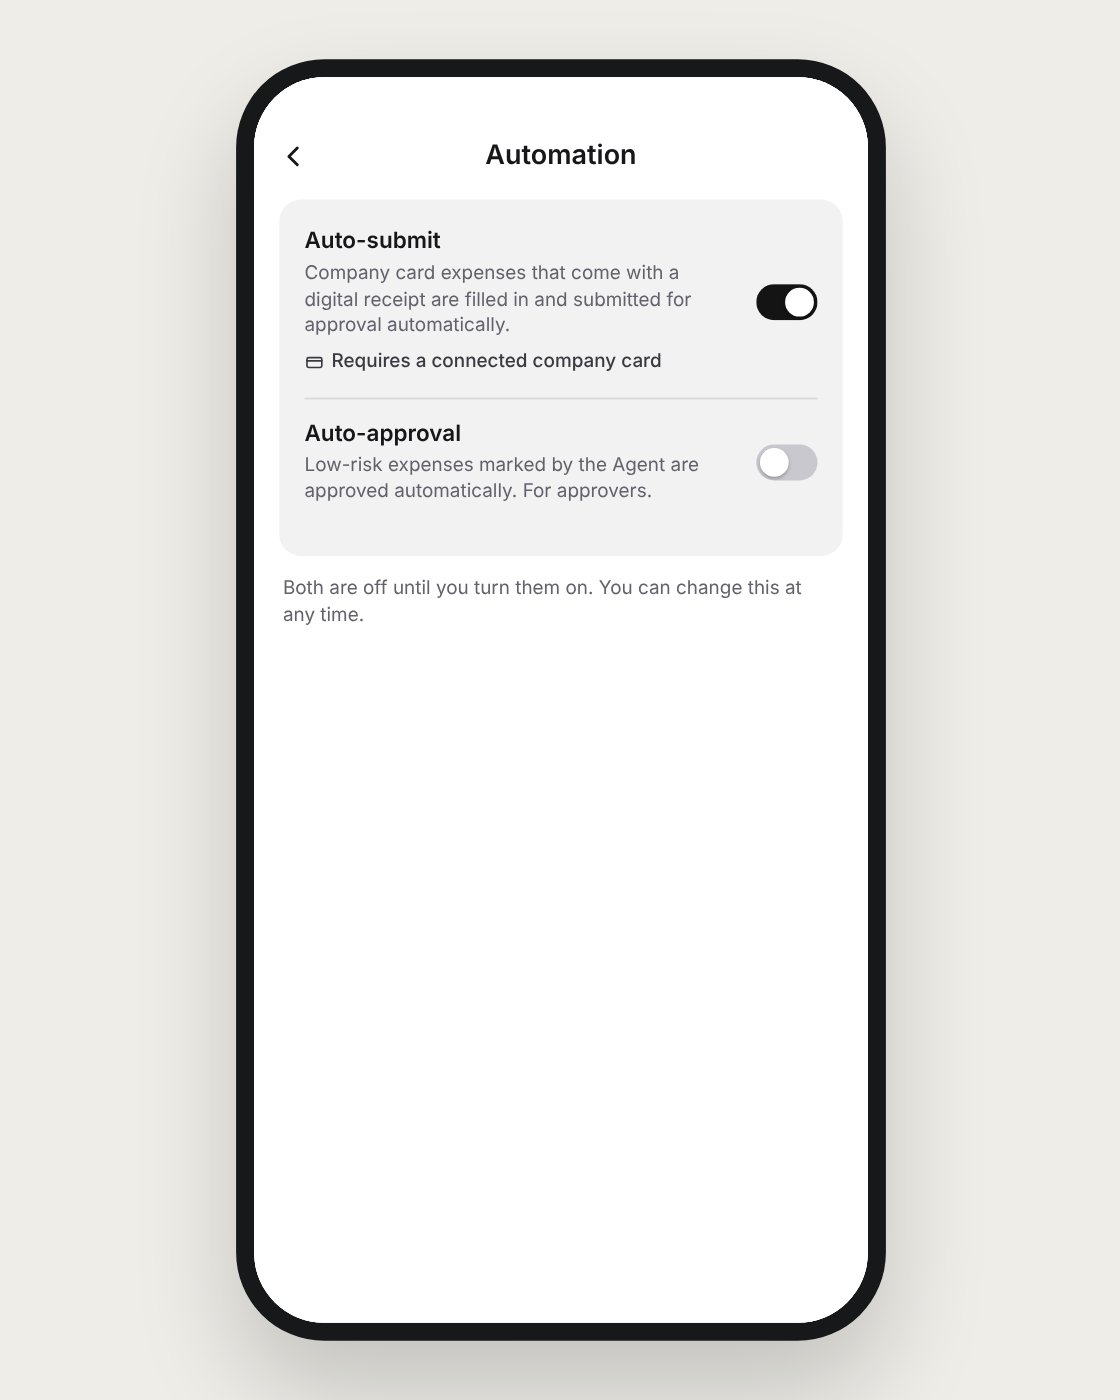
Good to know
- Only complete expenses without errors are submitted automatically.
- Auto-submit depends on the receipt being matched to the card transaction. Unmatched receipts are never submitted automatically.
- Expenses that are submitted automatically go through the same approval flow as other expenses.
For administrators
Auto-submit is allowed in the organisation by default. Each user then chooses whether to turn it on for themselves. Auto-submit is turned off if you disable all AI features for the organisation:1
Open the admin view
Go to the organisation’s Admin view.
2
Navigate to the settings
Go to Settings → Expense management → Reports workflow → Advanced settings.
3
Disable AI features
Tick Disable all AI-powered product features in your organisation and save. All AI features in the expense management platform are turned off for the organisation from that point on.
Next steps
How Findity uses AI in expense management
What the AI does, data privacy, and human oversight.
Receipt Matching
How receipts are matched to corporate card transactions.
Auto-generated expense description
How the AI writes a description for each expense.
Auto-approval
Let AI approve low-risk expenses automatically.
FAQ
Which expenses are submitted automatically?
Which expenses are submitted automatically?
Business card expenses where the receipt has been matched to the transaction, all required fields are filled in, and there are no errors.
Why was my expense not submitted automatically?
Why was my expense not submitted automatically?
The receipt may not have been matched, a required field may be missing, or the expense may have an error. The expense stays as a draft in the To-do tab so you can complete it.
How do I know an expense was submitted automatically?
How do I know an expense was submitted automatically?
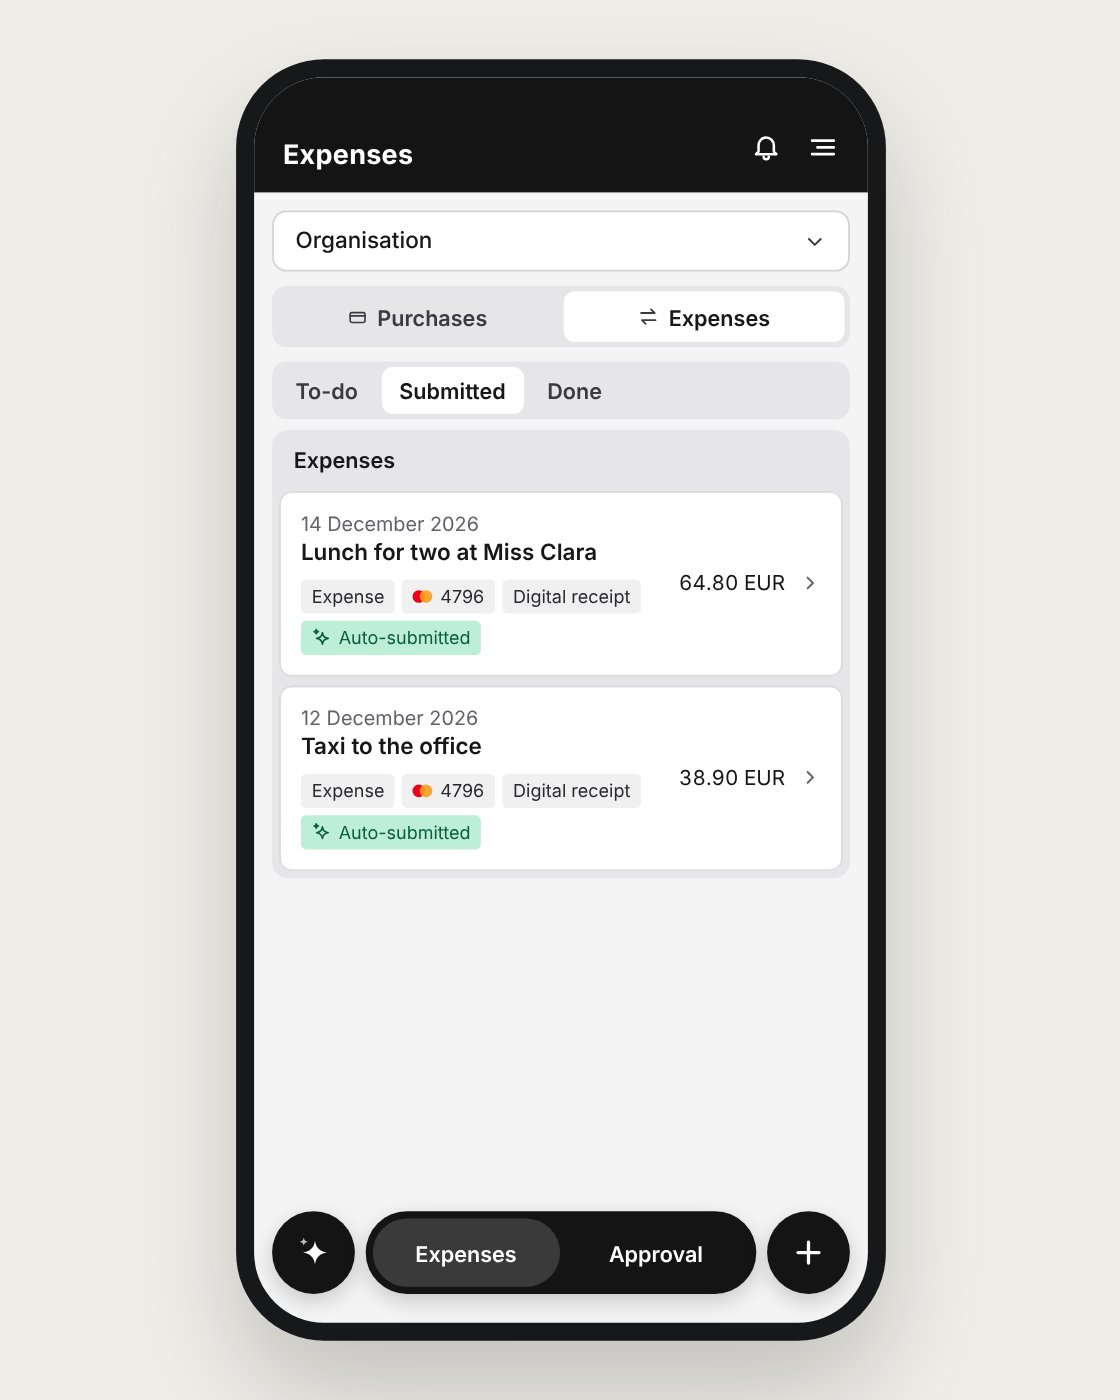
You get a notification, and the expense appears in the Submitted tab with an Auto-submitted label. In addition, the automatic submission is shown in the history log of the PDF report.
Can I turn off auto-submit?
Can I turn off auto-submit?
Yes. Go to Menu → Settings → Automation and turn off Auto-submit.
Can the organisation turn off auto-submit for everyone?
Can the organisation turn off auto-submit for everyone?
Yes. An administrator can turn off all AI features for the organisation. See For administrators.
AI features in Findity
Findity’s AI features are divided into basic AI features, which are always on, and additional AI features, which administrators control with one switch.Basic AI features (always on)
Always available. They cannot be turned off.- Receipt analysis
- Receipt matching
- New self onboarding
- Duplicate receipt detection
Additional AI features (admin switch, on by default)
Administrators can turn off the additional AI features for the whole organisation under Settings → Expense management → Reports workflow → Advanced settings. On for everyone- Auto-generated description
- Auto-fetched email receipts (the user connects their inbox)
- Approval guidance (approvers)
- Review guidance (admins)
- Expense assistant chat
- Auto-submit (off by default): employees turn it on.
- Auto-approval (off by default): approvers turn it on. Admins can turn it off for the whole organisation, for manual approvals only.