Activate Fleet management

Written by Elin Ivarsson
Updated at February 21st, 2023
Table of Contents
Make it easier to report mileage for trips and link Findity to your fleet management service. This means that the user gets all trips automatically linked to Findity, then easy submit these for accounting and payment. In this way, you get a correct ground for all business trips directly in the app with support for both private and company cars.
This article describes how to connect your fleet management to Findity.
Automile
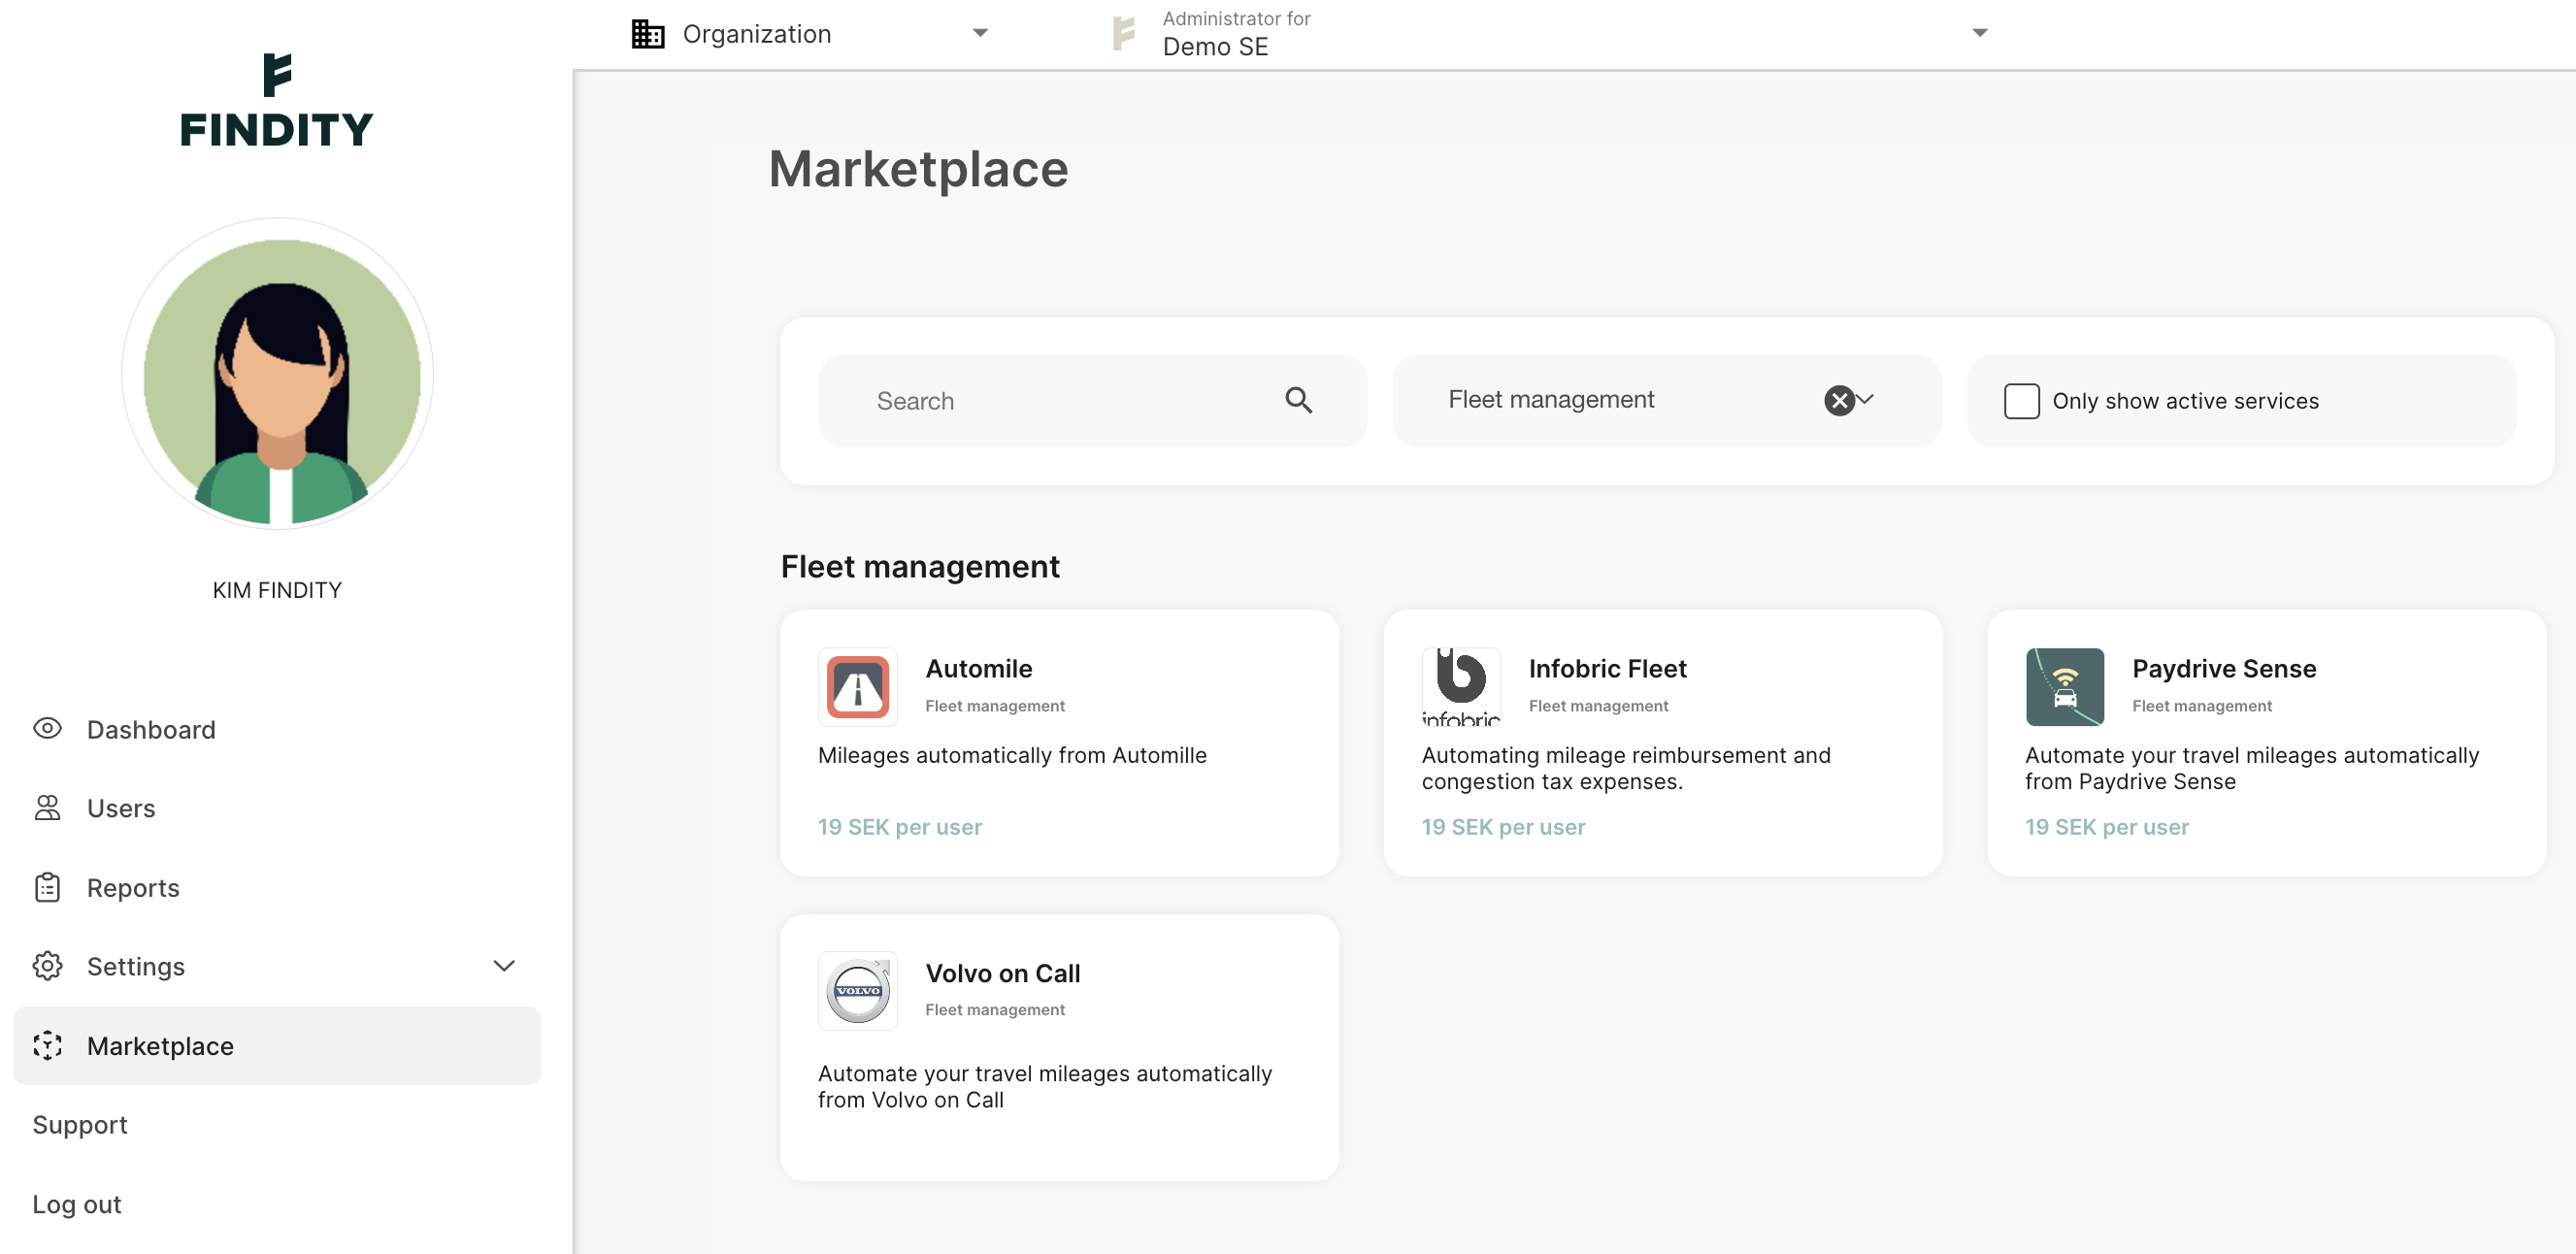
Go to the tab Marketplace and Select the category Fleet management. Click on the box for Automile.
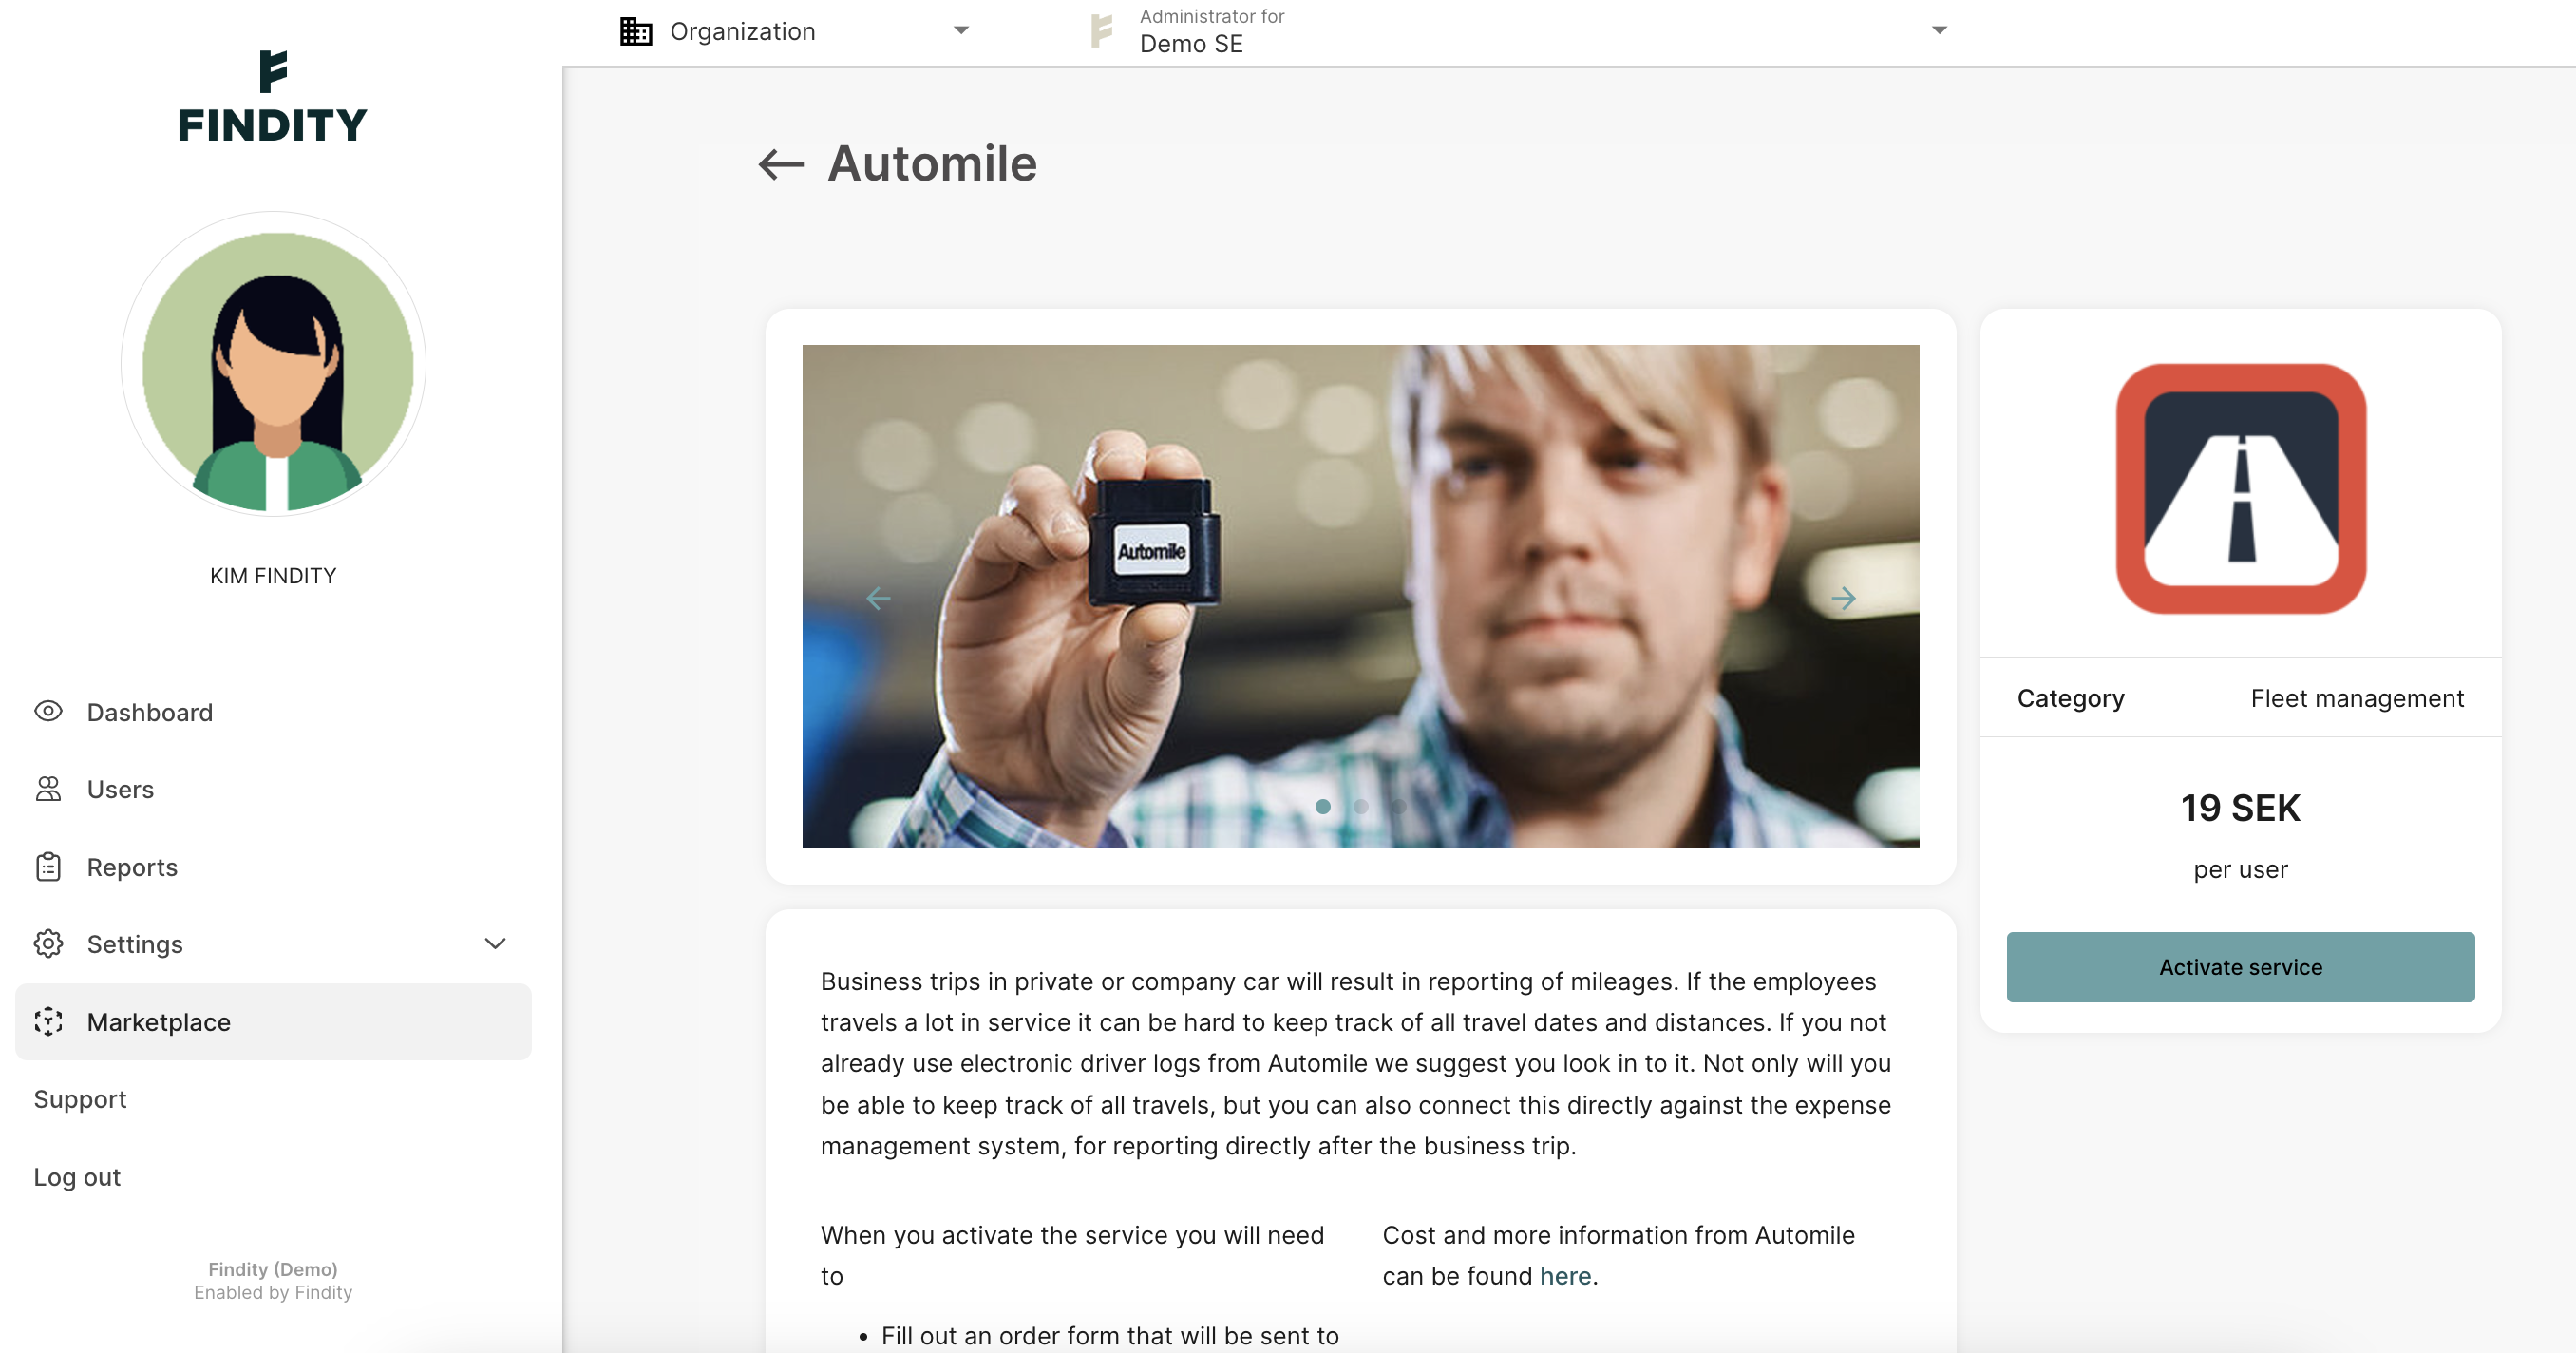
Choose to Activate Service.
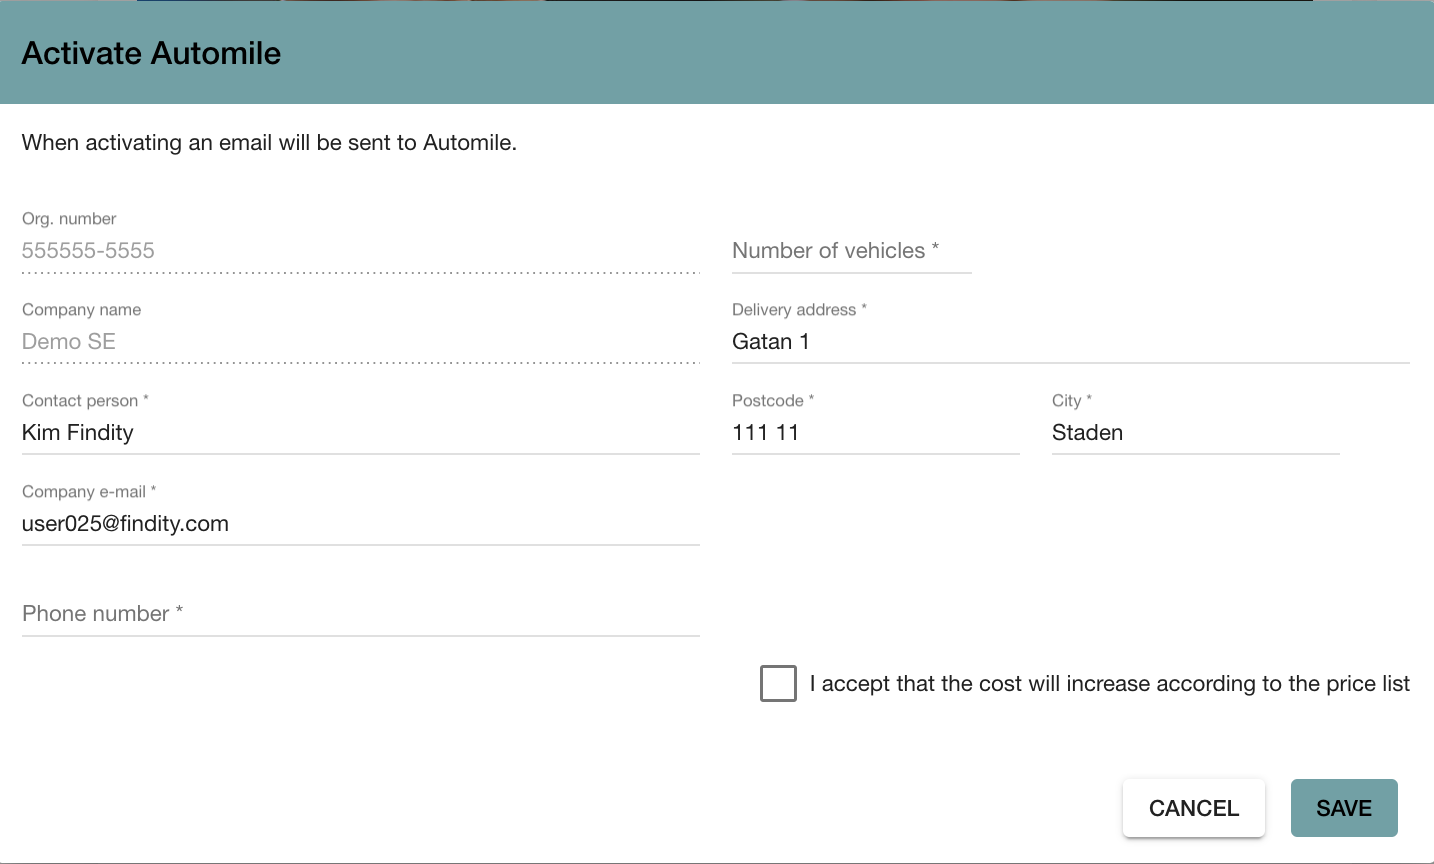
Fill in the the information needed in the box that appears. Mark the box accepting that the cost will increase according to the price list and press Save.
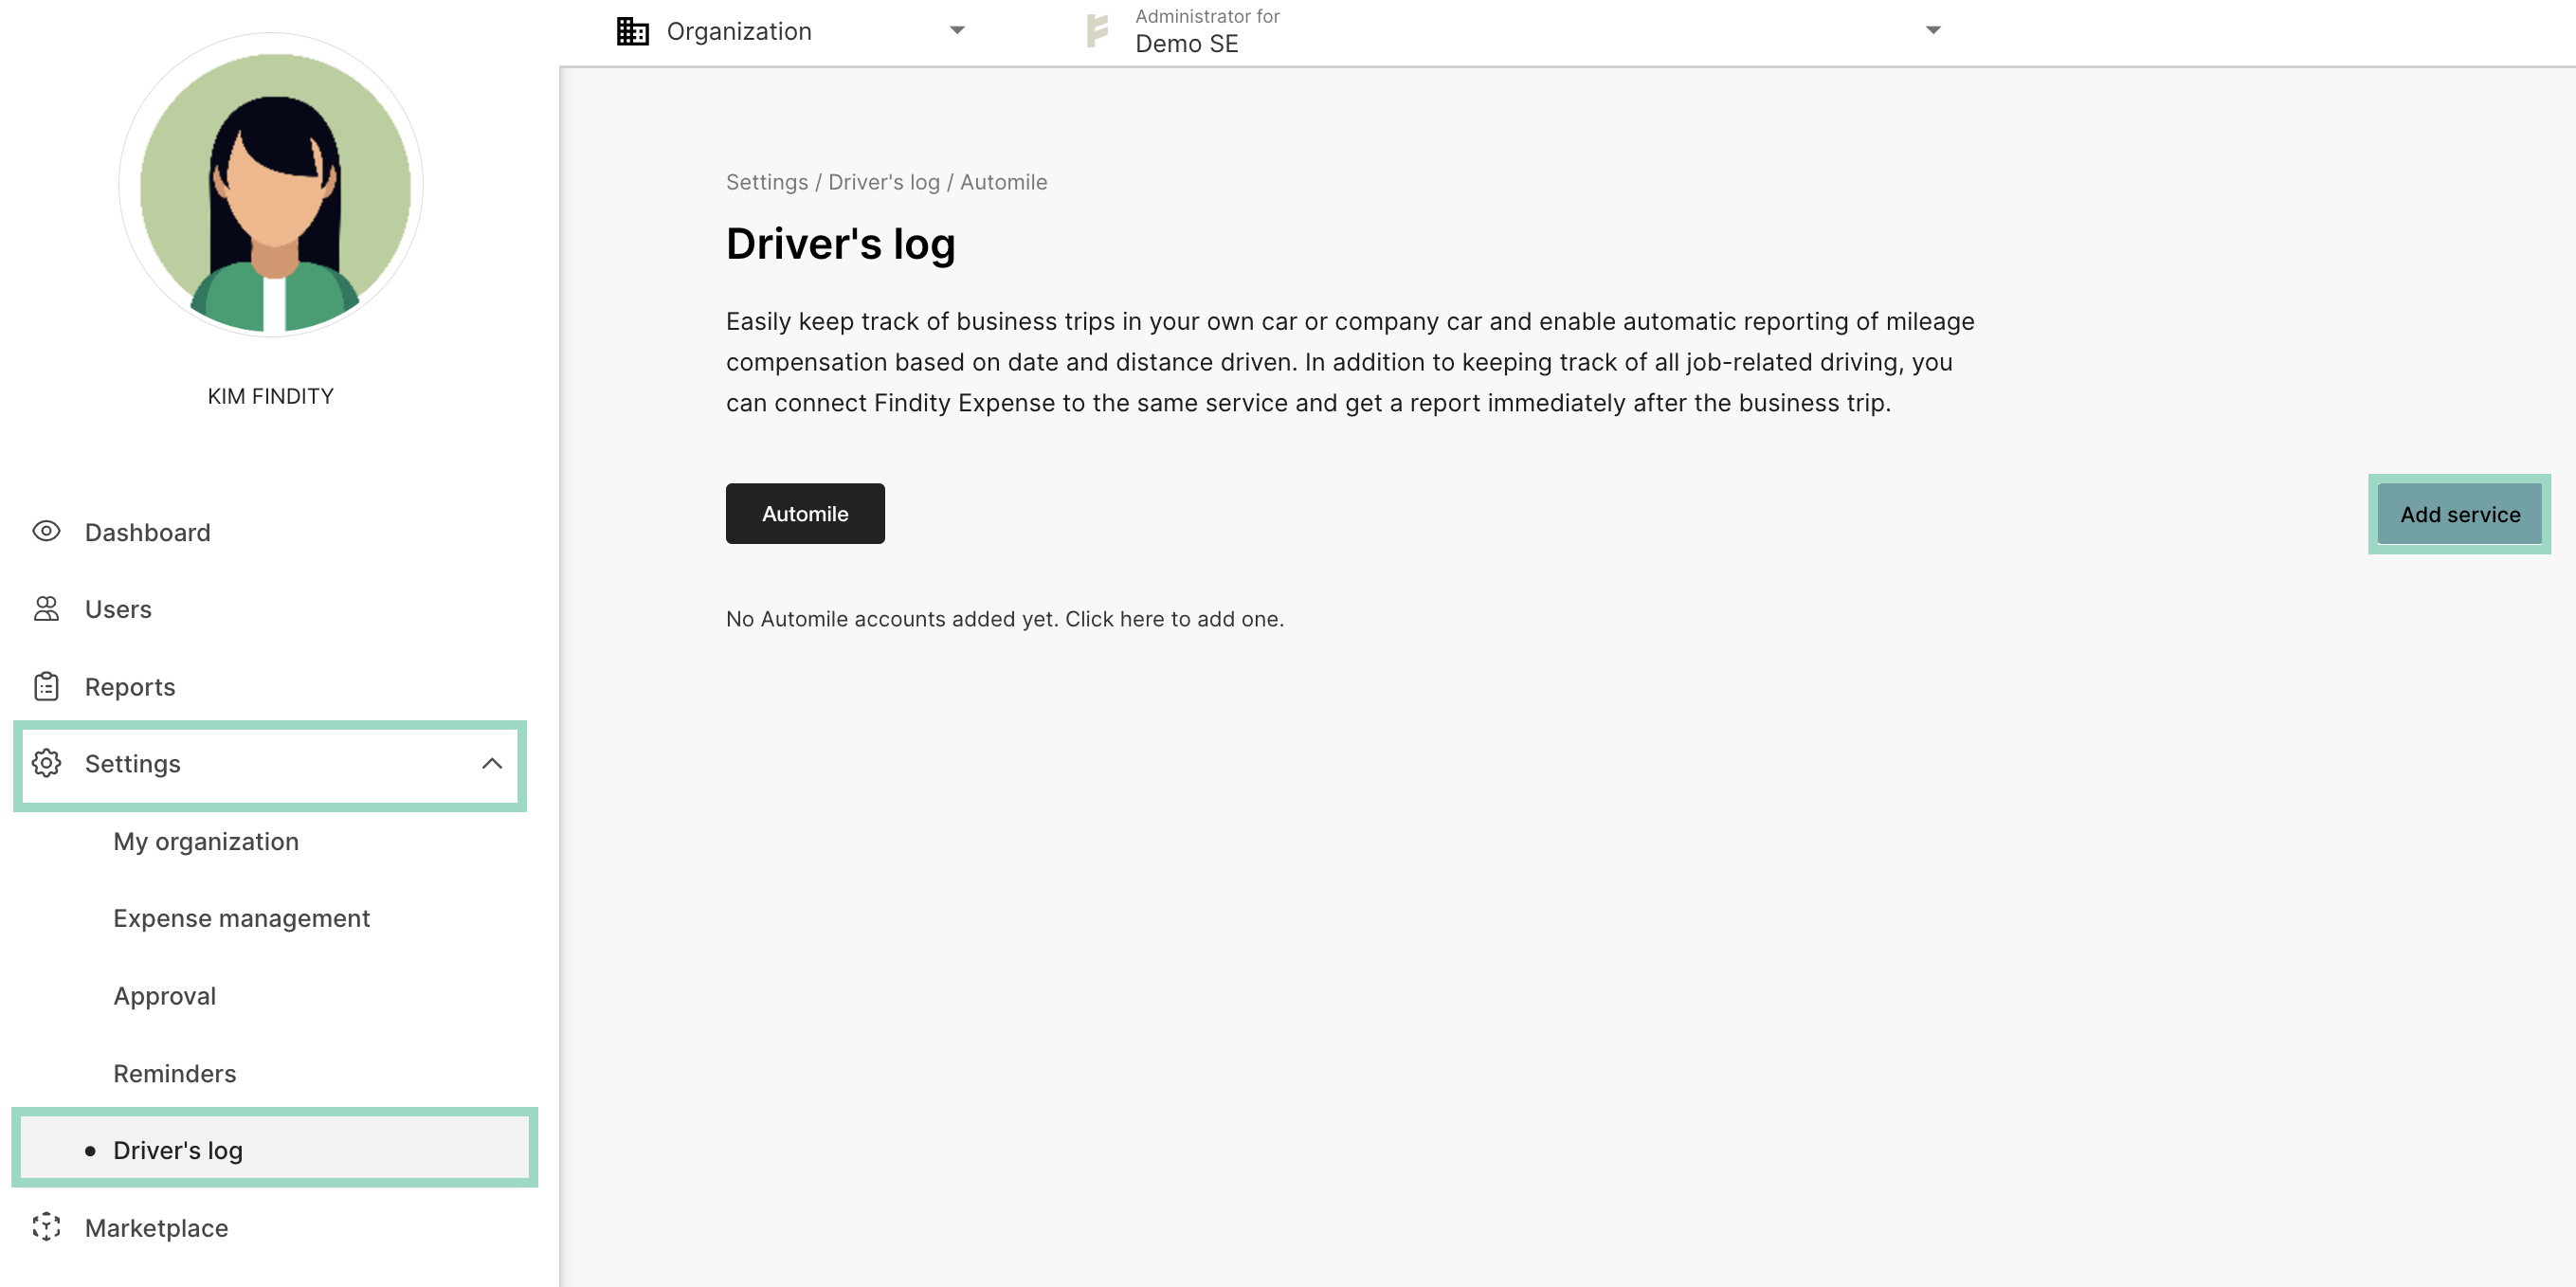
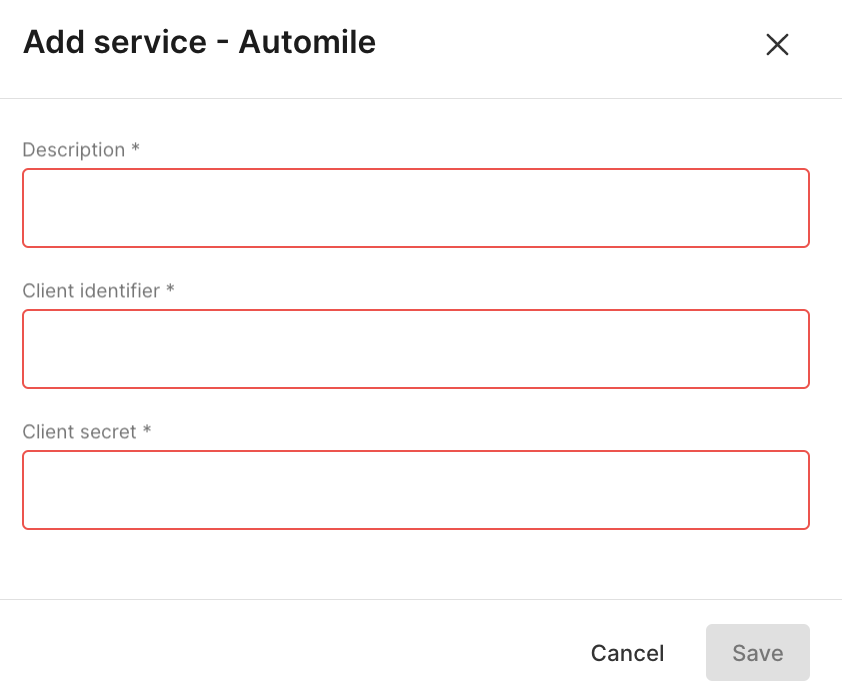
Go to the tab Settings and Driver's log. Click on Add service.
Add your Description (for example automile) and Client identifier and Client secret.
Client identifier and Client secret can you find in your automile account under the tab: Settings/Developer/API clients/Click on "Add new"/Under the tab "Secret"
Press Save when your done.
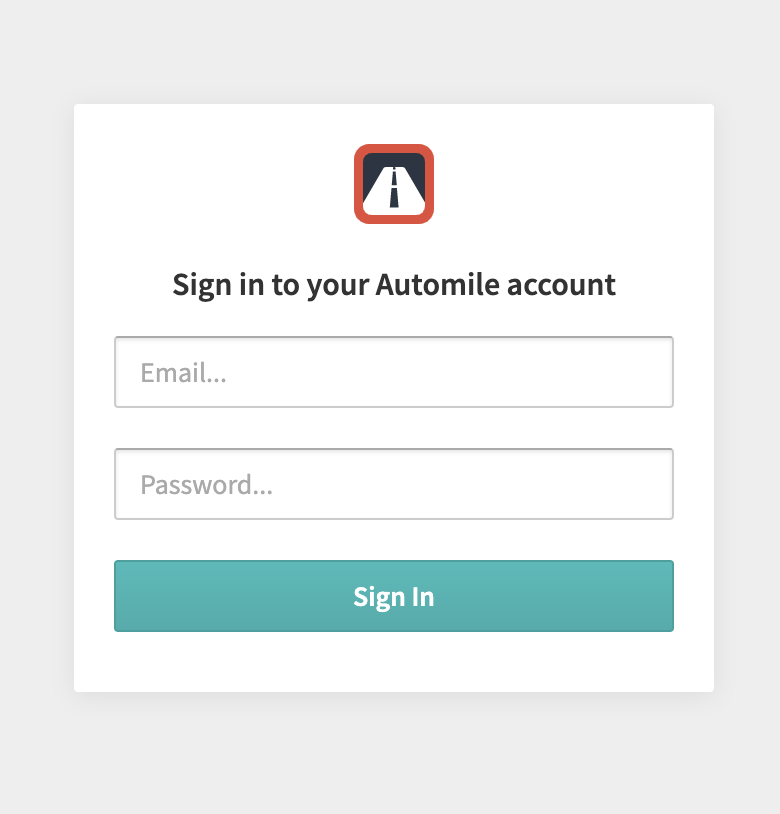
Now a pop-up page appears in your browser (make sure you accept pop-up pages in your browser) where you have to sign in with your Automile account to complete the connection.
The integration is now activated.
Select Types if trips under the settings for Driver's log.
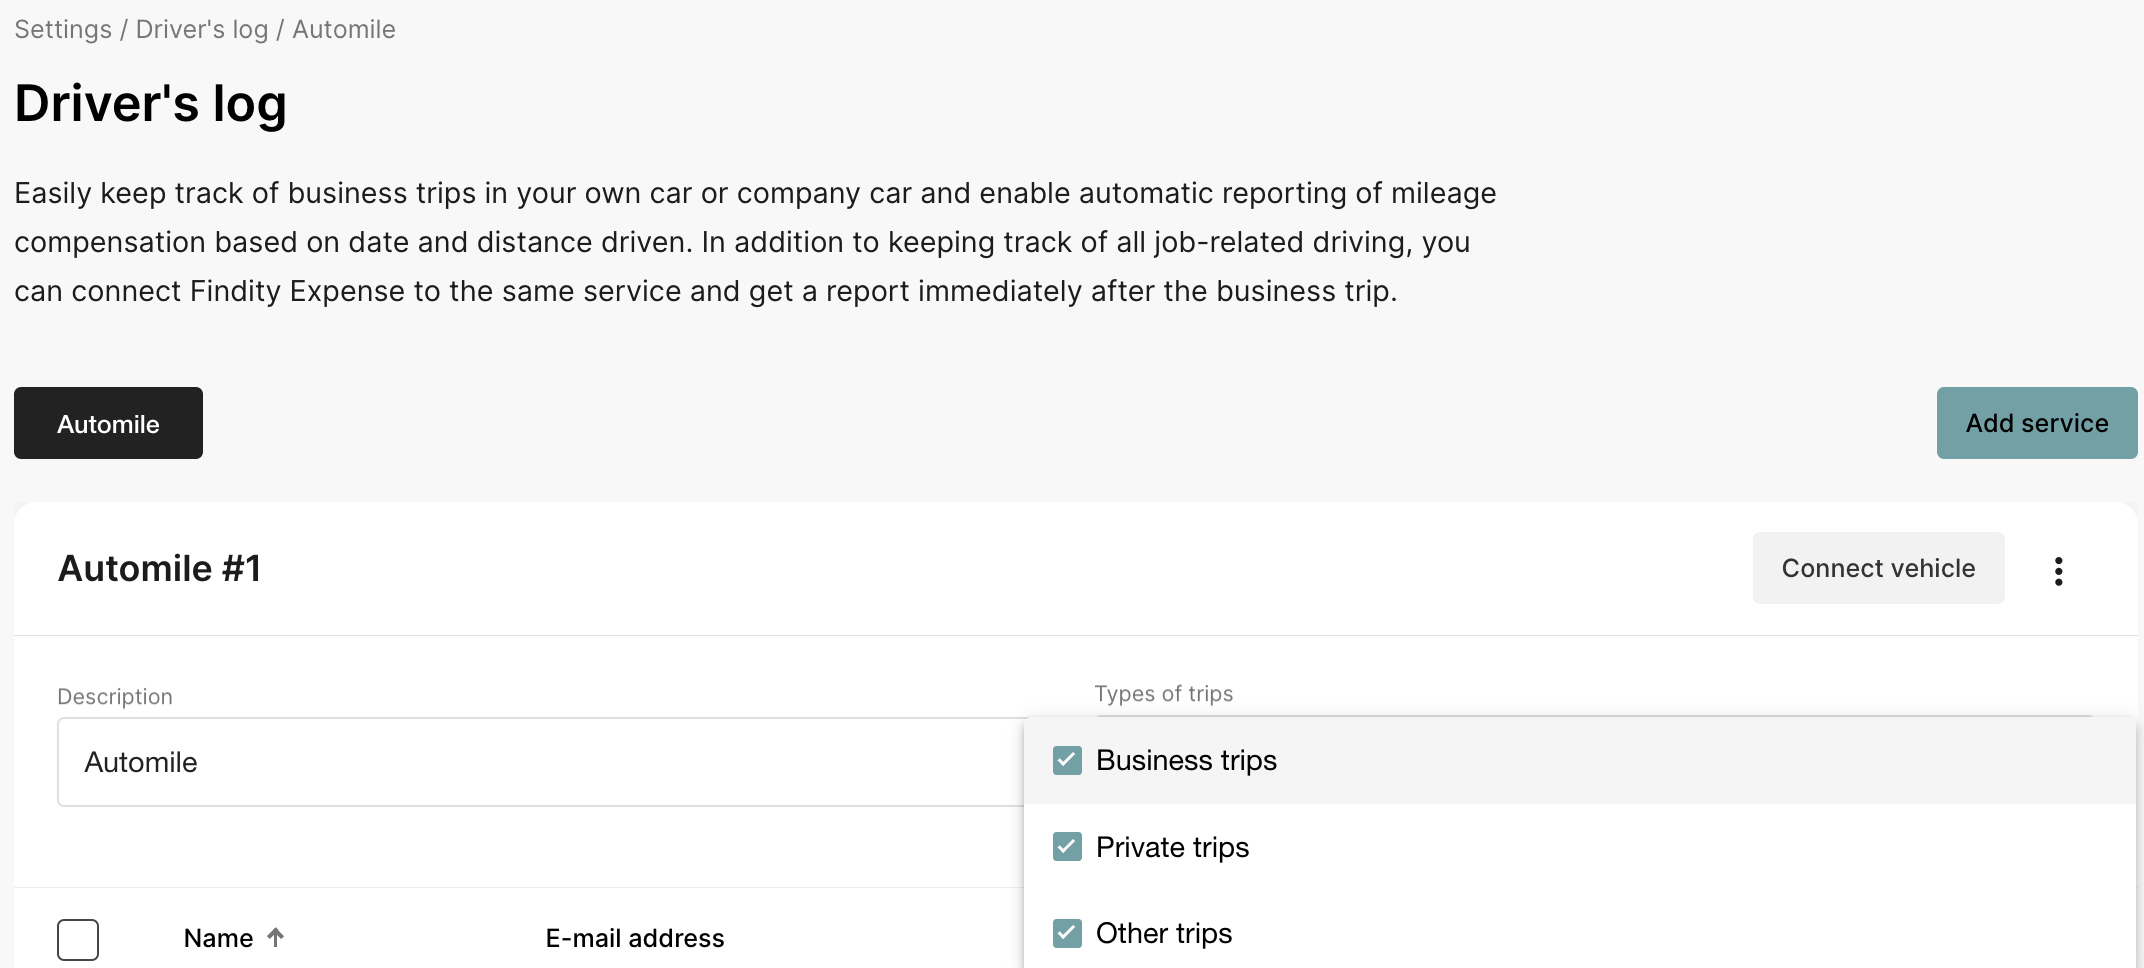
Now it's time to add the users.
Click on Connect vehicles.
Select User, Vehicle and Vehicle type and click on Connect. The vehicle and vehicle types registered in your Automile account appear as selectable vehicles. When the information is filled in, click on Connect.
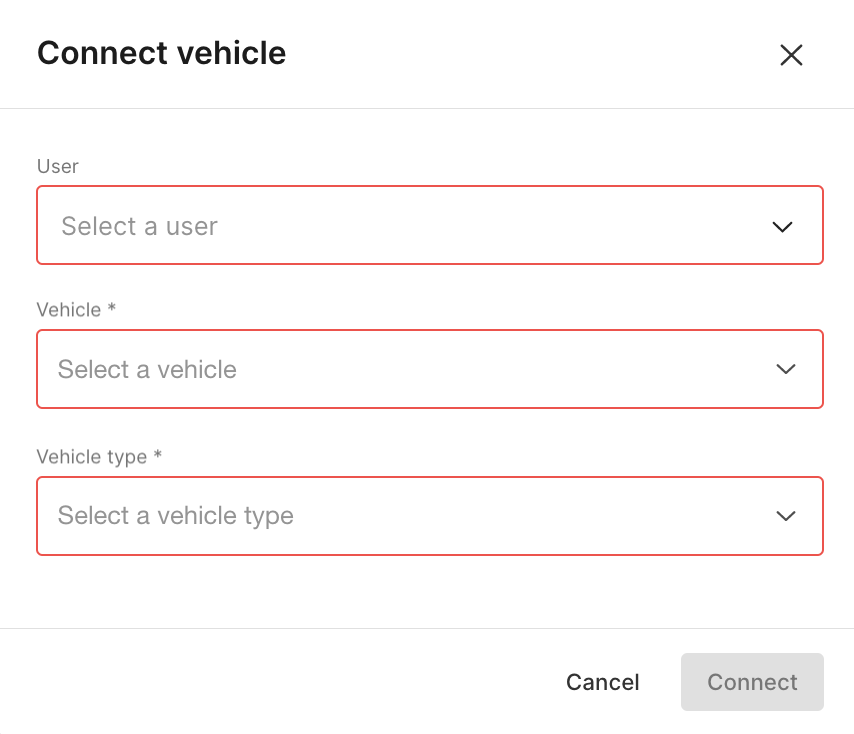
The user is now added. 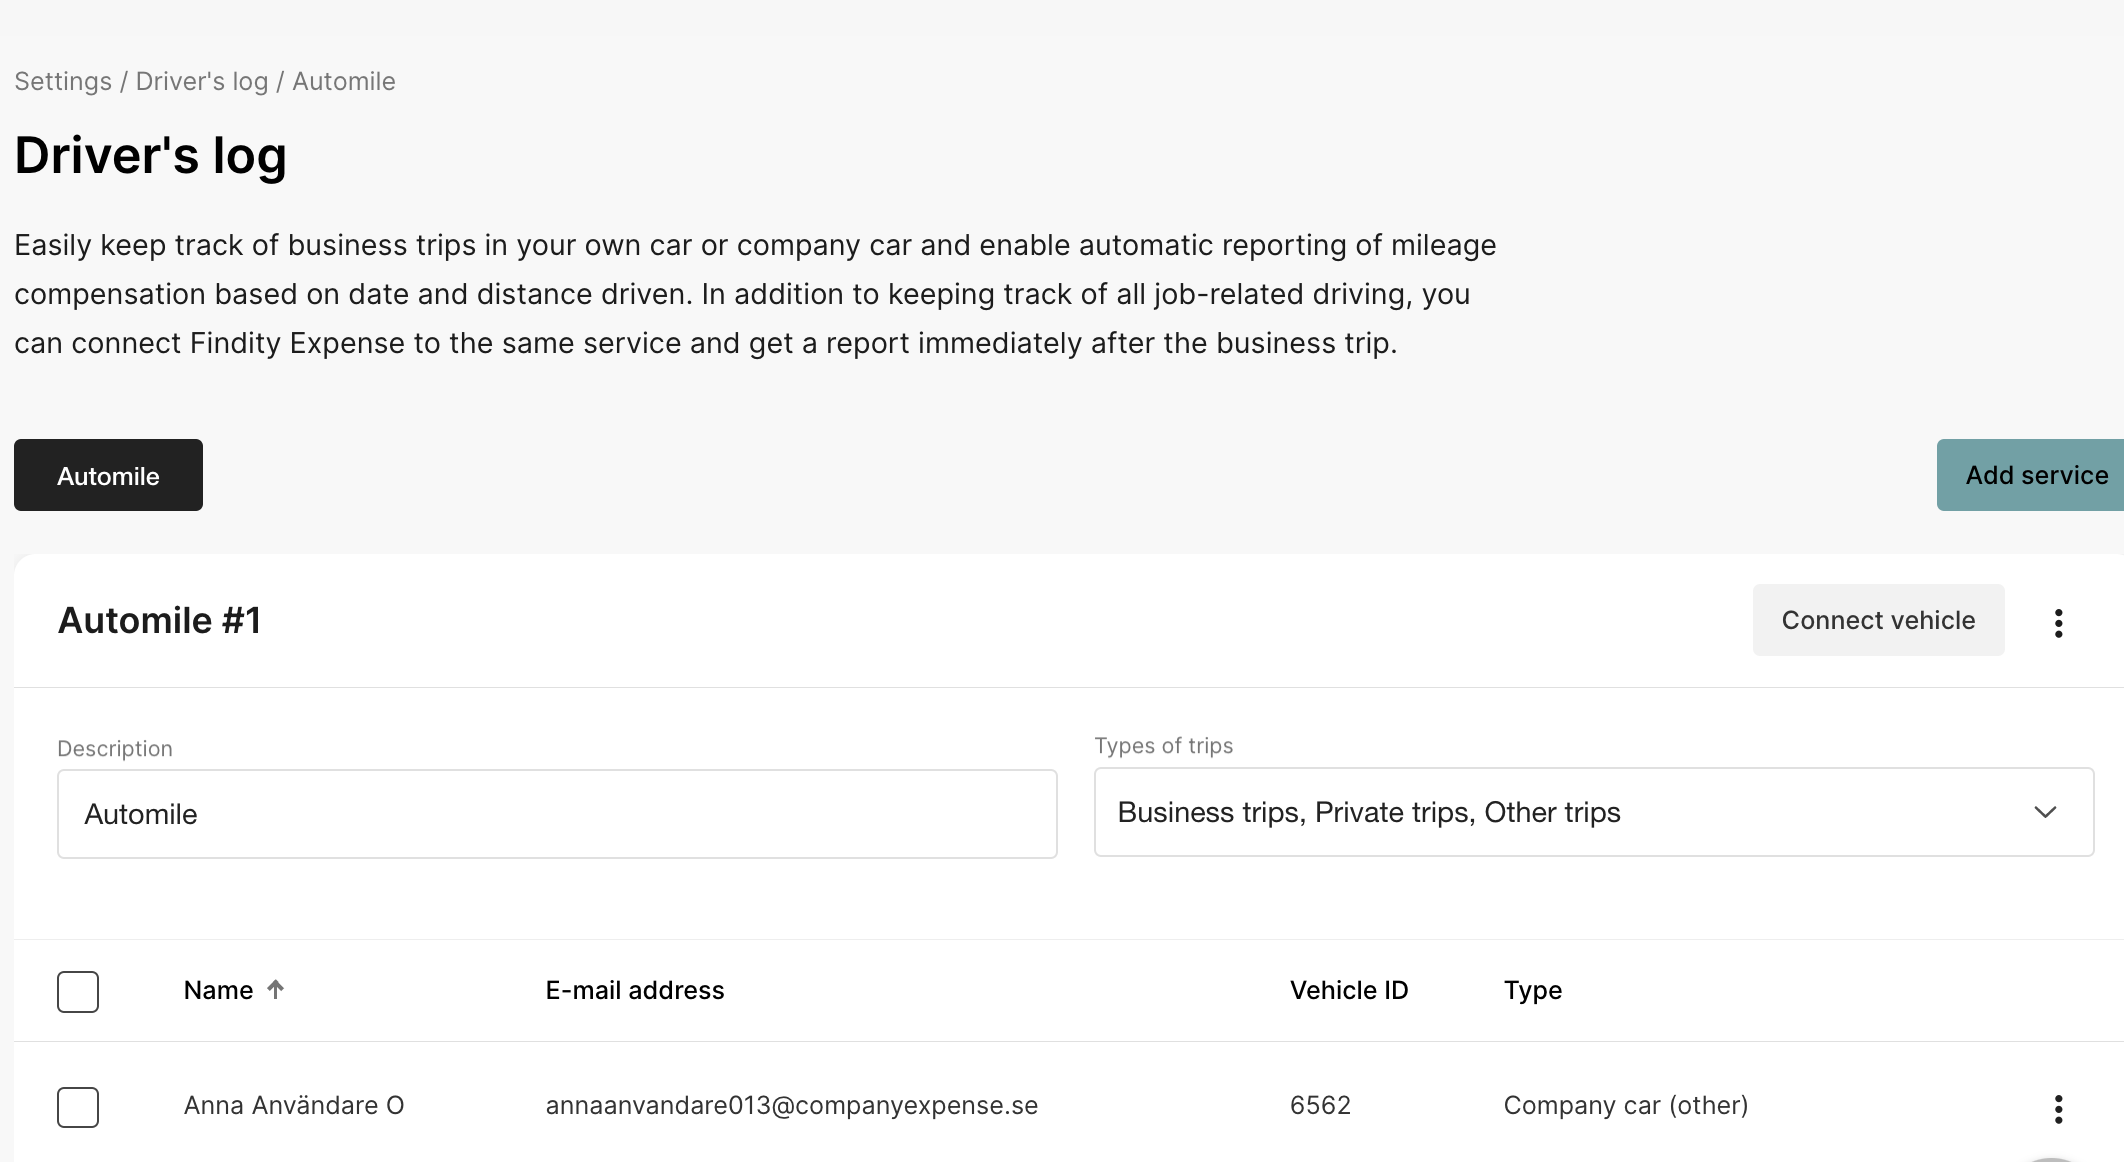
Now go to the tab Settings and Expense management. Click on Expense categories and Milage.
Click on Create new category, name the category and connect Automile in the drop-down on the right side of the page under the tab Fleet Management. 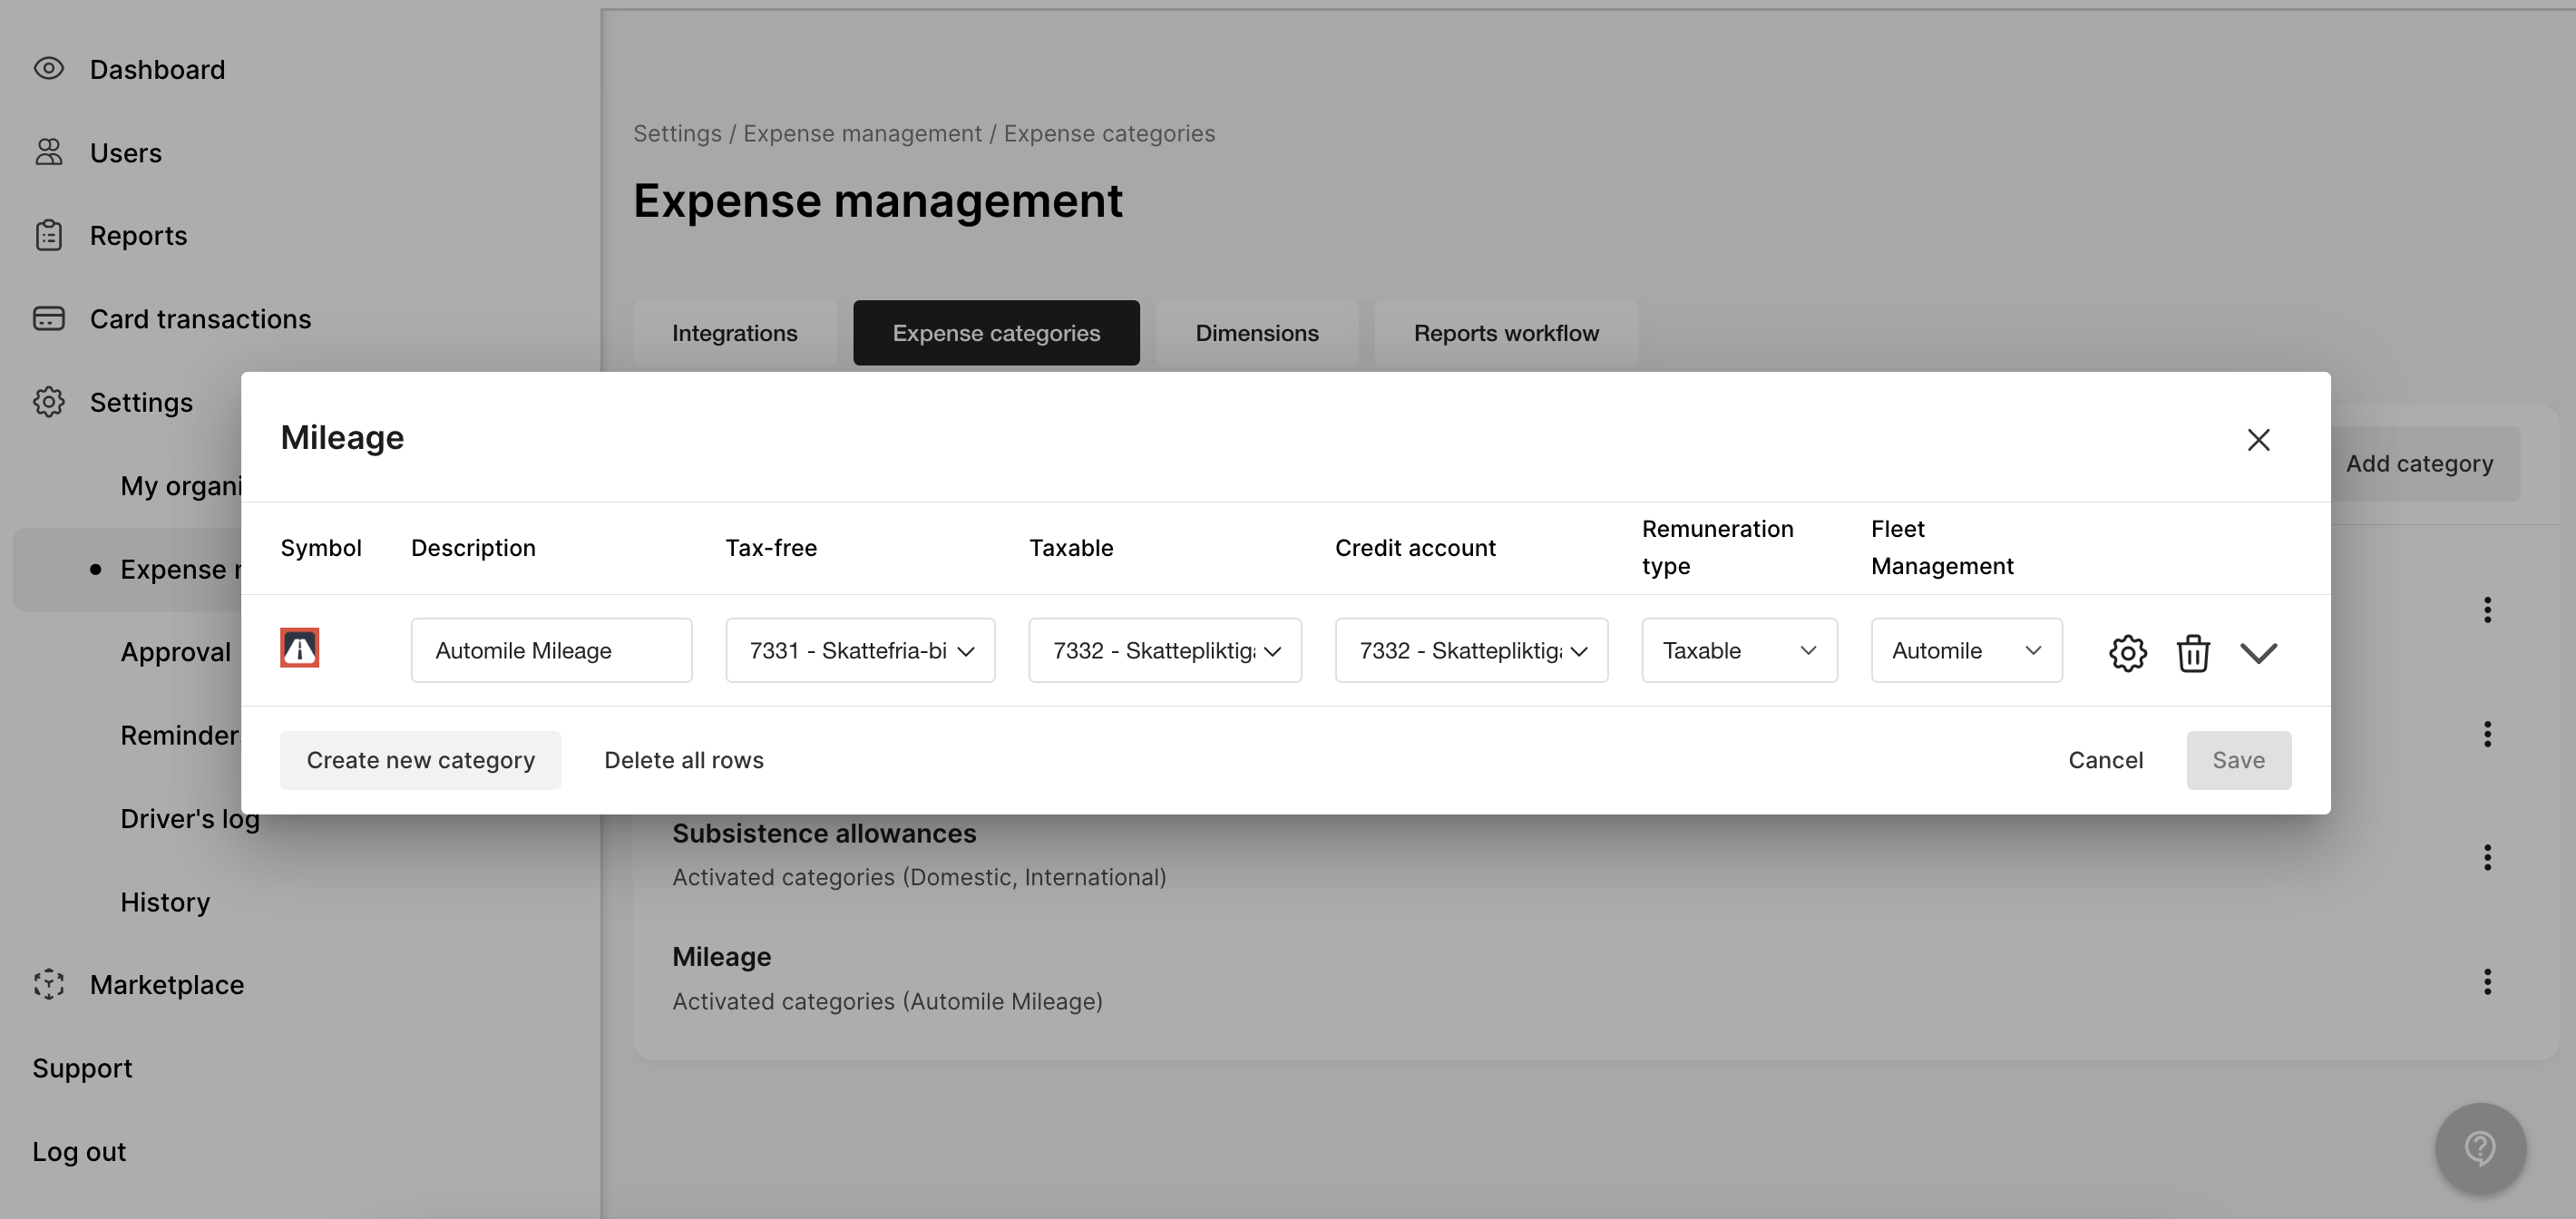
The settings are now done!
DeleteInfobric Fleet
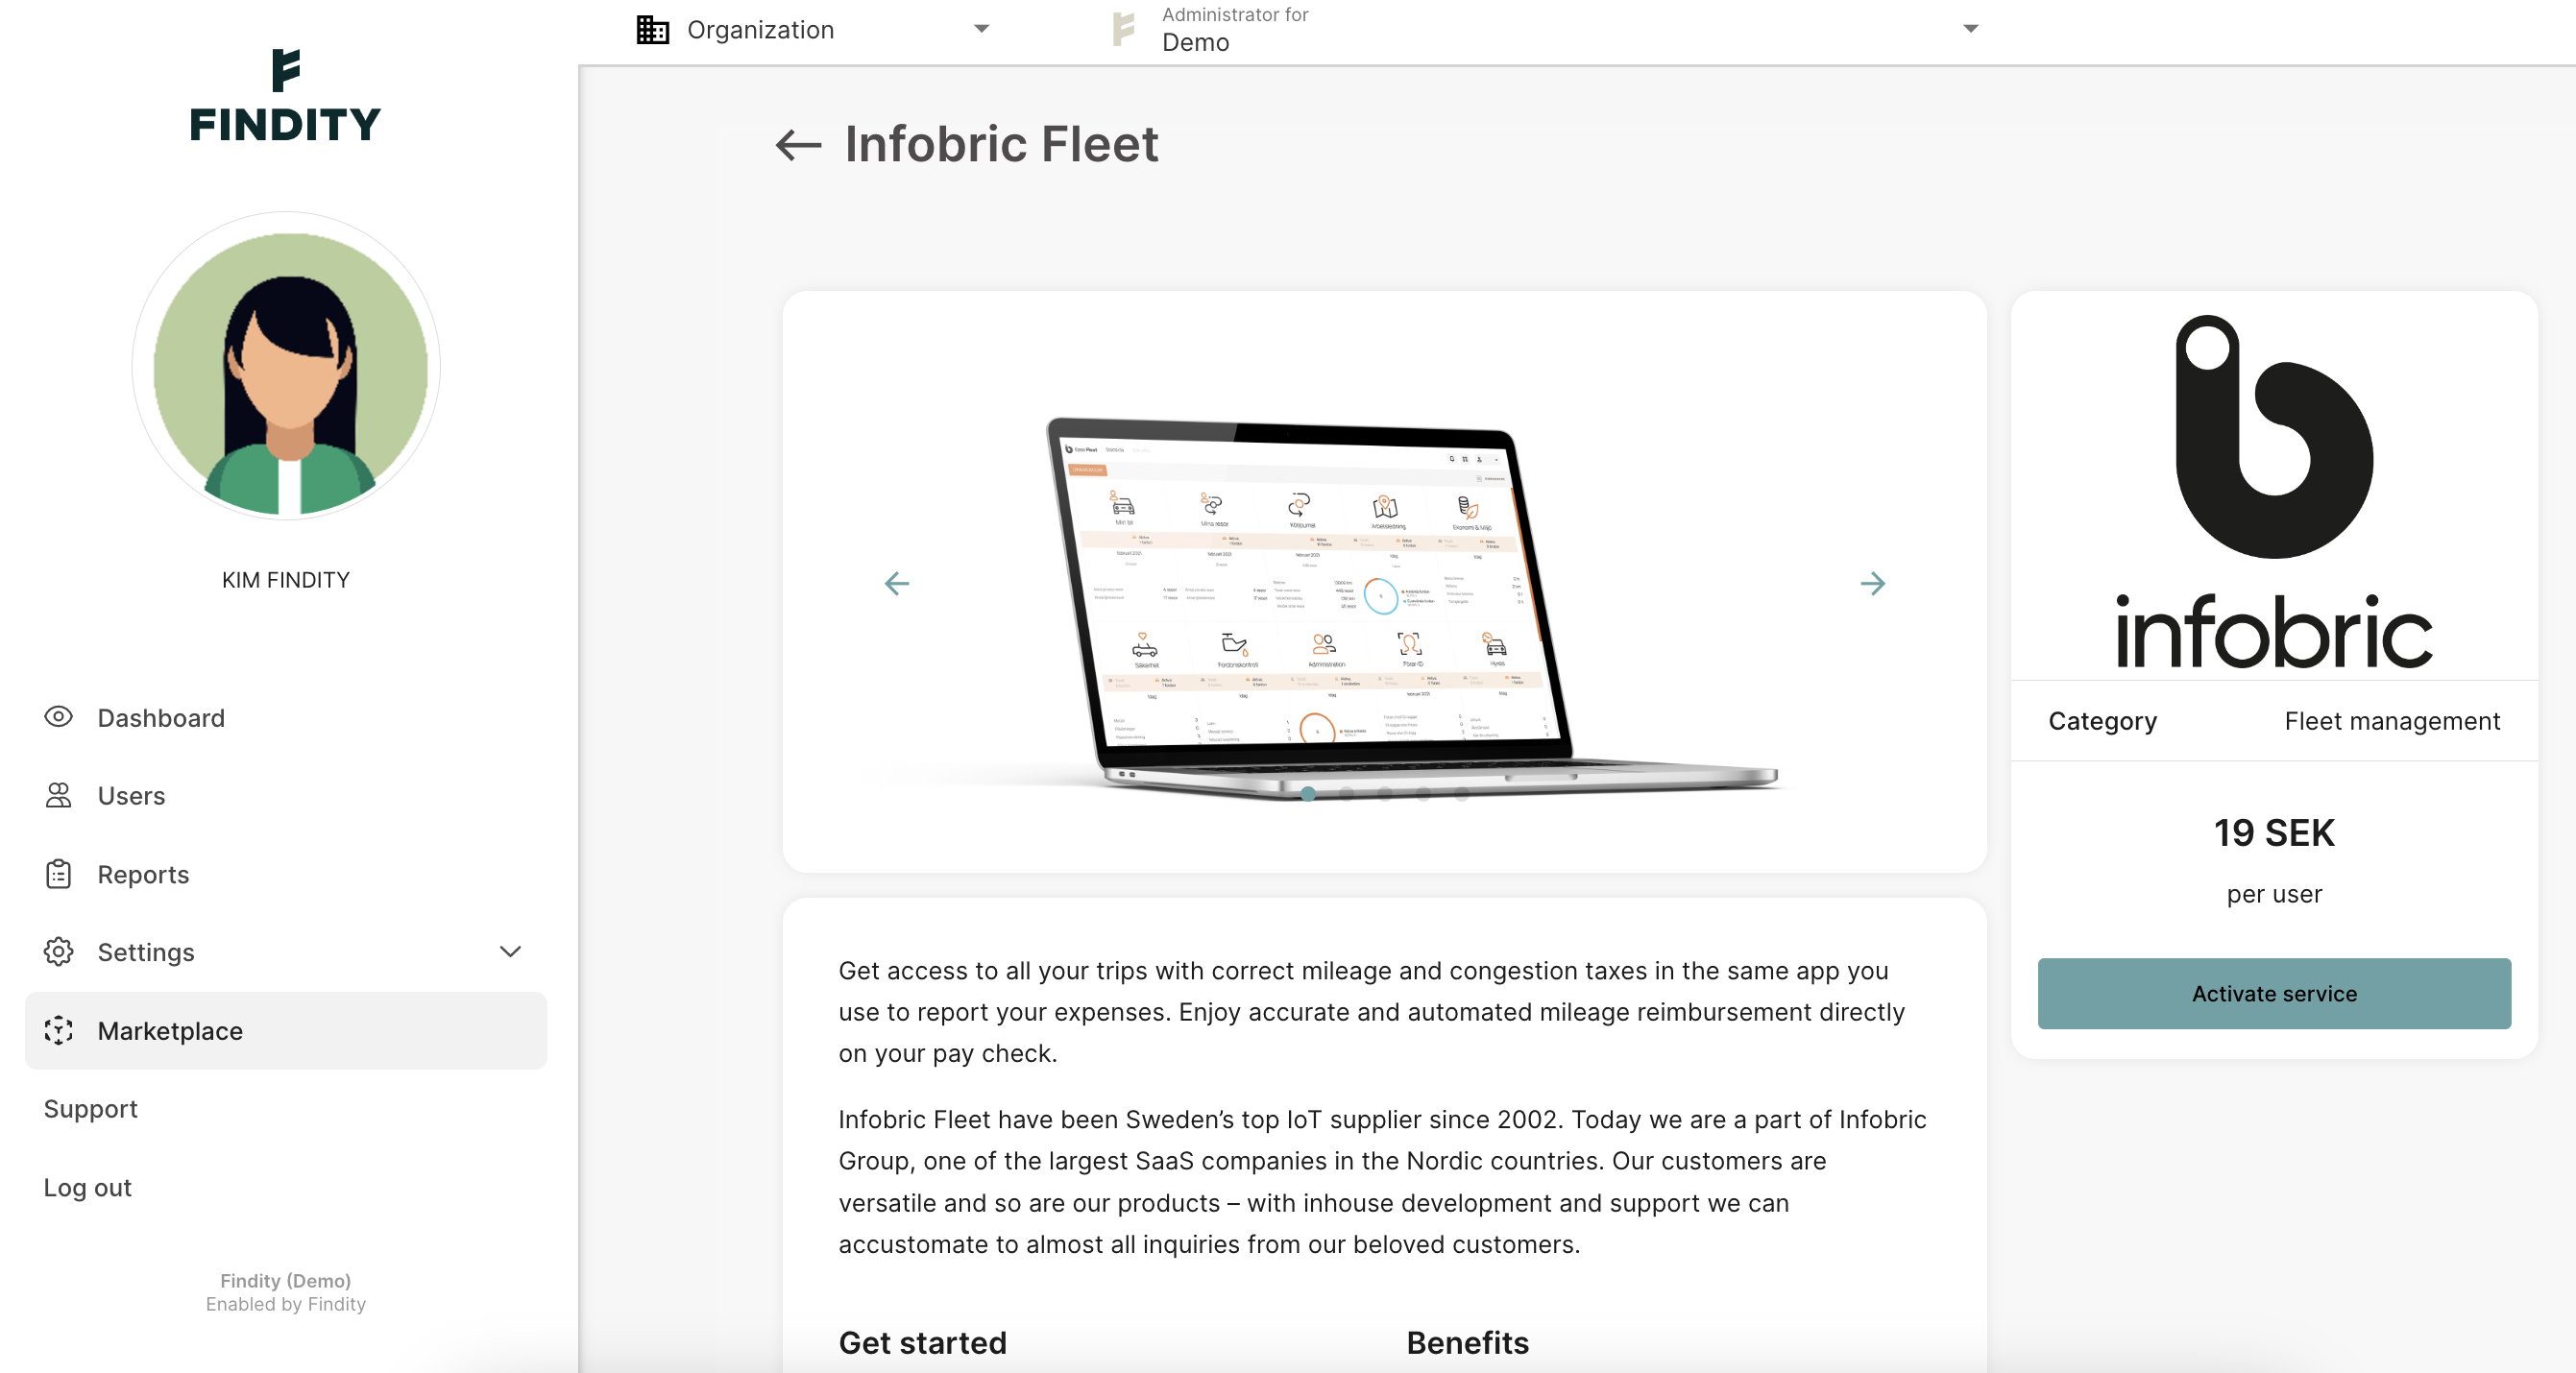
Go to the tab Marketplace and select the category Fleet management. Click on the box for Infobric Fleet. Choose to activate service
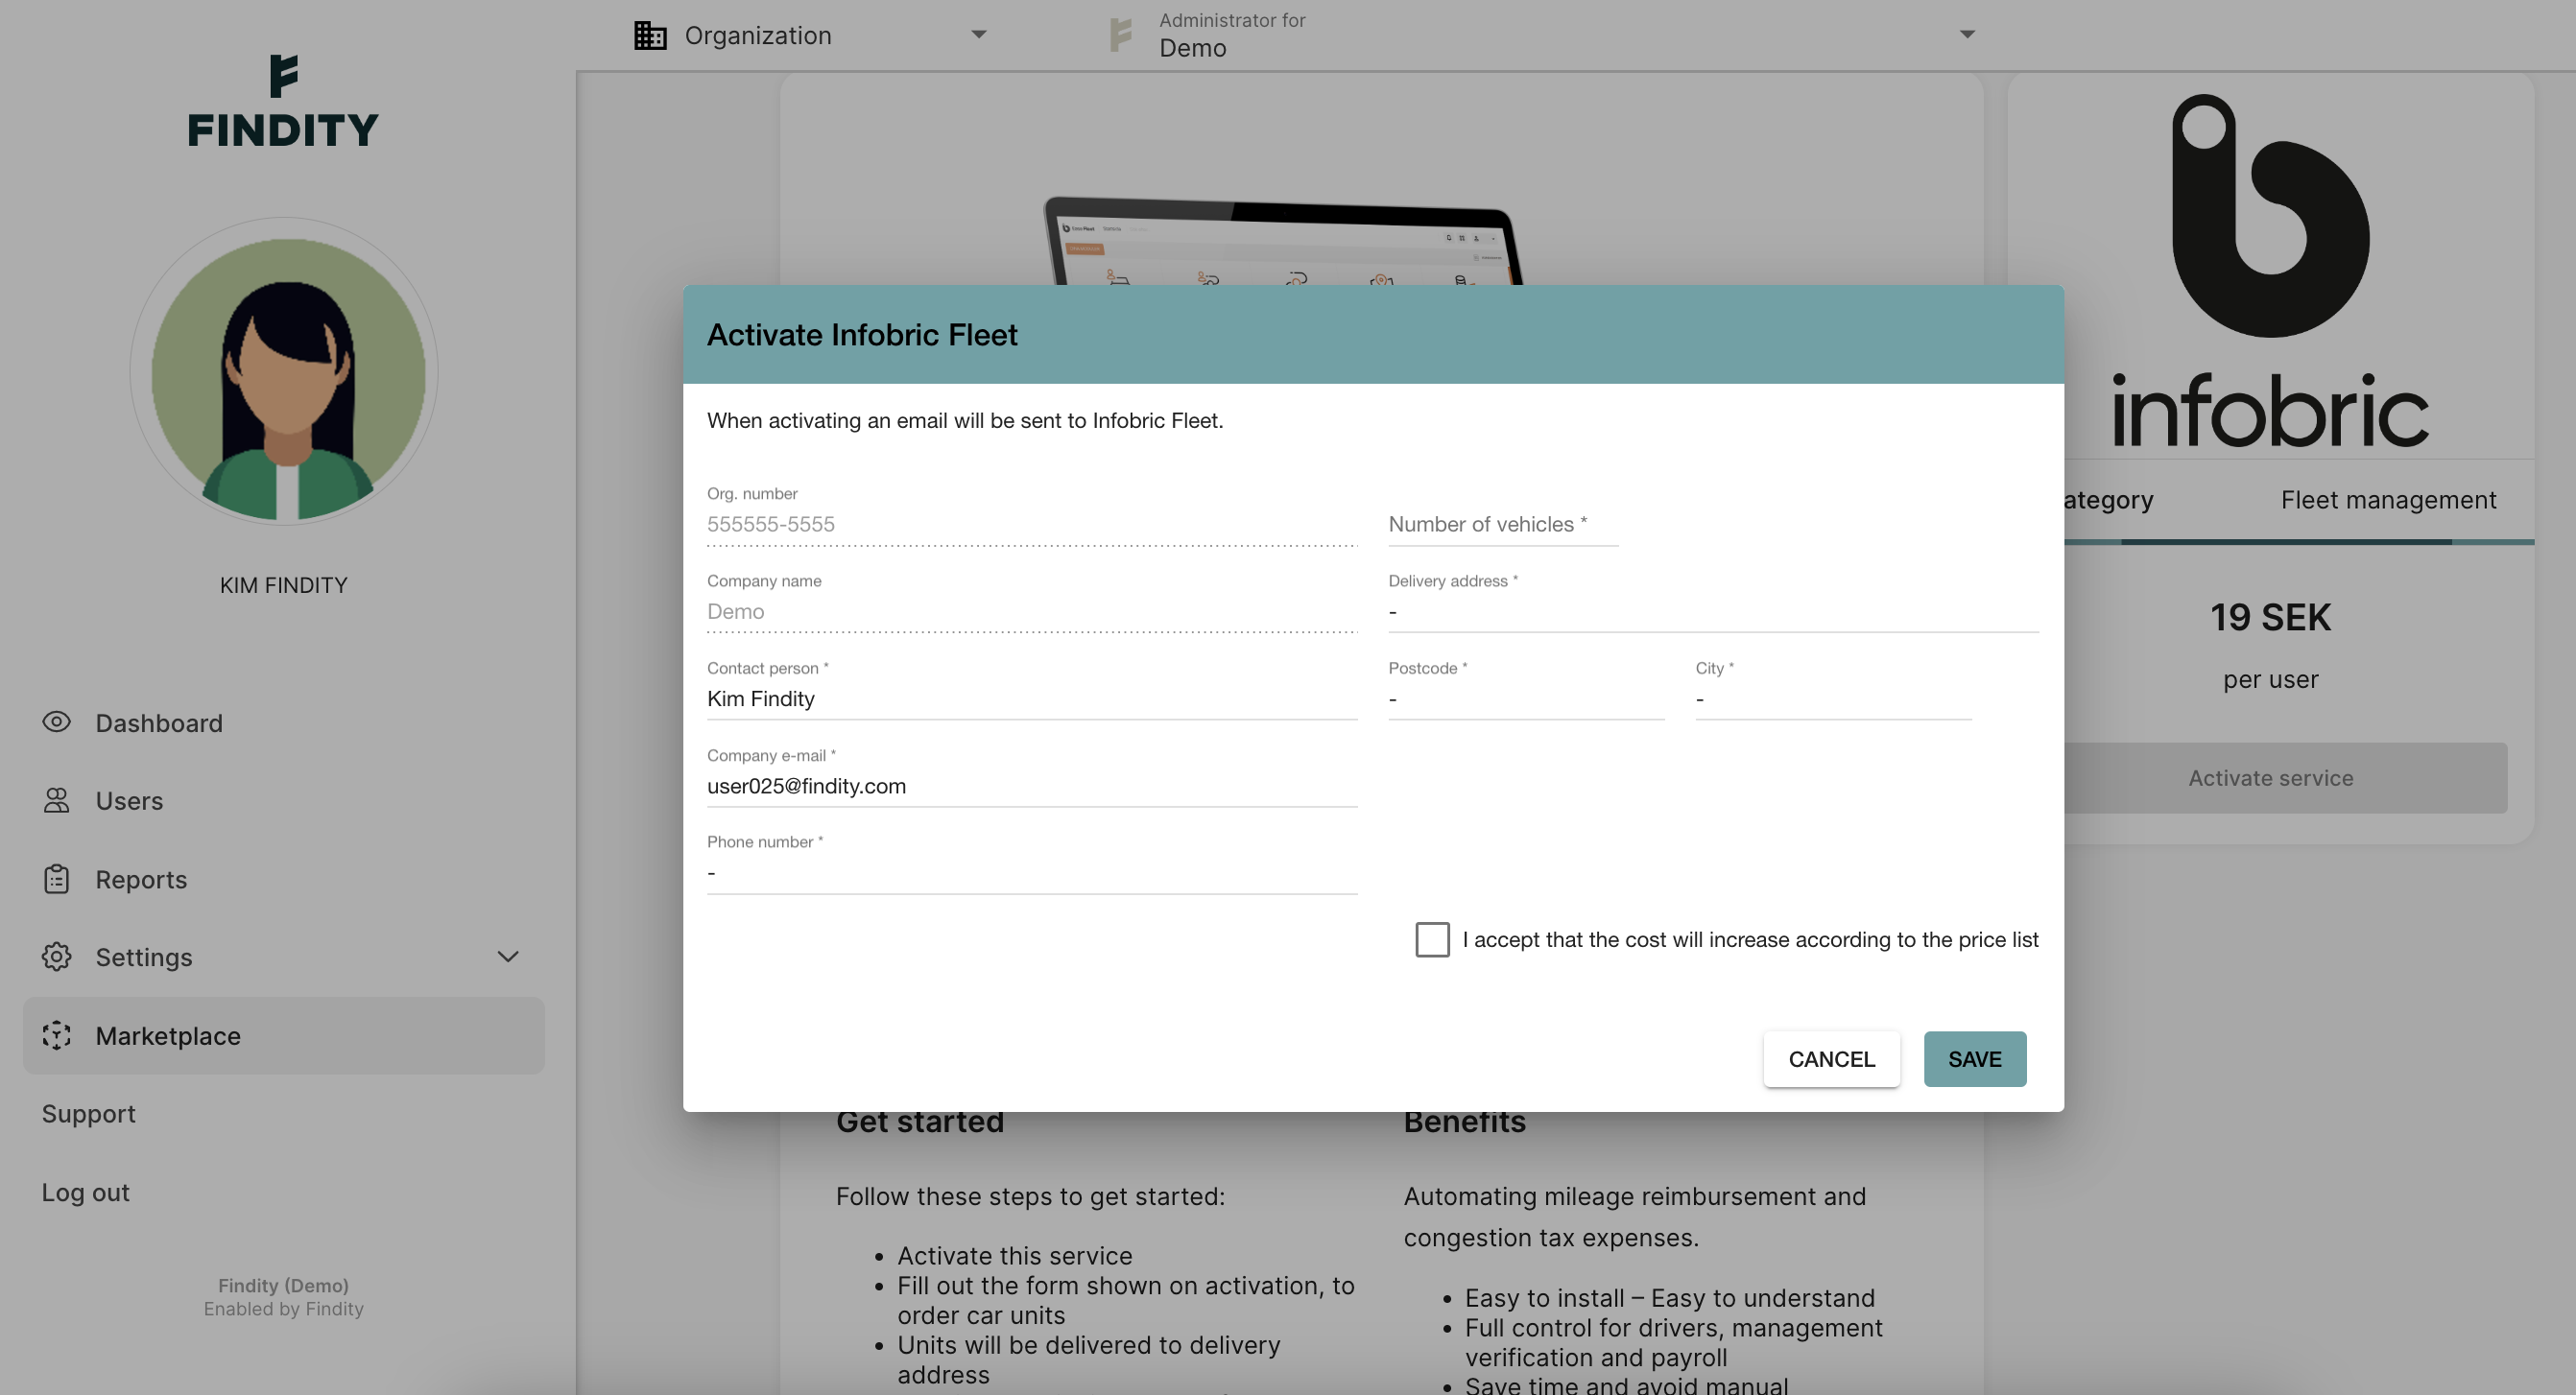
Fill in the mandatory information and press Save.
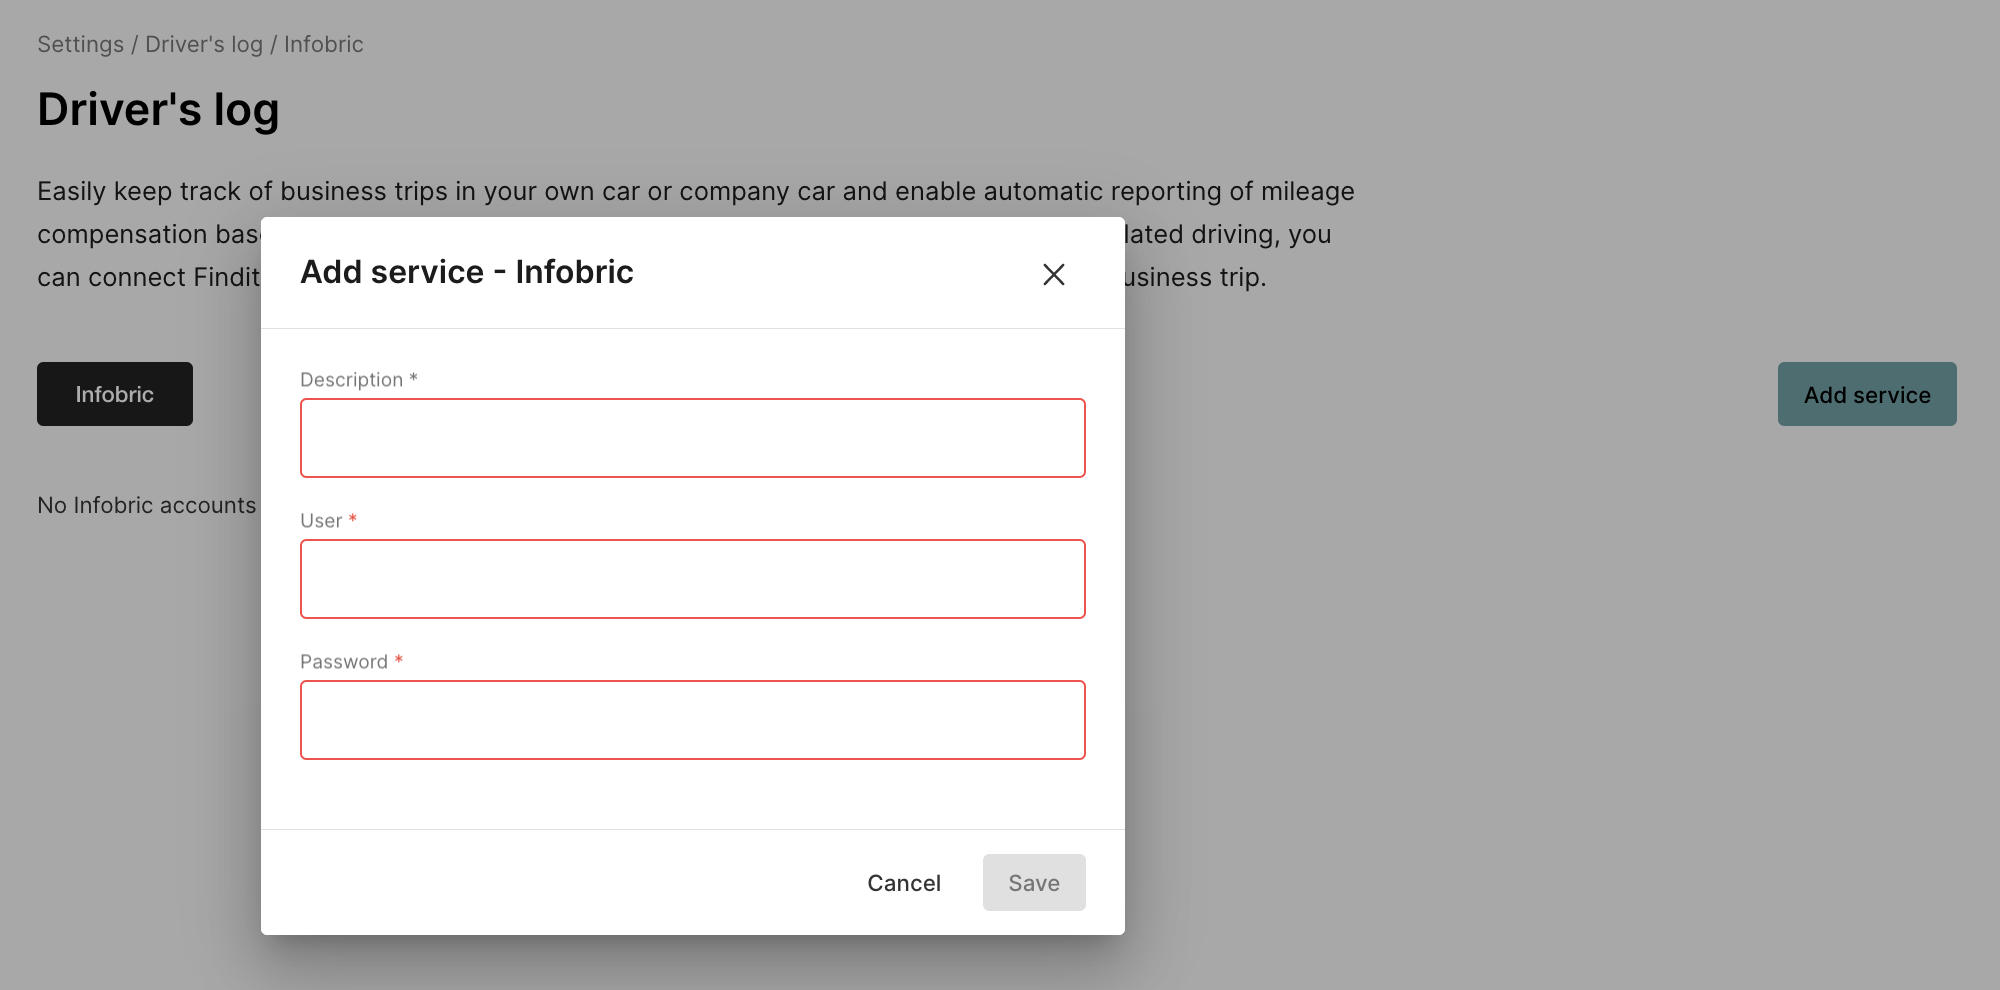
Go to the tab Driver's log and press Add service.
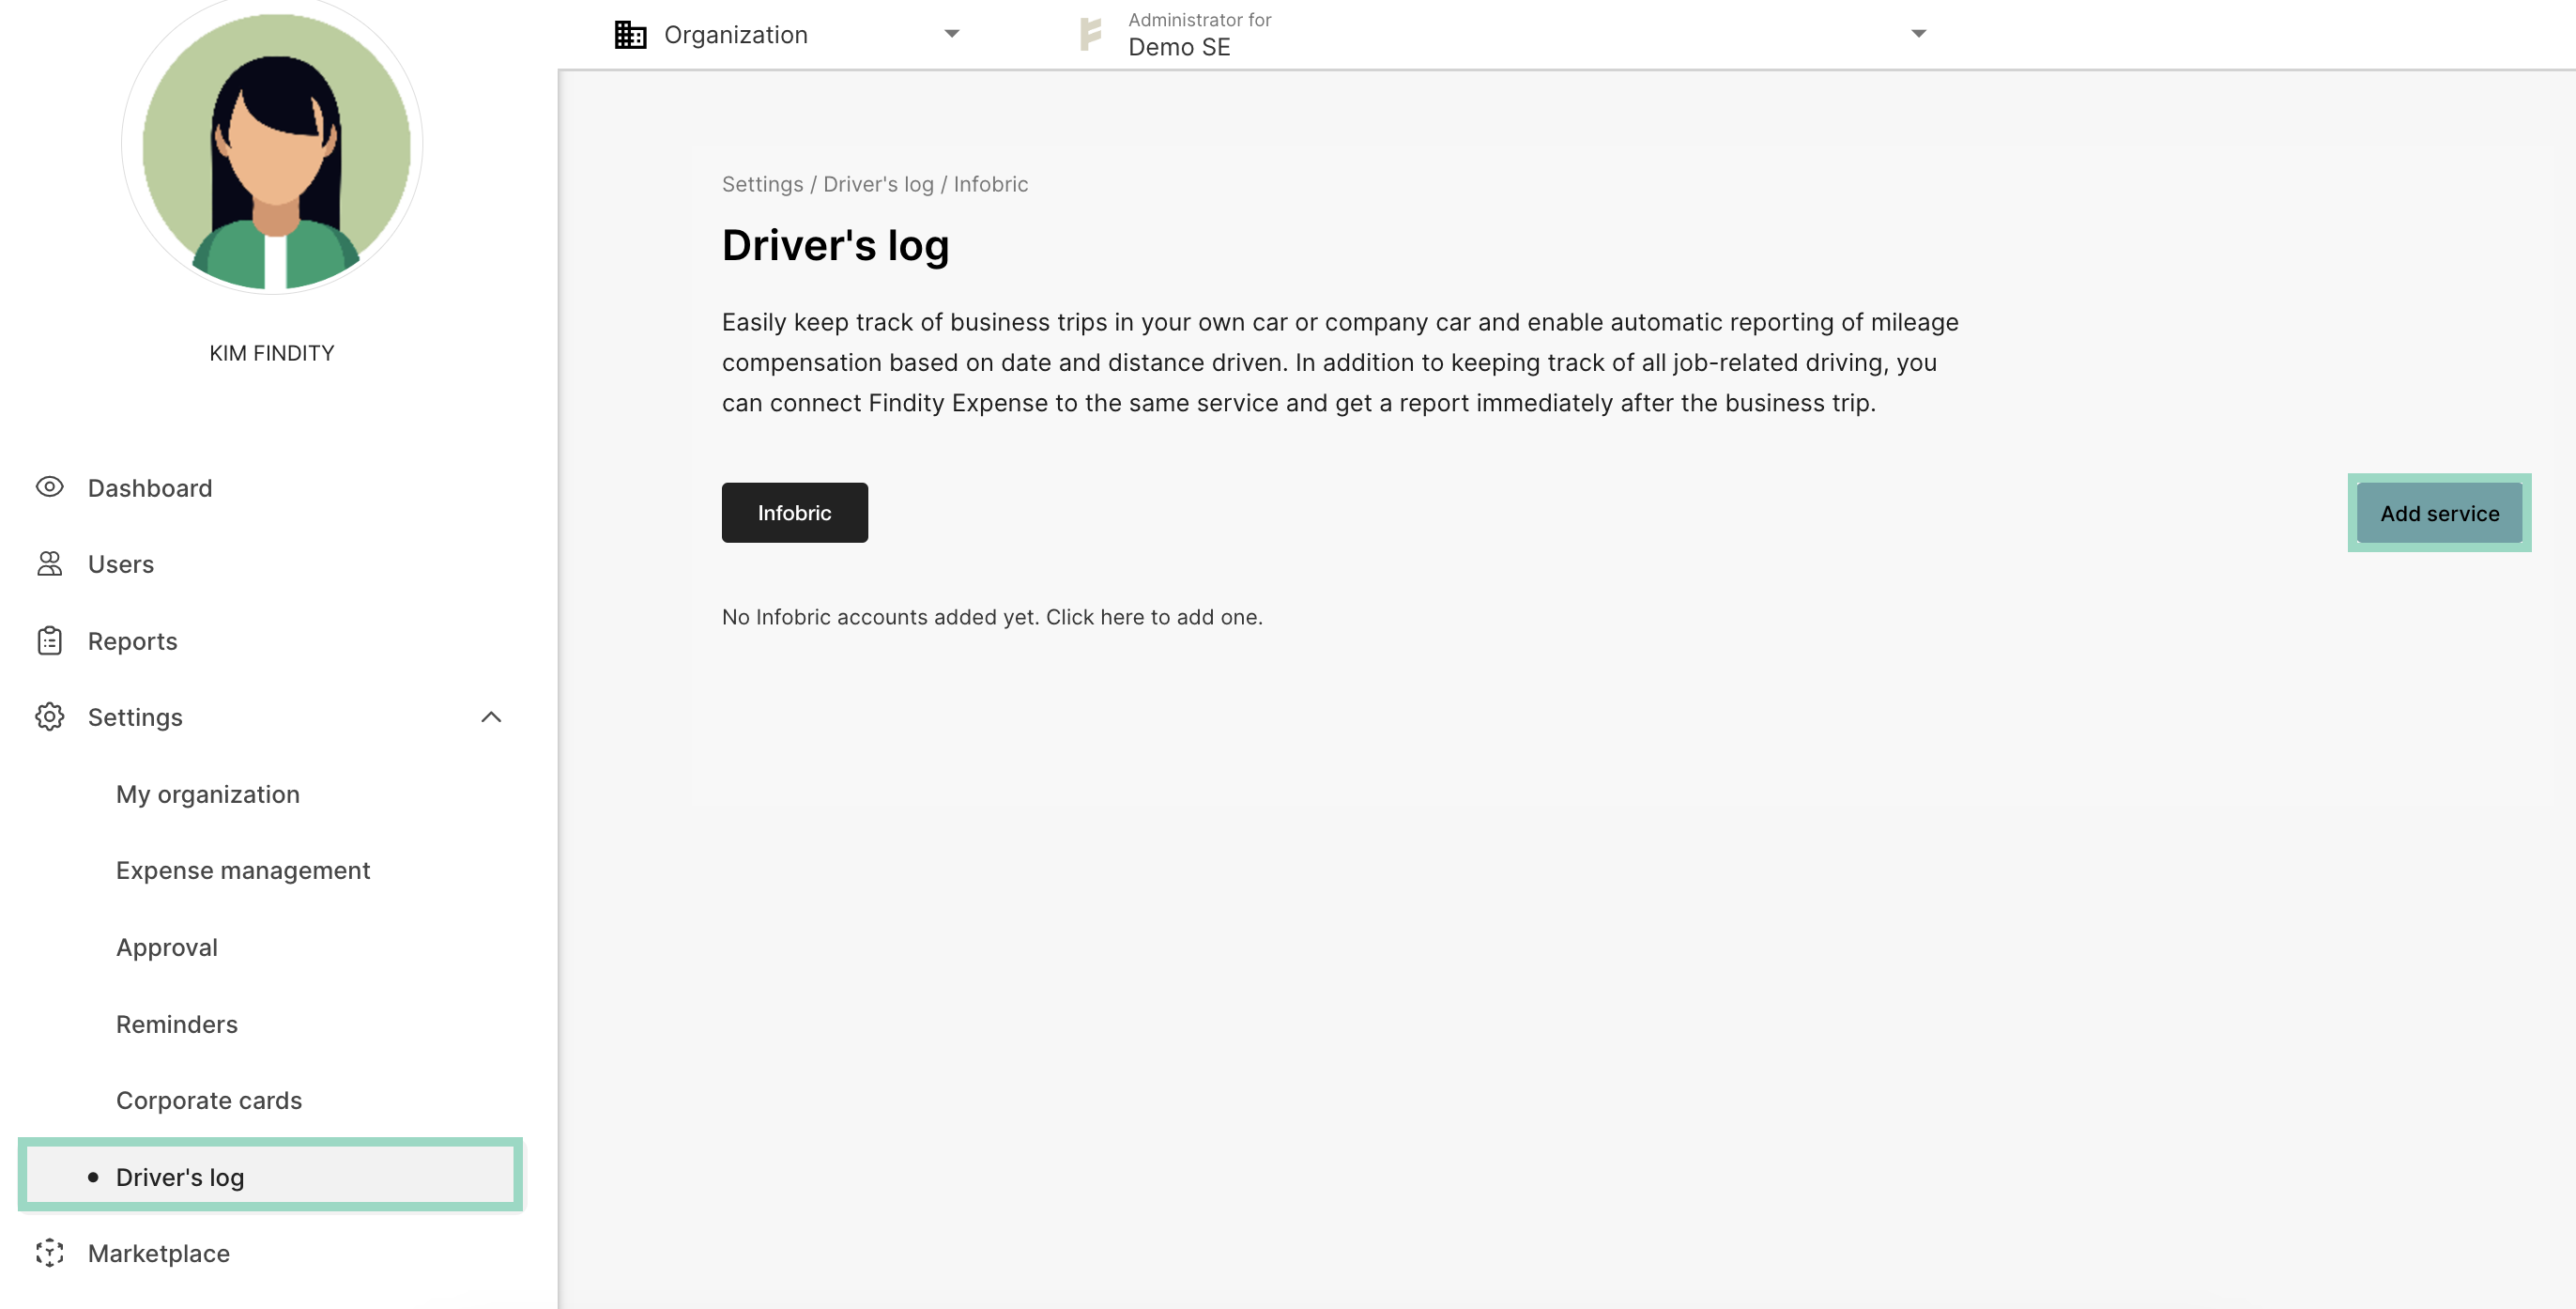
Add Description and the login details you have for your Infobric Fleet account.
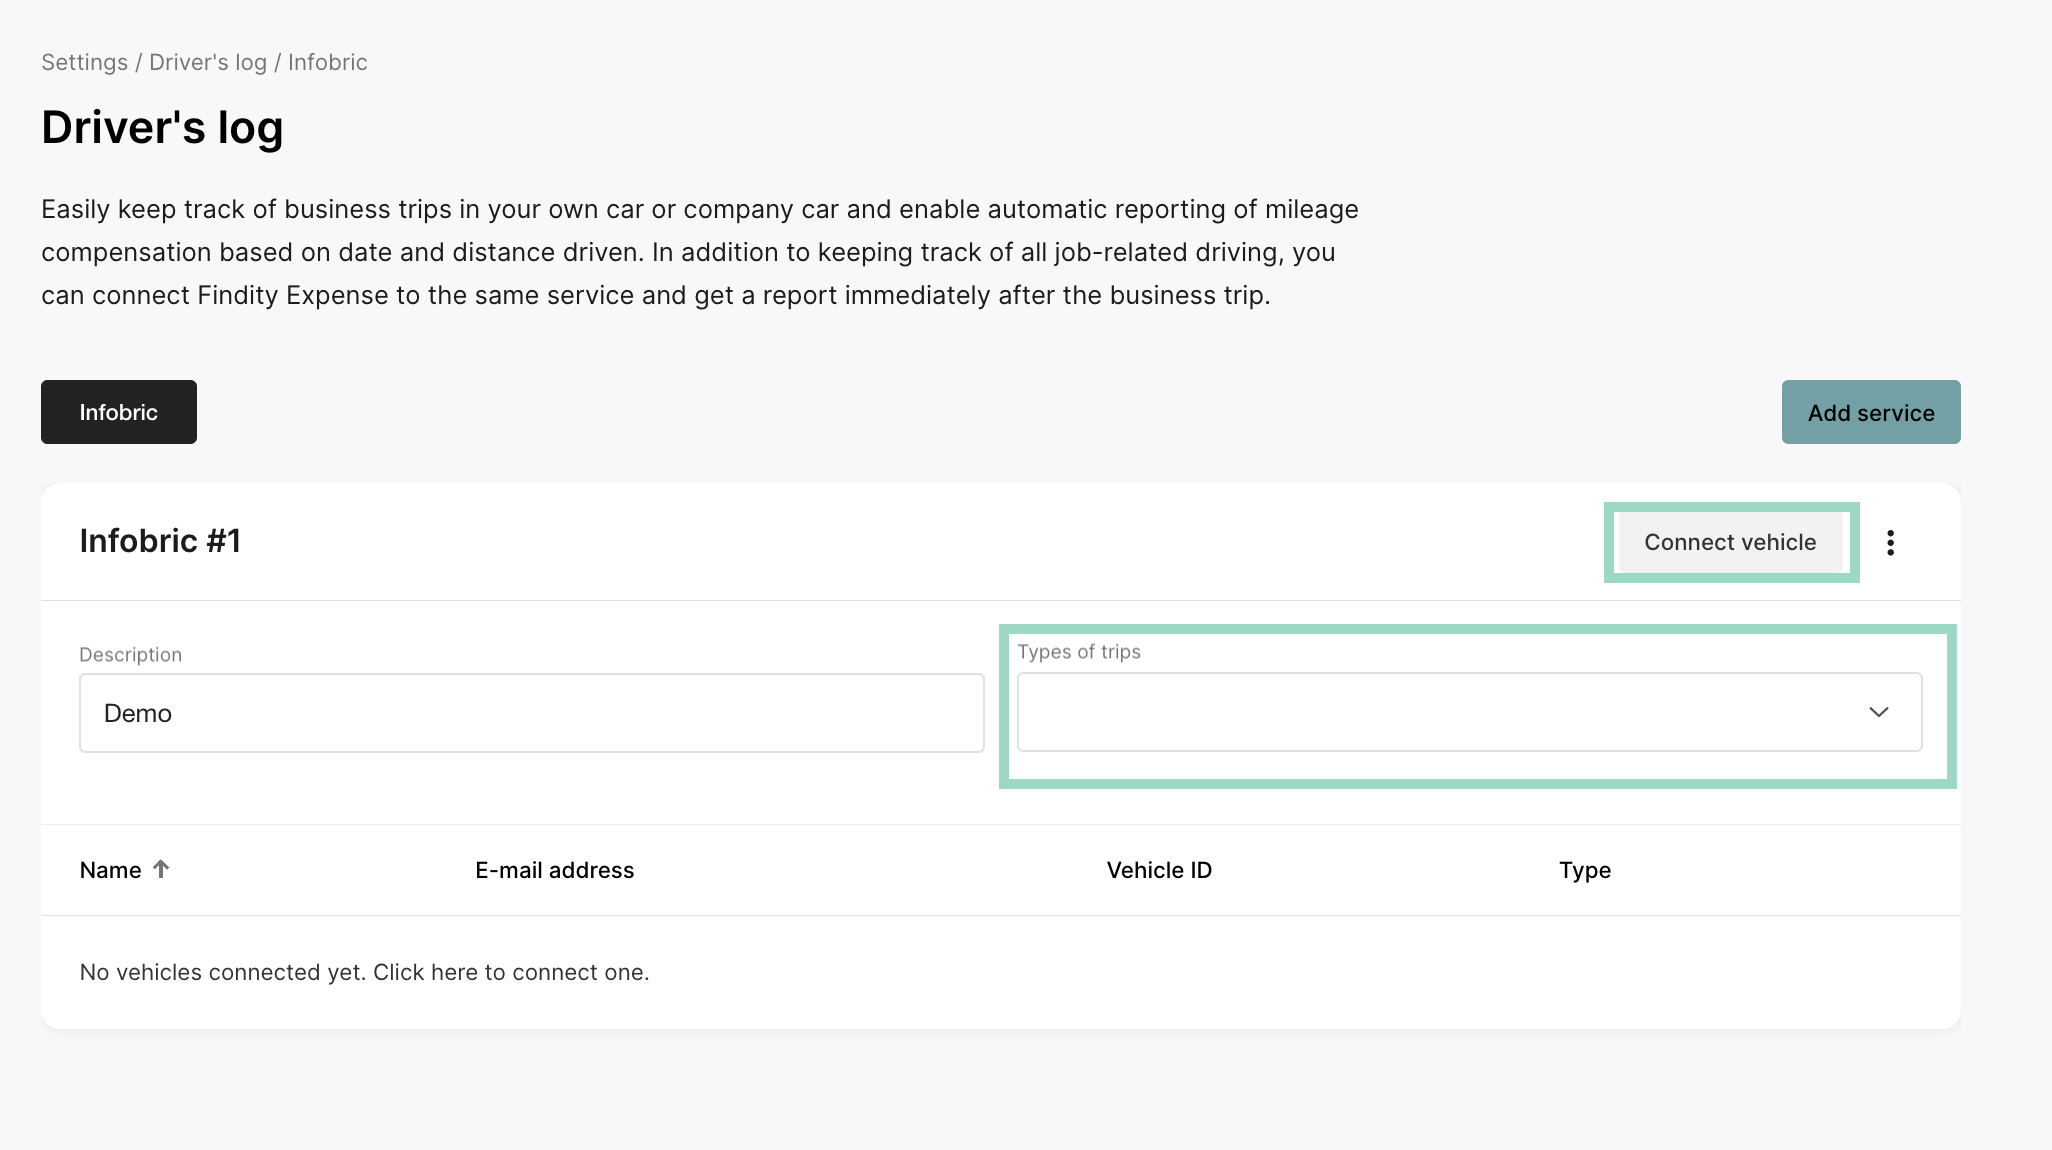
Click on Connect vehicle to add the users, and choose Types of trips.
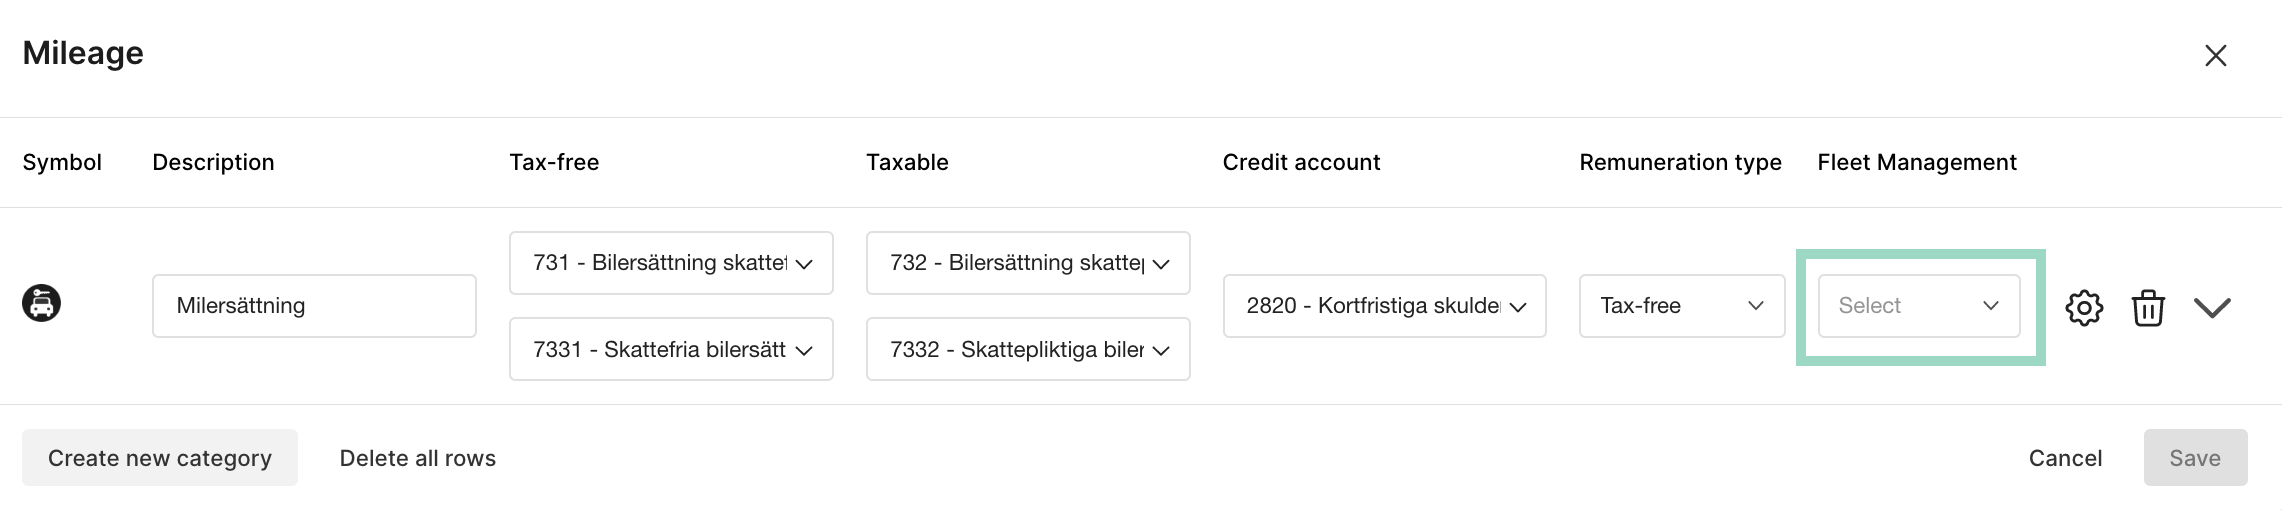
Now it's time to add the setting for milage. Go to the tab Settings - Expense management - Expense categories - Milage.
Click on the box under the tab Fleet Management to connect the category to the settings for Infobric fleet, or create a new category and make the connection there.
Devices for Infobric fleet will be delivered. The users has to plug in the device into their car to start reading the trips.
DeletePaydrive Sense
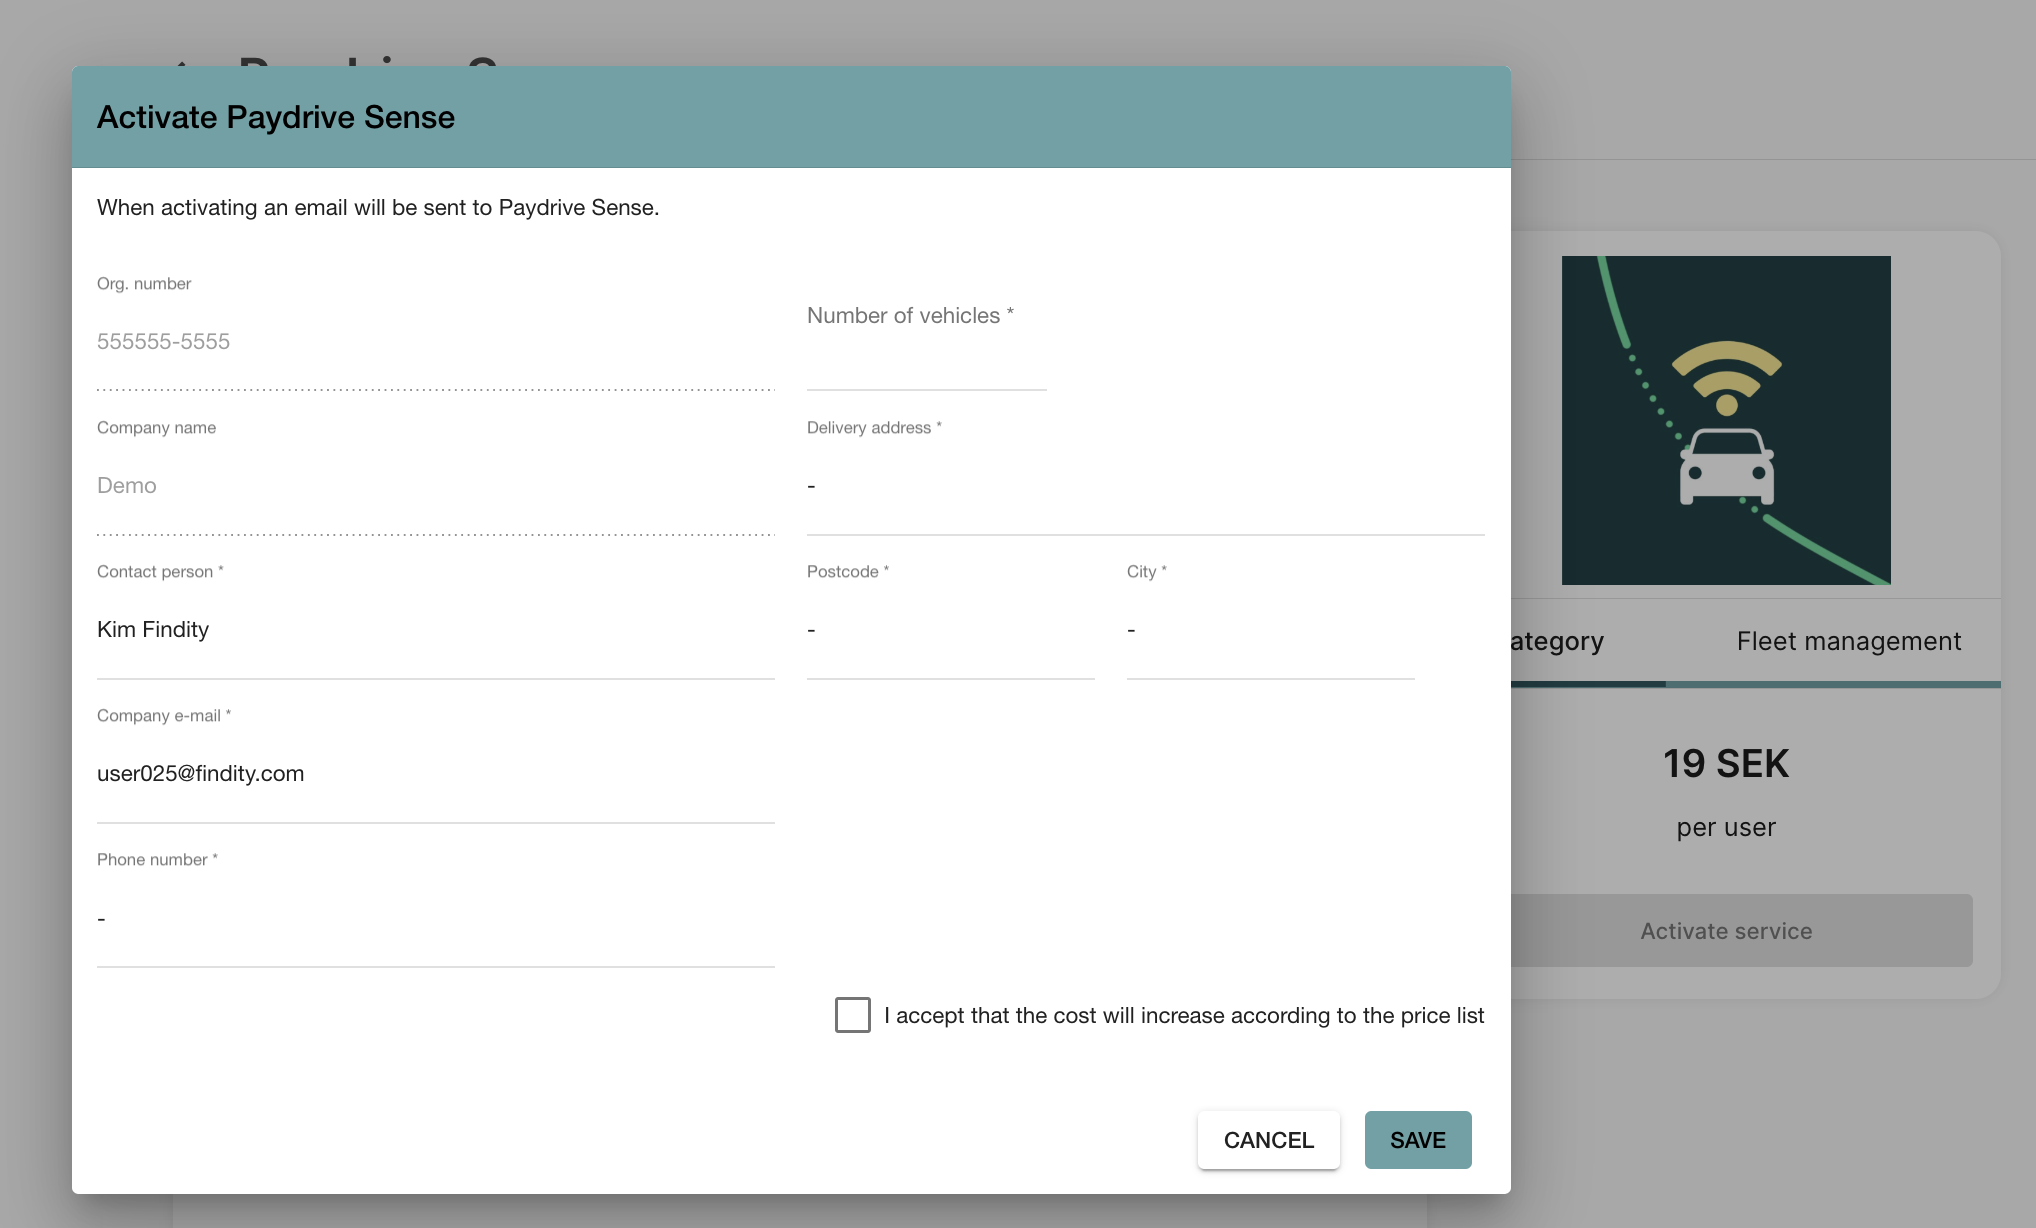
Go to the tab Marketplace and select the category Fleet management. Click on the box for Paydrive Sense. Choose to Activate service.
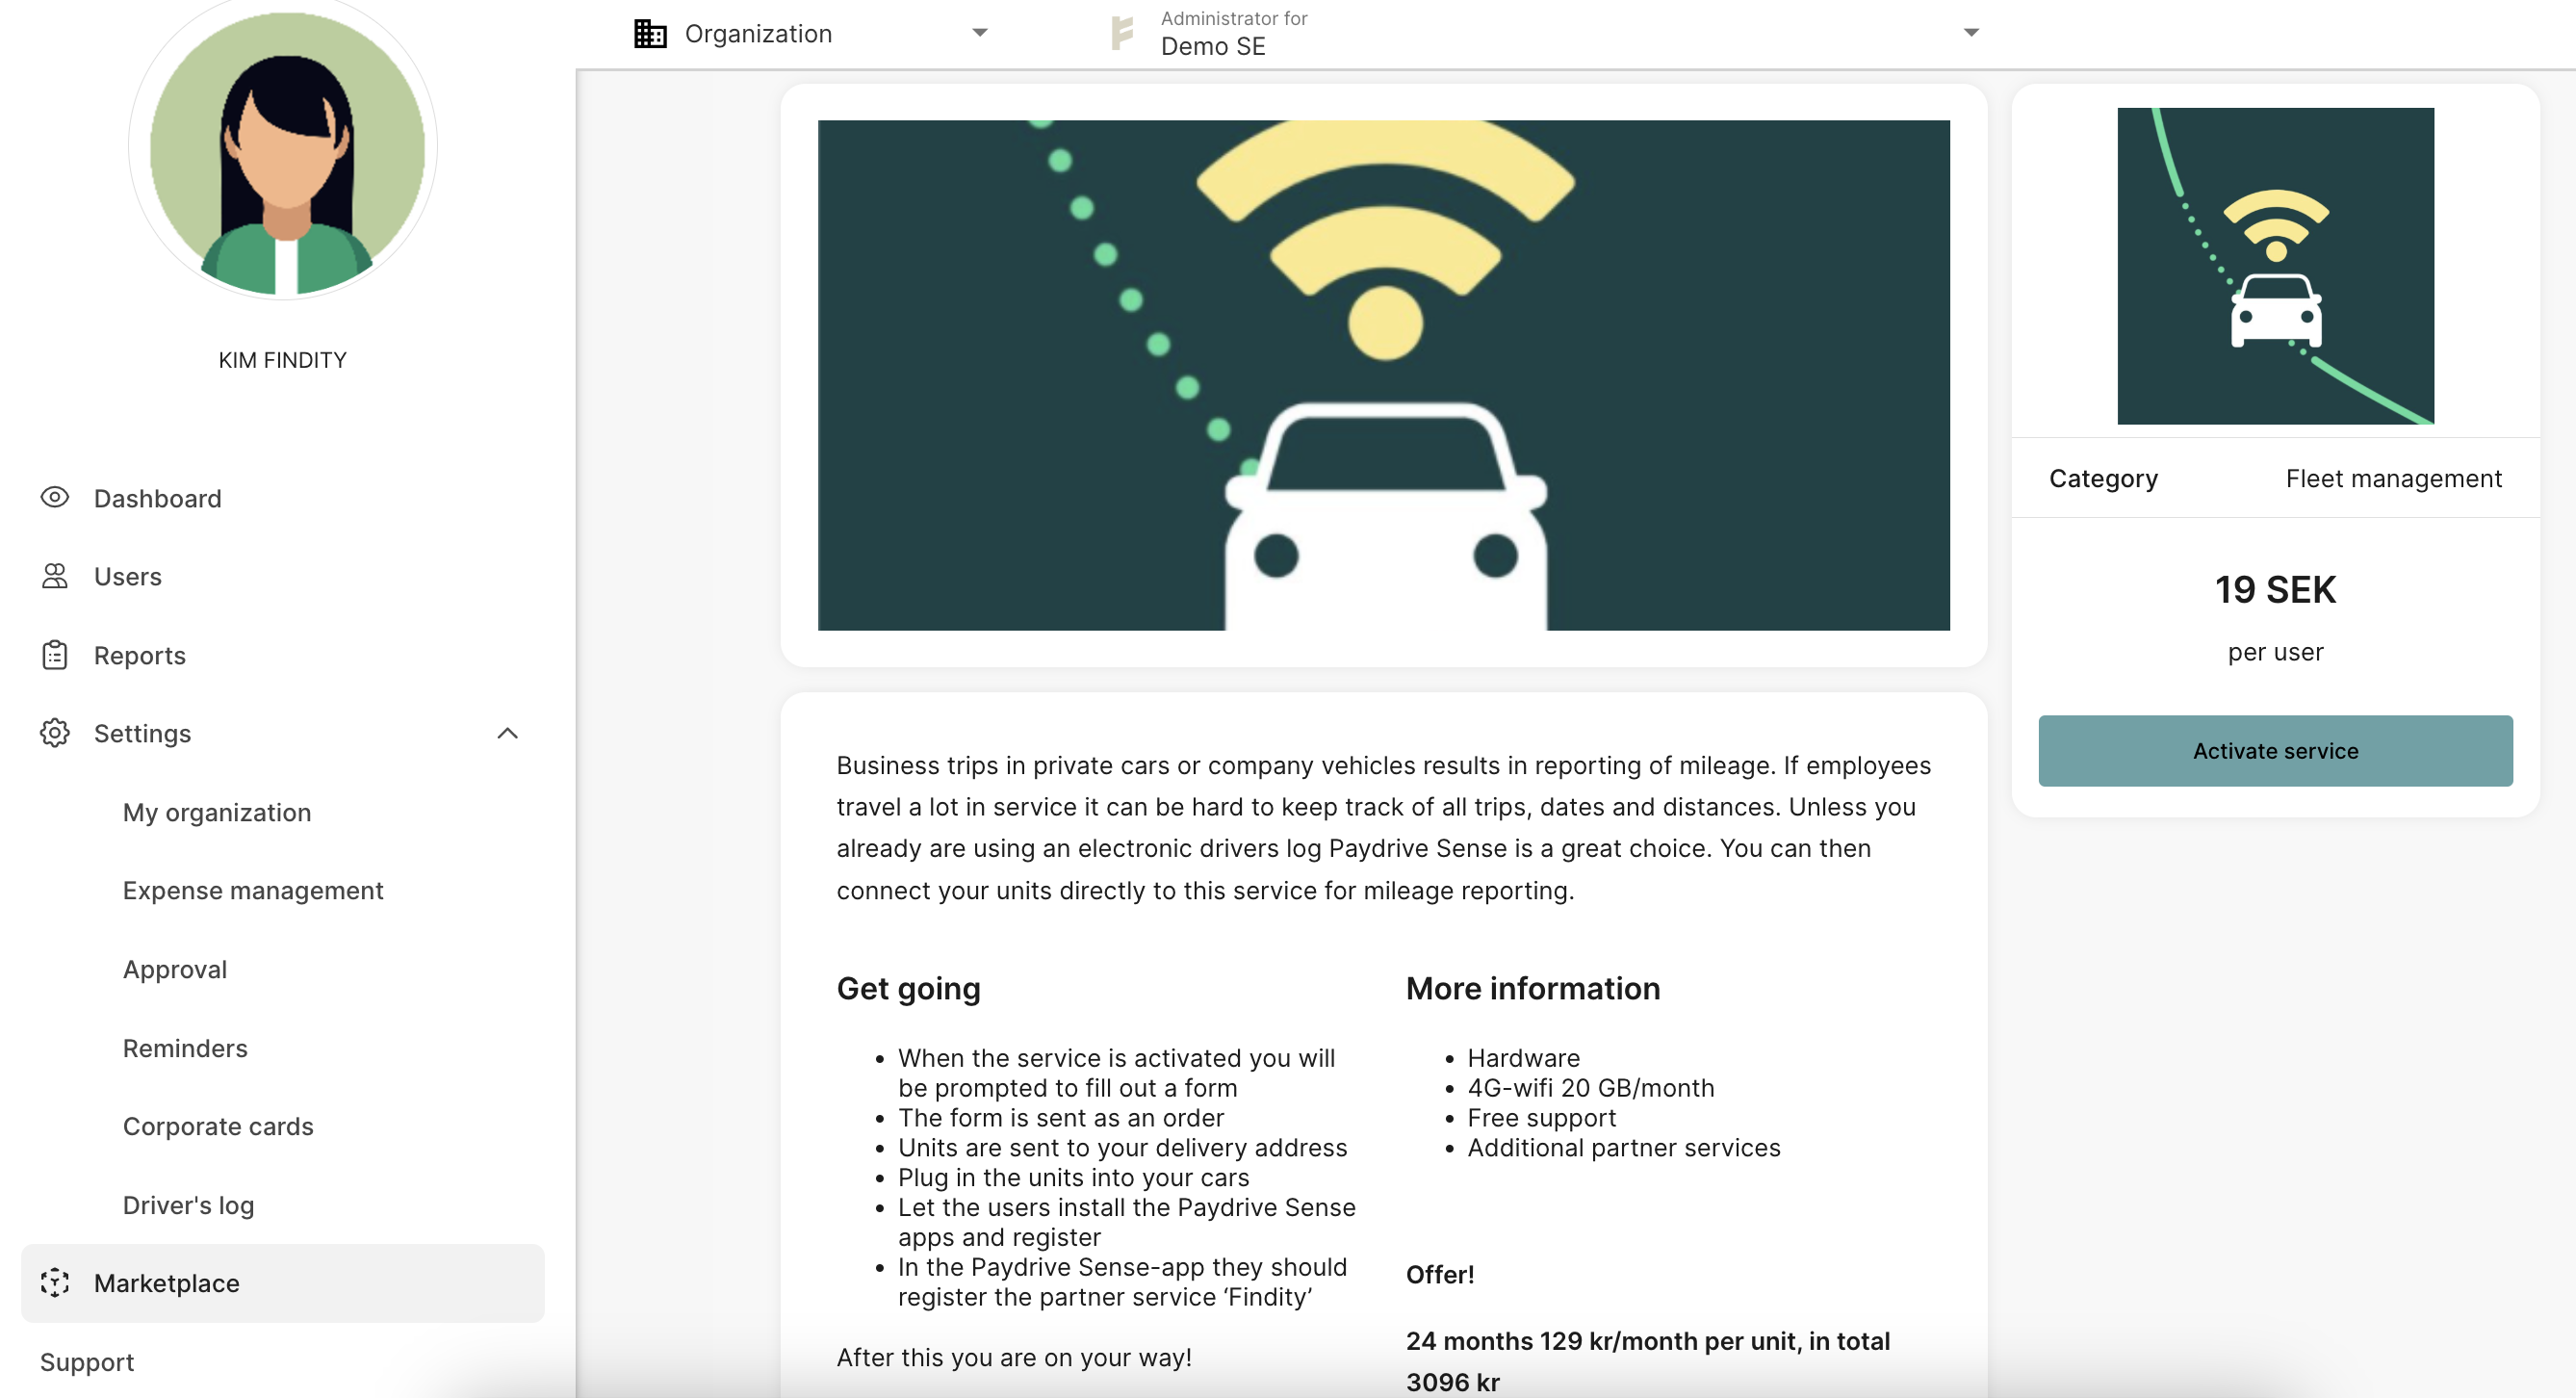
Fill in the mandatory information and press Save.
Devices for Paydrive Sense will be delivered. The users has to plug in the device into their car to start reading the trips.
Download and open the app Paydrive Sense. Click on More and choose to add partner service Findity.
Volvo on Call
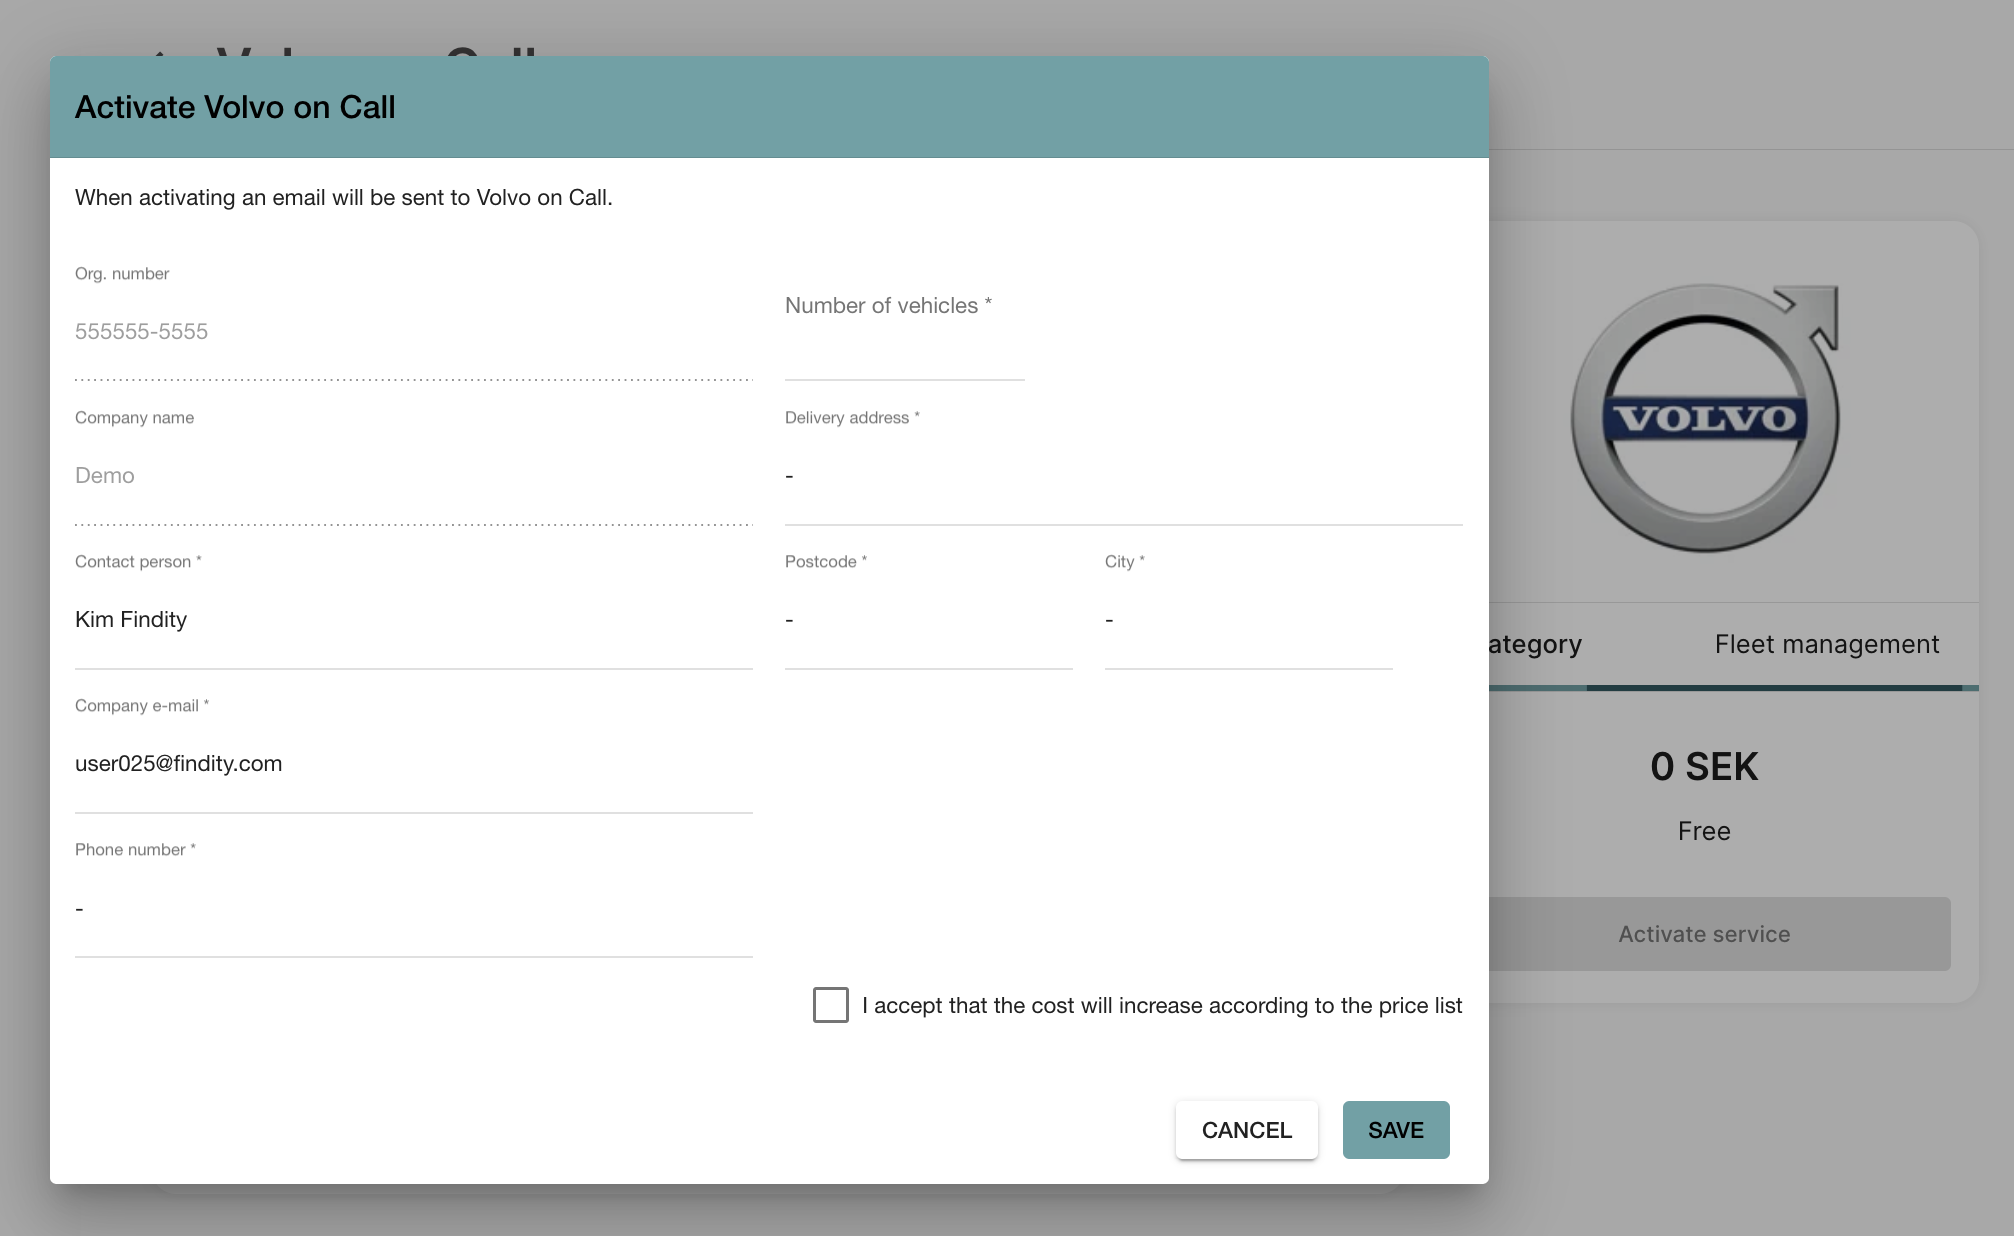
Go to the tab Marketplace and select the category Fleet management. Click on the box for Volvo on call. Choose to Activate service.
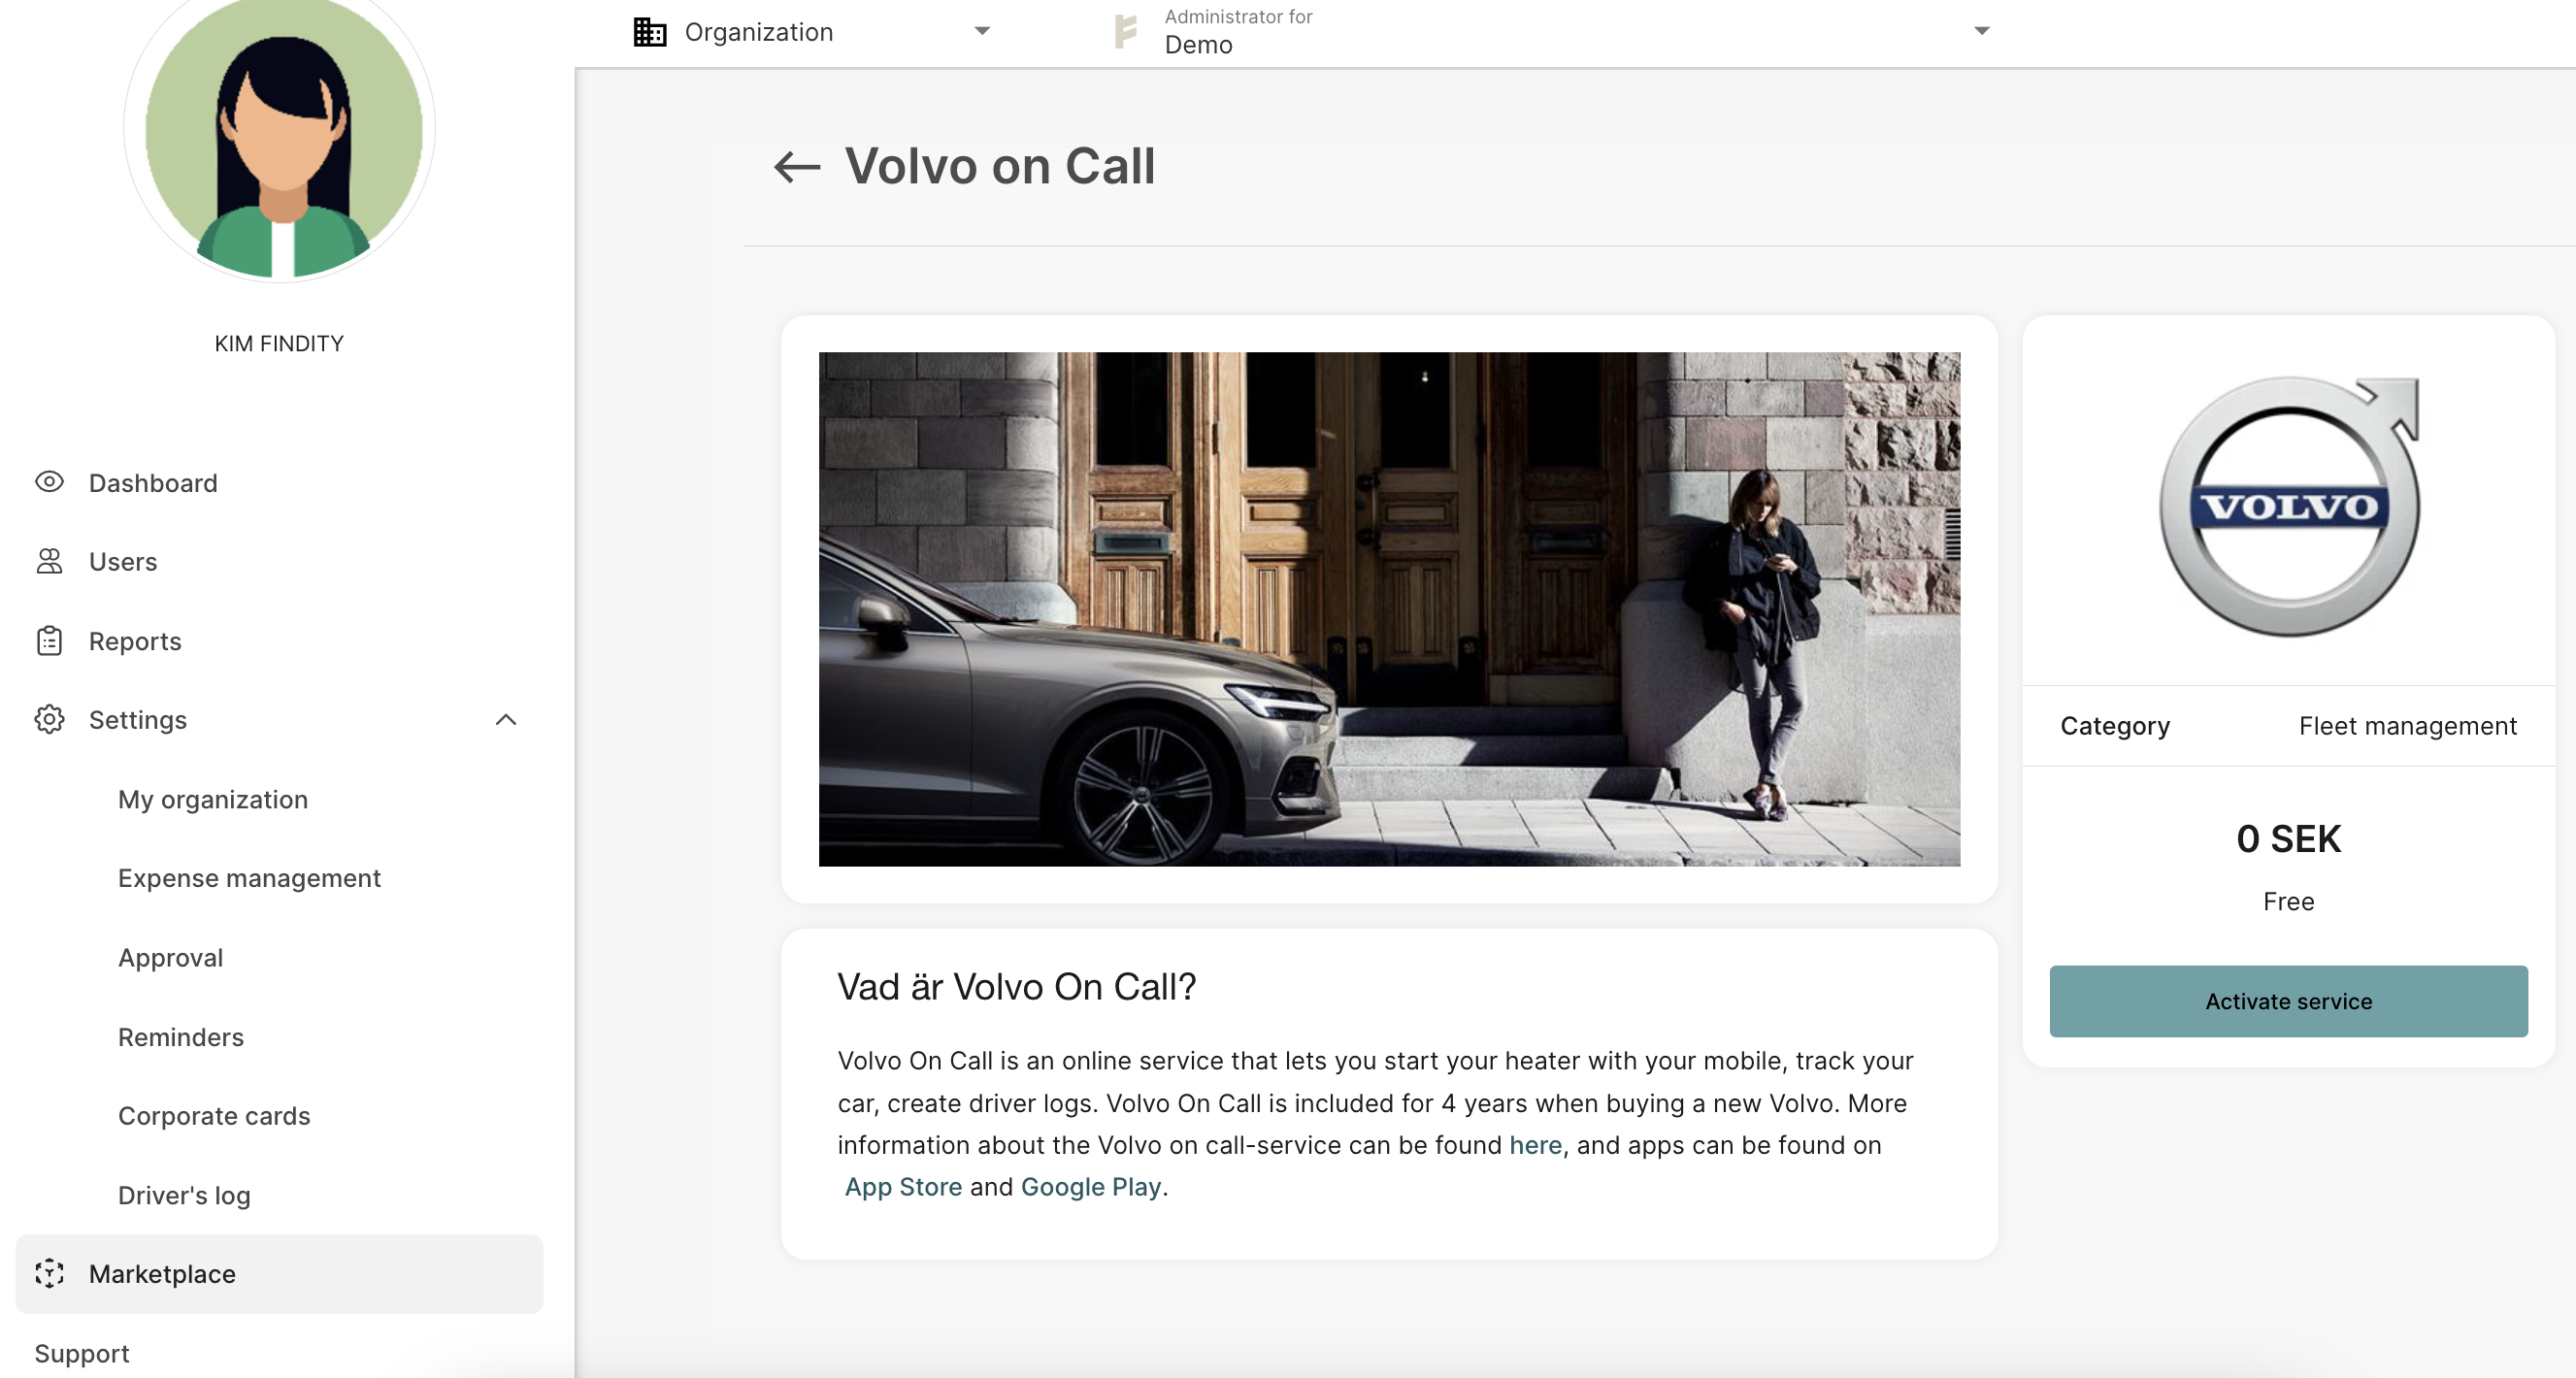
Fill in the mandatory information and press Save.
The user needs to open the Volvo On Call app and mark the journeys to send to Findity. After the trips are selected, the user chooses to e-mail the trips as a CSV-file and then send the file to expense@findity.com
It's important that the user e-mail the trips from the same e-mail that is registered on the user account in Findity.
The user then opens Findity and the trips are now uploaded under the field Unsubmitted Expenses.