How do I manage reports under the tab Ready to Send?

Written by Elin Ivarsson
Updated at March 25th, 2026
Table of Contents
Add settings
The first step, to be able to manage reports before they are sent in to the report recipient, you need to activate Review mode. When this setting is activated, you will get a new tab under Reports named Ready to send.
Follow this article to activate the setting Add the step Ready to send
The next step is to add the setting Allow administrators to edit reports if you want all administrators in your company to be able to make changes in the reports before they are sent to the report recipient. For example, one user has registered the wrong amount in the expense when it was submitted. This setting allows the administrator to make the adjustment before the report is sent in and the file is generated.
Go to the tab Settings - Expense management - Report workflow to add the setting.

Ready to send tab
Go to the tab Reports and Ready to send.
In this view, all submitted reports are collected before they are handled by the administrators on your company. If you choose to click on the Eye for review, the report will then be previewed and displayed in your browser.
If you click on the three dots, you will have many different options. For example you can choose to re-send the report back to the user.


Send in reports
If you want to send in multiple reports, mark the box next to User to choose all reports under the tab Ready to send. Click on the box for Manage reports and choose to Send reports. If you have the setting choose accounting date for the reports, a new box will appear and you will be able to choose the date before the reports are sent. 

If you want to send in just one report. Click on the three dots on the right side of the page and choose to Send expense report.

Make changes in a report
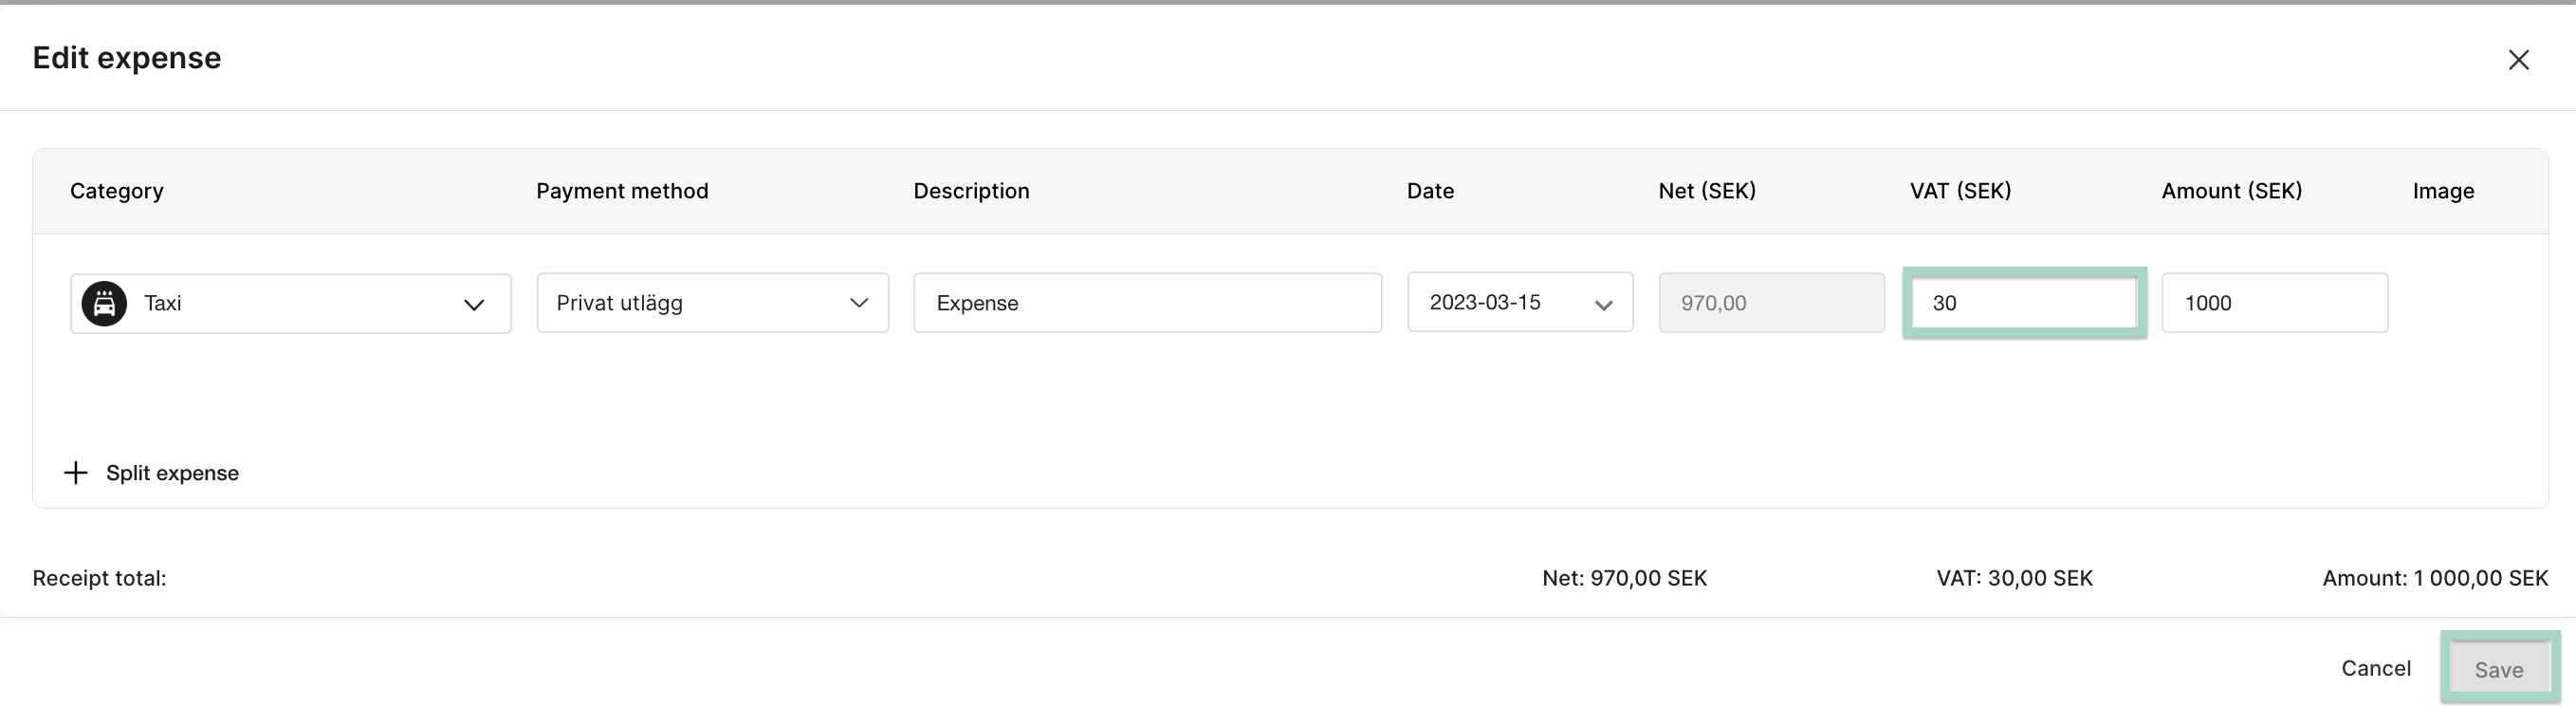
Now we will move on and make a change in a report under the tab Ready to send. Press on the row of the report you want to make a change in.

A new page will now open. Press the Edit button on the expense you want to do the change in.
For mileage and per diem it is only possible to adjust dimensions, other lines in this expenses can't be adjusted. To change milage and per diem, the report needs to be sent back to the user who adjusts and submits the report again.
If you want to Delete an expense, press on the Trashcan to remove the expense from the report.

Do the change and Save when you are done. For example, if you want to change the amount for VAT. Click on the box for VAT, enter the new amount and press Save.
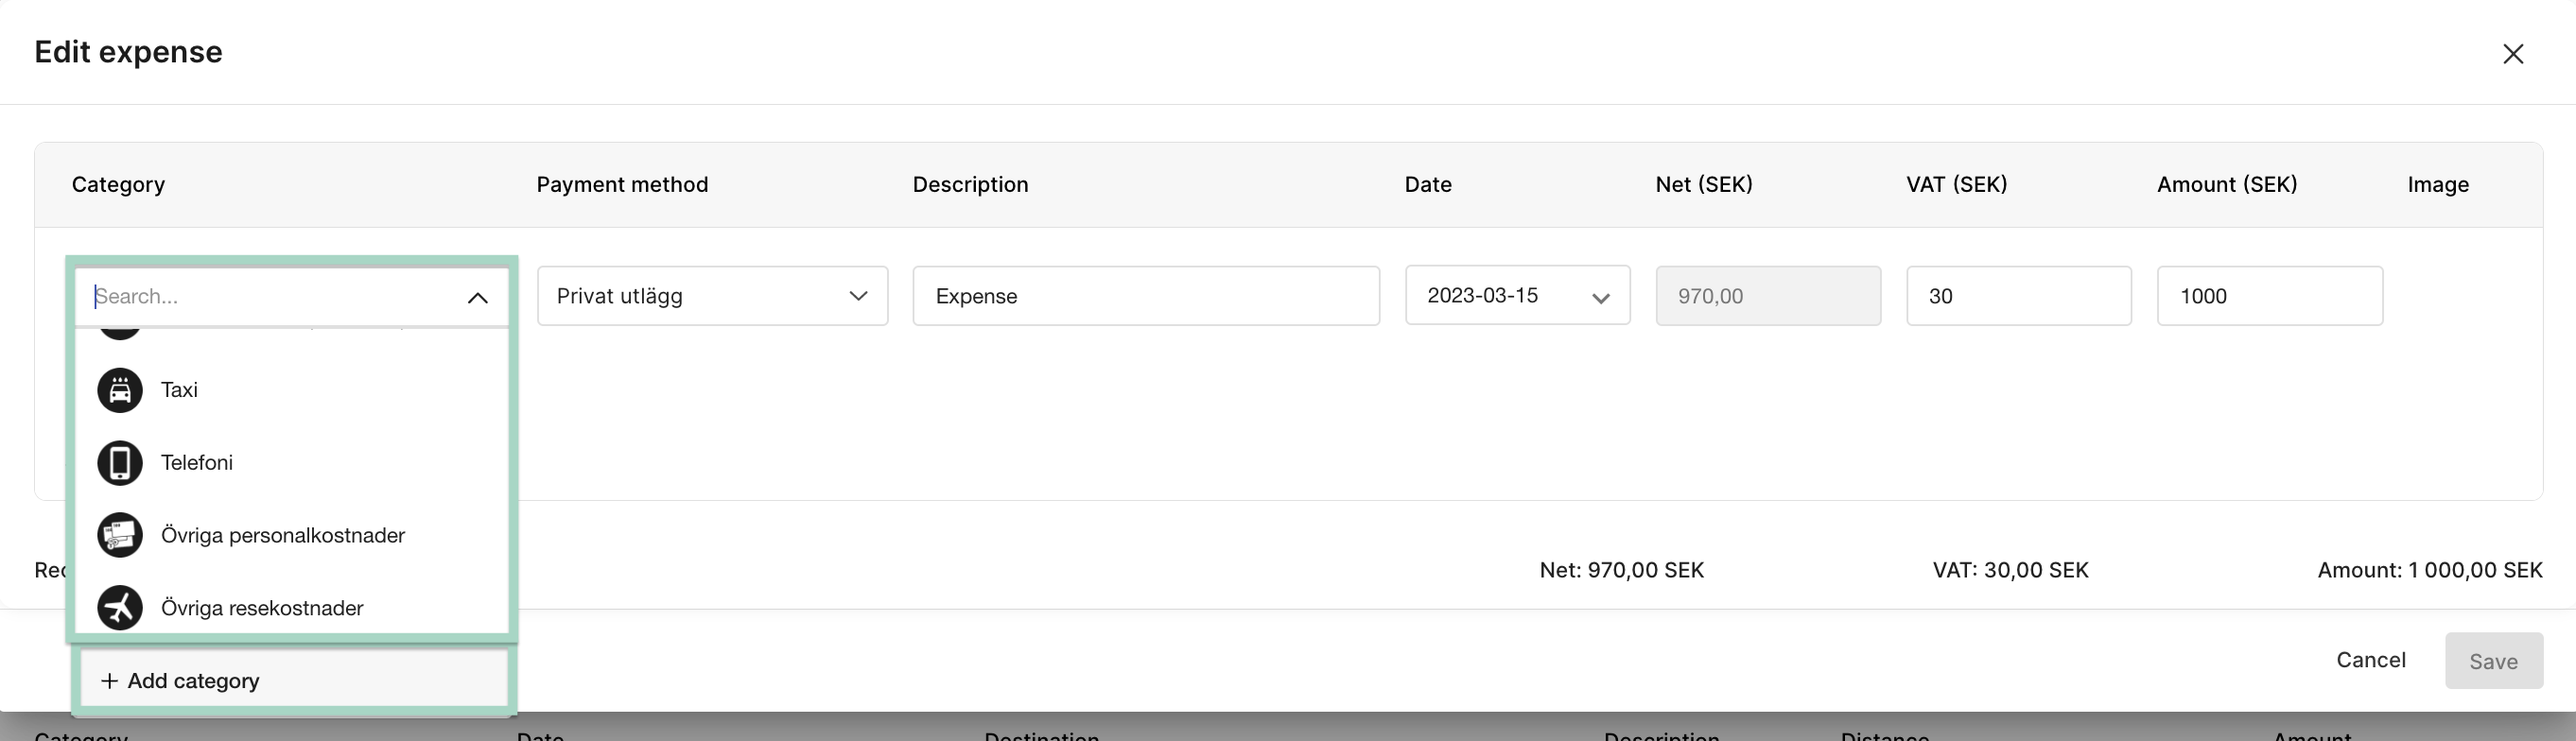
Change and add category
It's possible to change the category or add a new category. If you add a new, it will be saved as a new category on your settings and you can choose if it should be visible or not for the users.
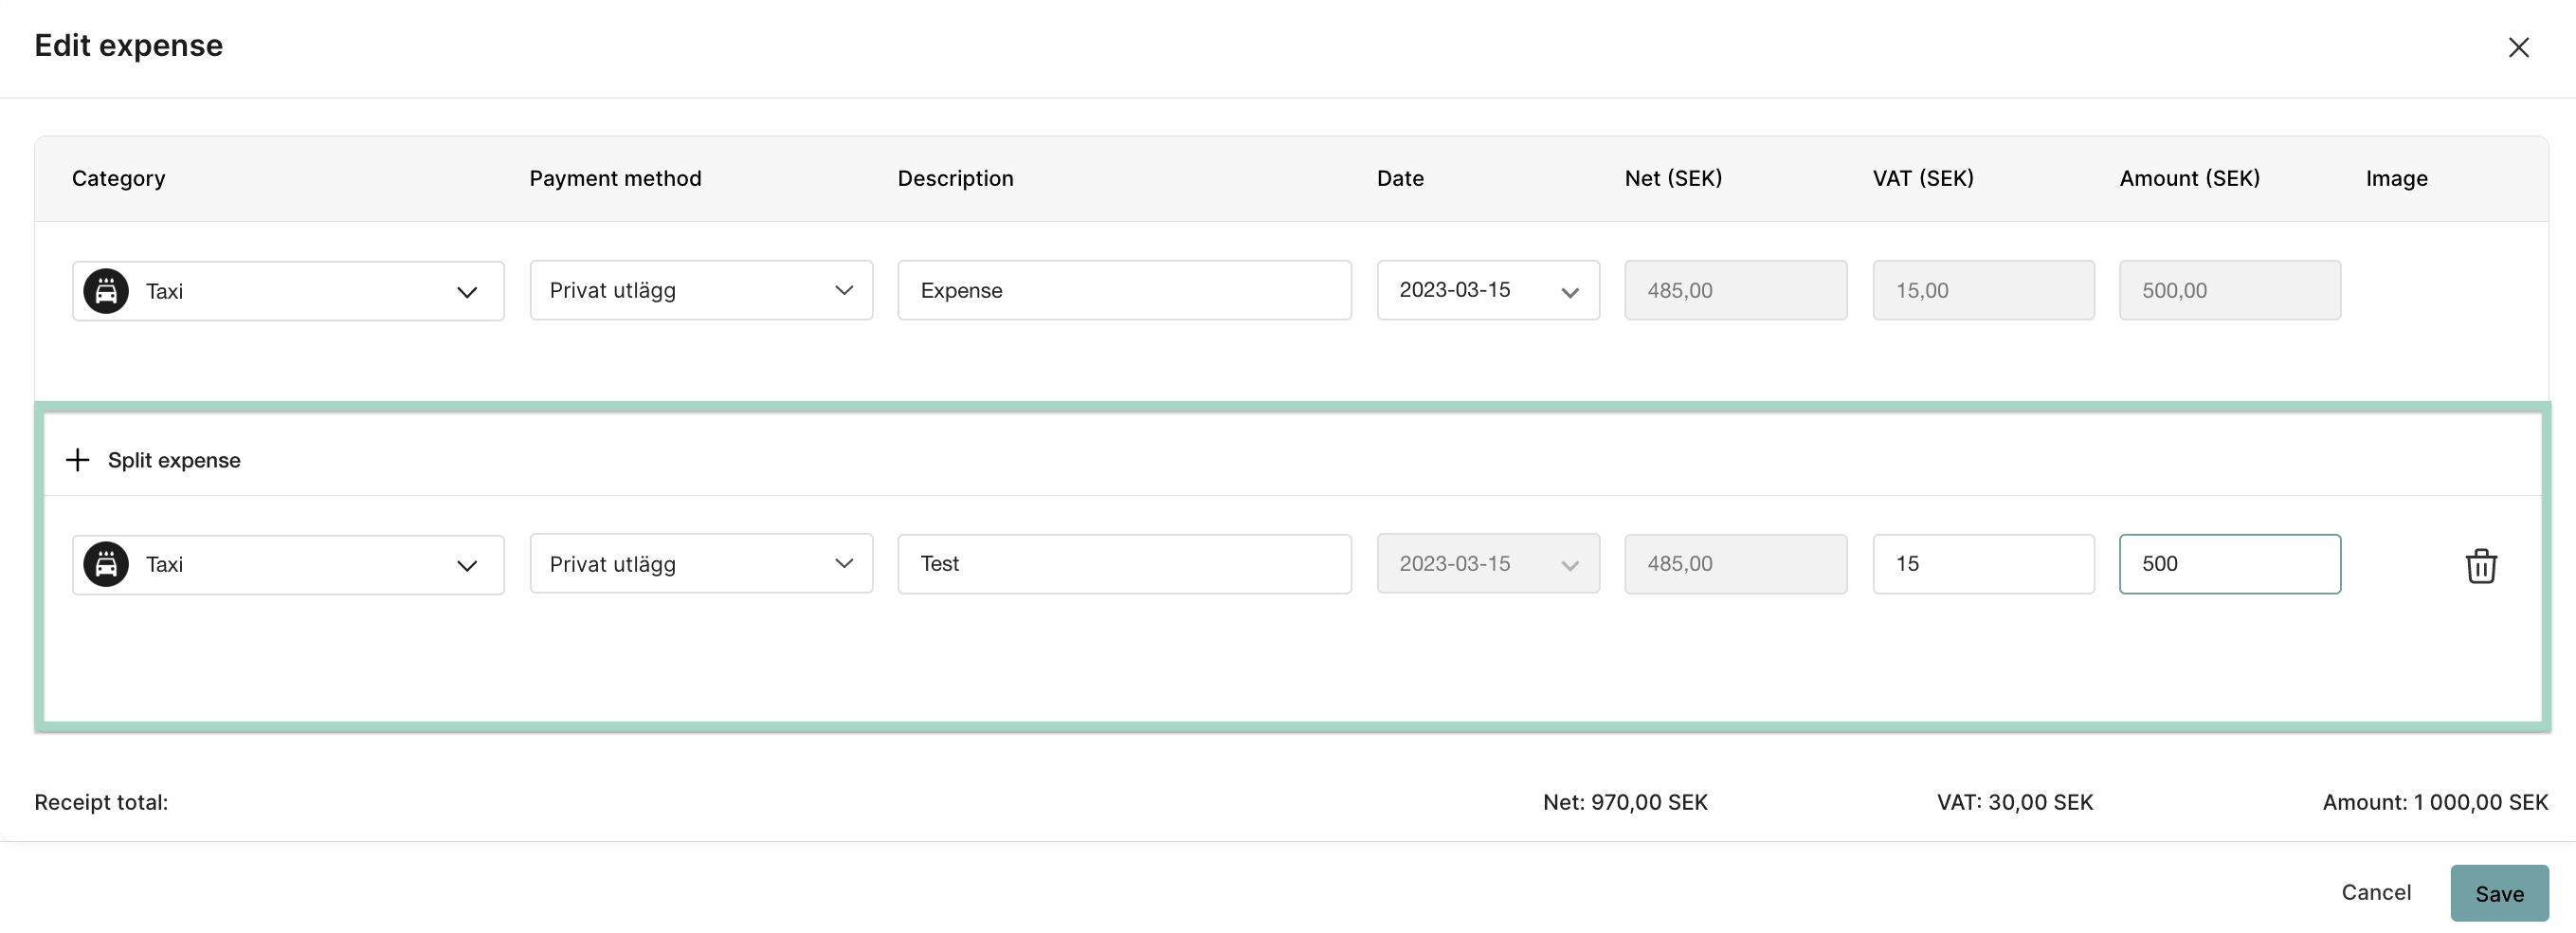
Split expense
It's possible to split one expense into two or more.
By clicking on Split expense. You will get a copy of your first expense. You can edit the category, payment method, description, VAT, amount and dimensions (if you use dimensions on your organisation). You can do several splits.
The function Split expense in the tab Ready to send is visible on all organisations. For users to use split expense, you still need to activate it in the Marketplace Split expense for users