How do I approve or reject a submitted report/expense?

Written by Robin Göransson
Updated at May 18th, 2026
Table of Contents
This article applies to the following countries
- All countries
When a user submits a report to you for approval, you will receive both an email and a notification in the app with information about the report.
You have the option to approve or reject the entire report, or individual expenses. This article explains how to approve or reject a report within the service.
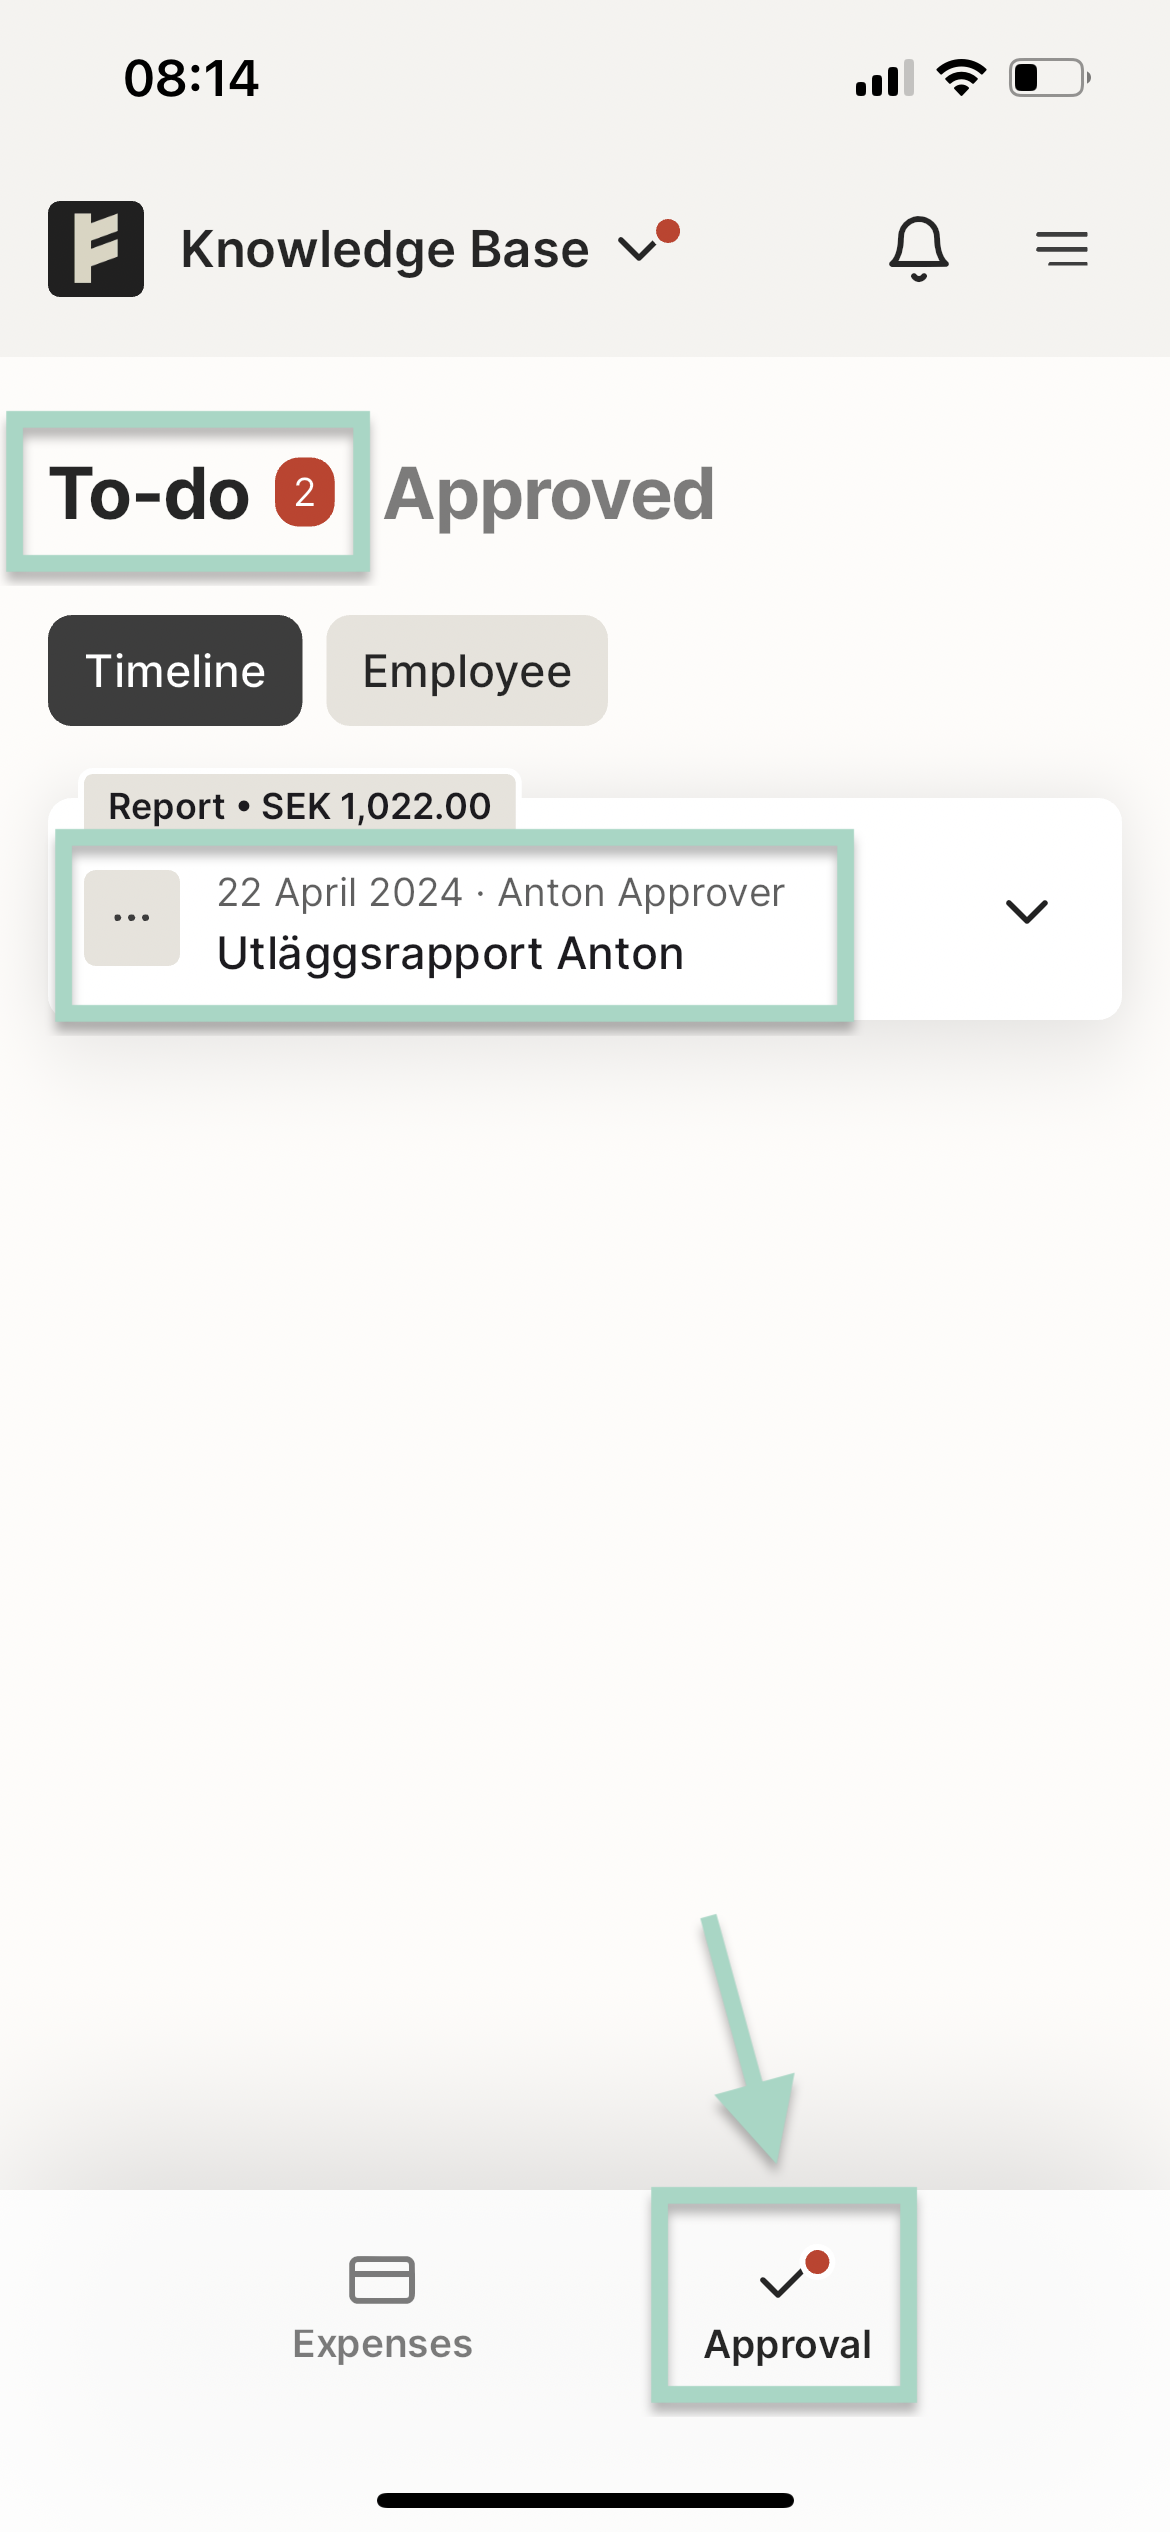
Click the Approval icon at the bottom right of your app. If you are logged in on the web, you will find this button at the top center.
You will now se your To-do timeline. In this example we have a report from Anton waiting for approval. We can see the total amount of the report in this view (1 022 SEK).
To review the report, click on the line of the expense report.
Approve or Reject
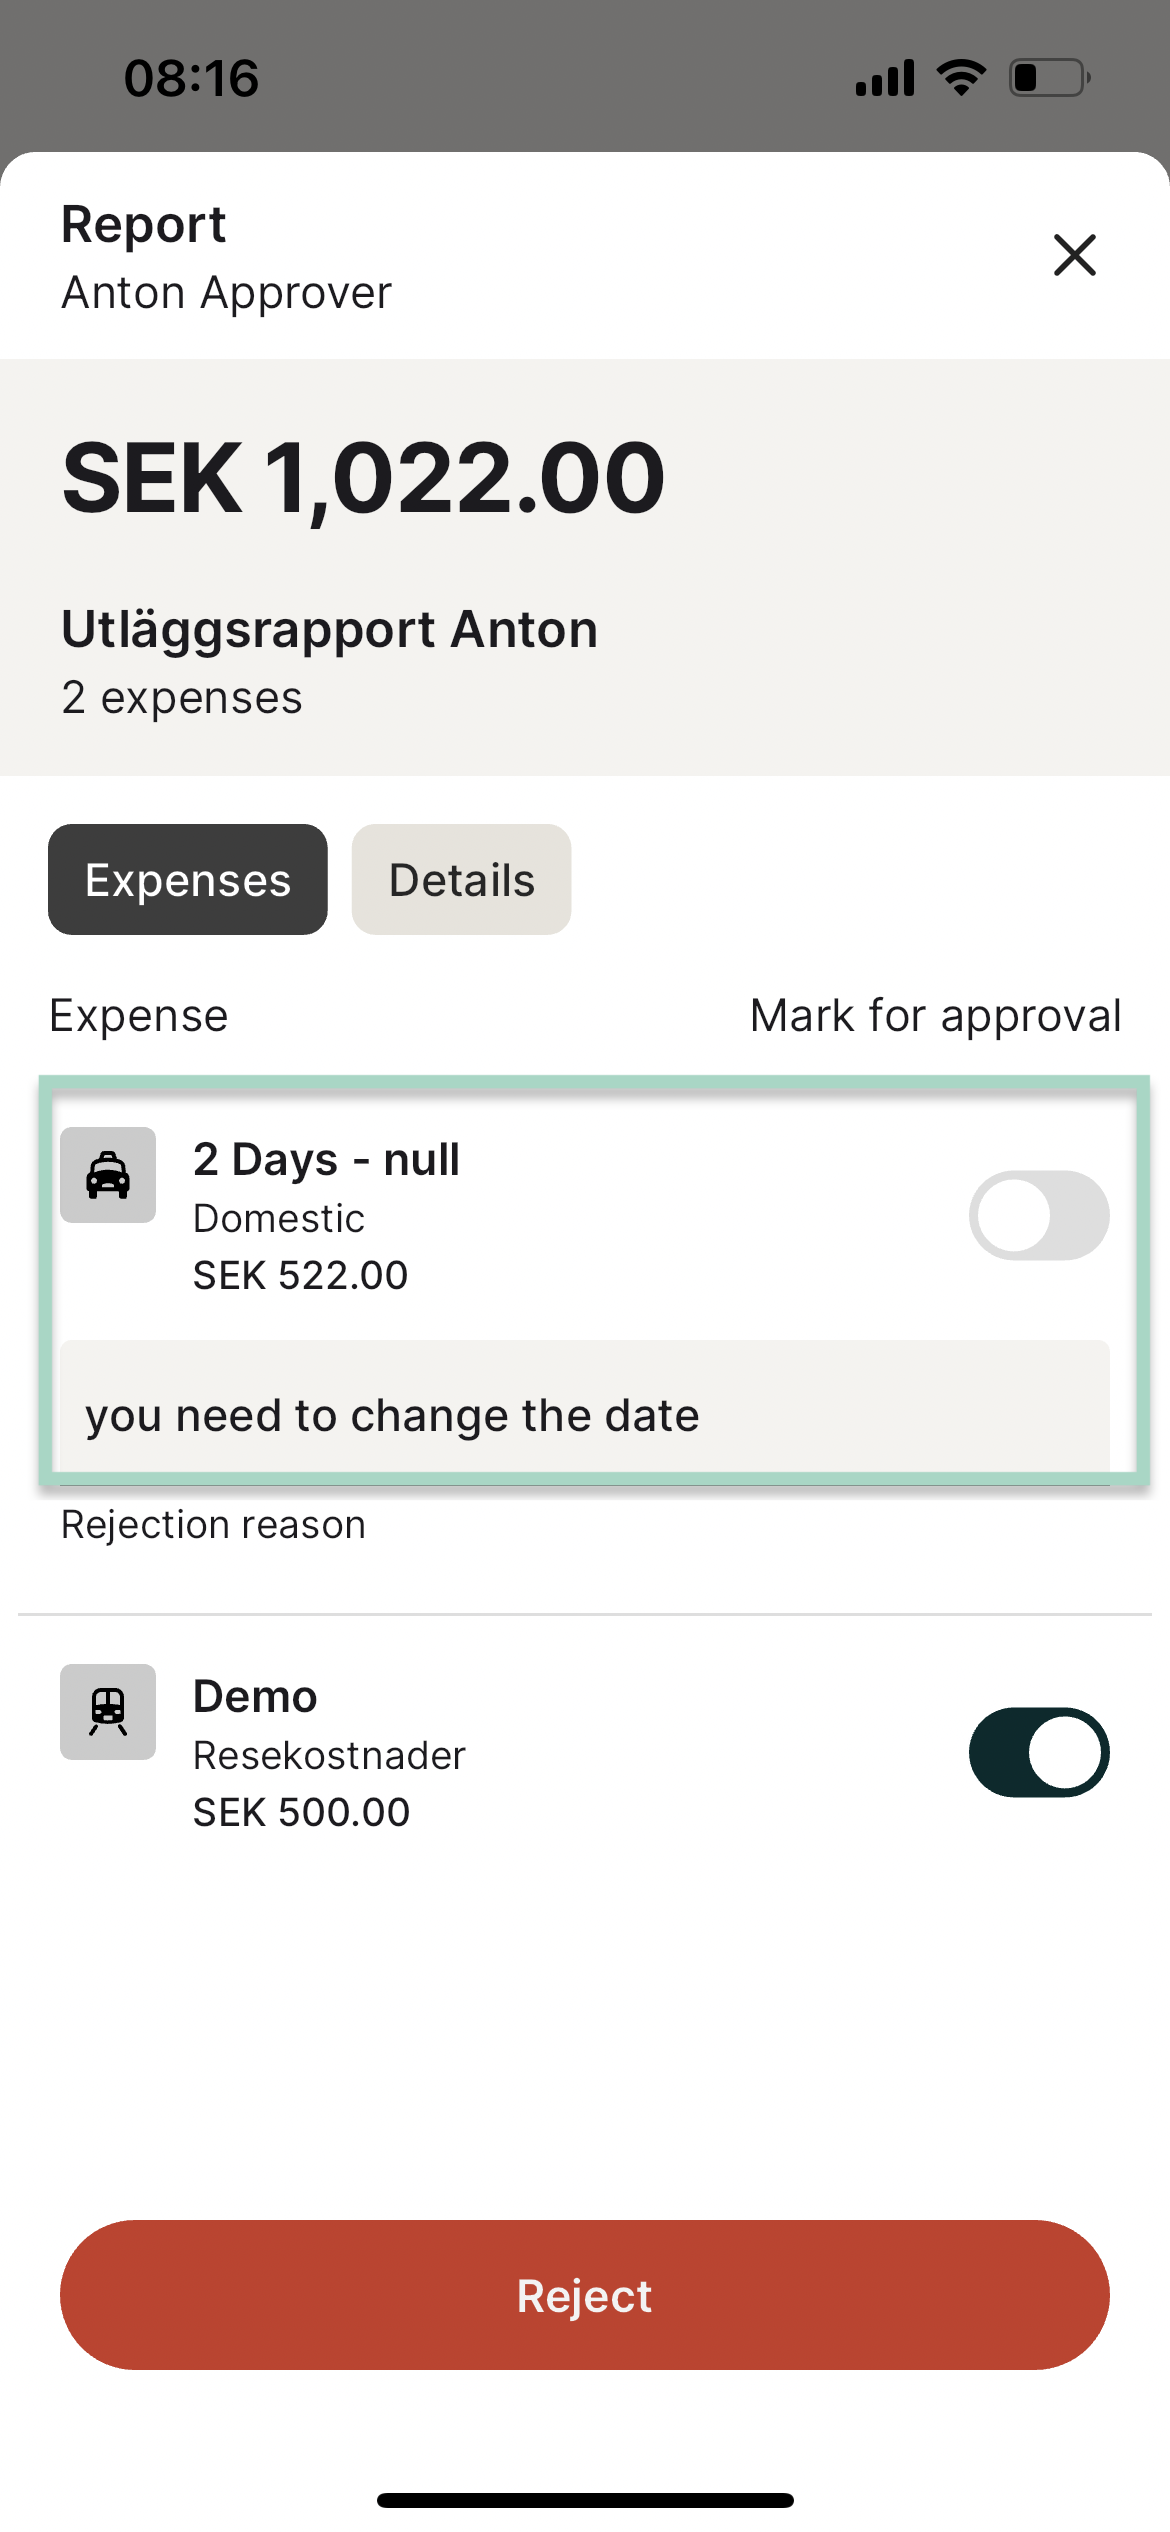
You will now see all included expenses in the report. All expenses is Marked for approval from the start. To approve the hole report press the Approve button.
To reject one or more expenses, unmark the box from Mark for approval to Reject. In this example, we want to reject 2 days domestic allowance.

We change the box in this expense to rejected. It's possible to add Rejection reason to the user. Press on the red button Reject when you want to reject the expense to the user.
Preview the expenses
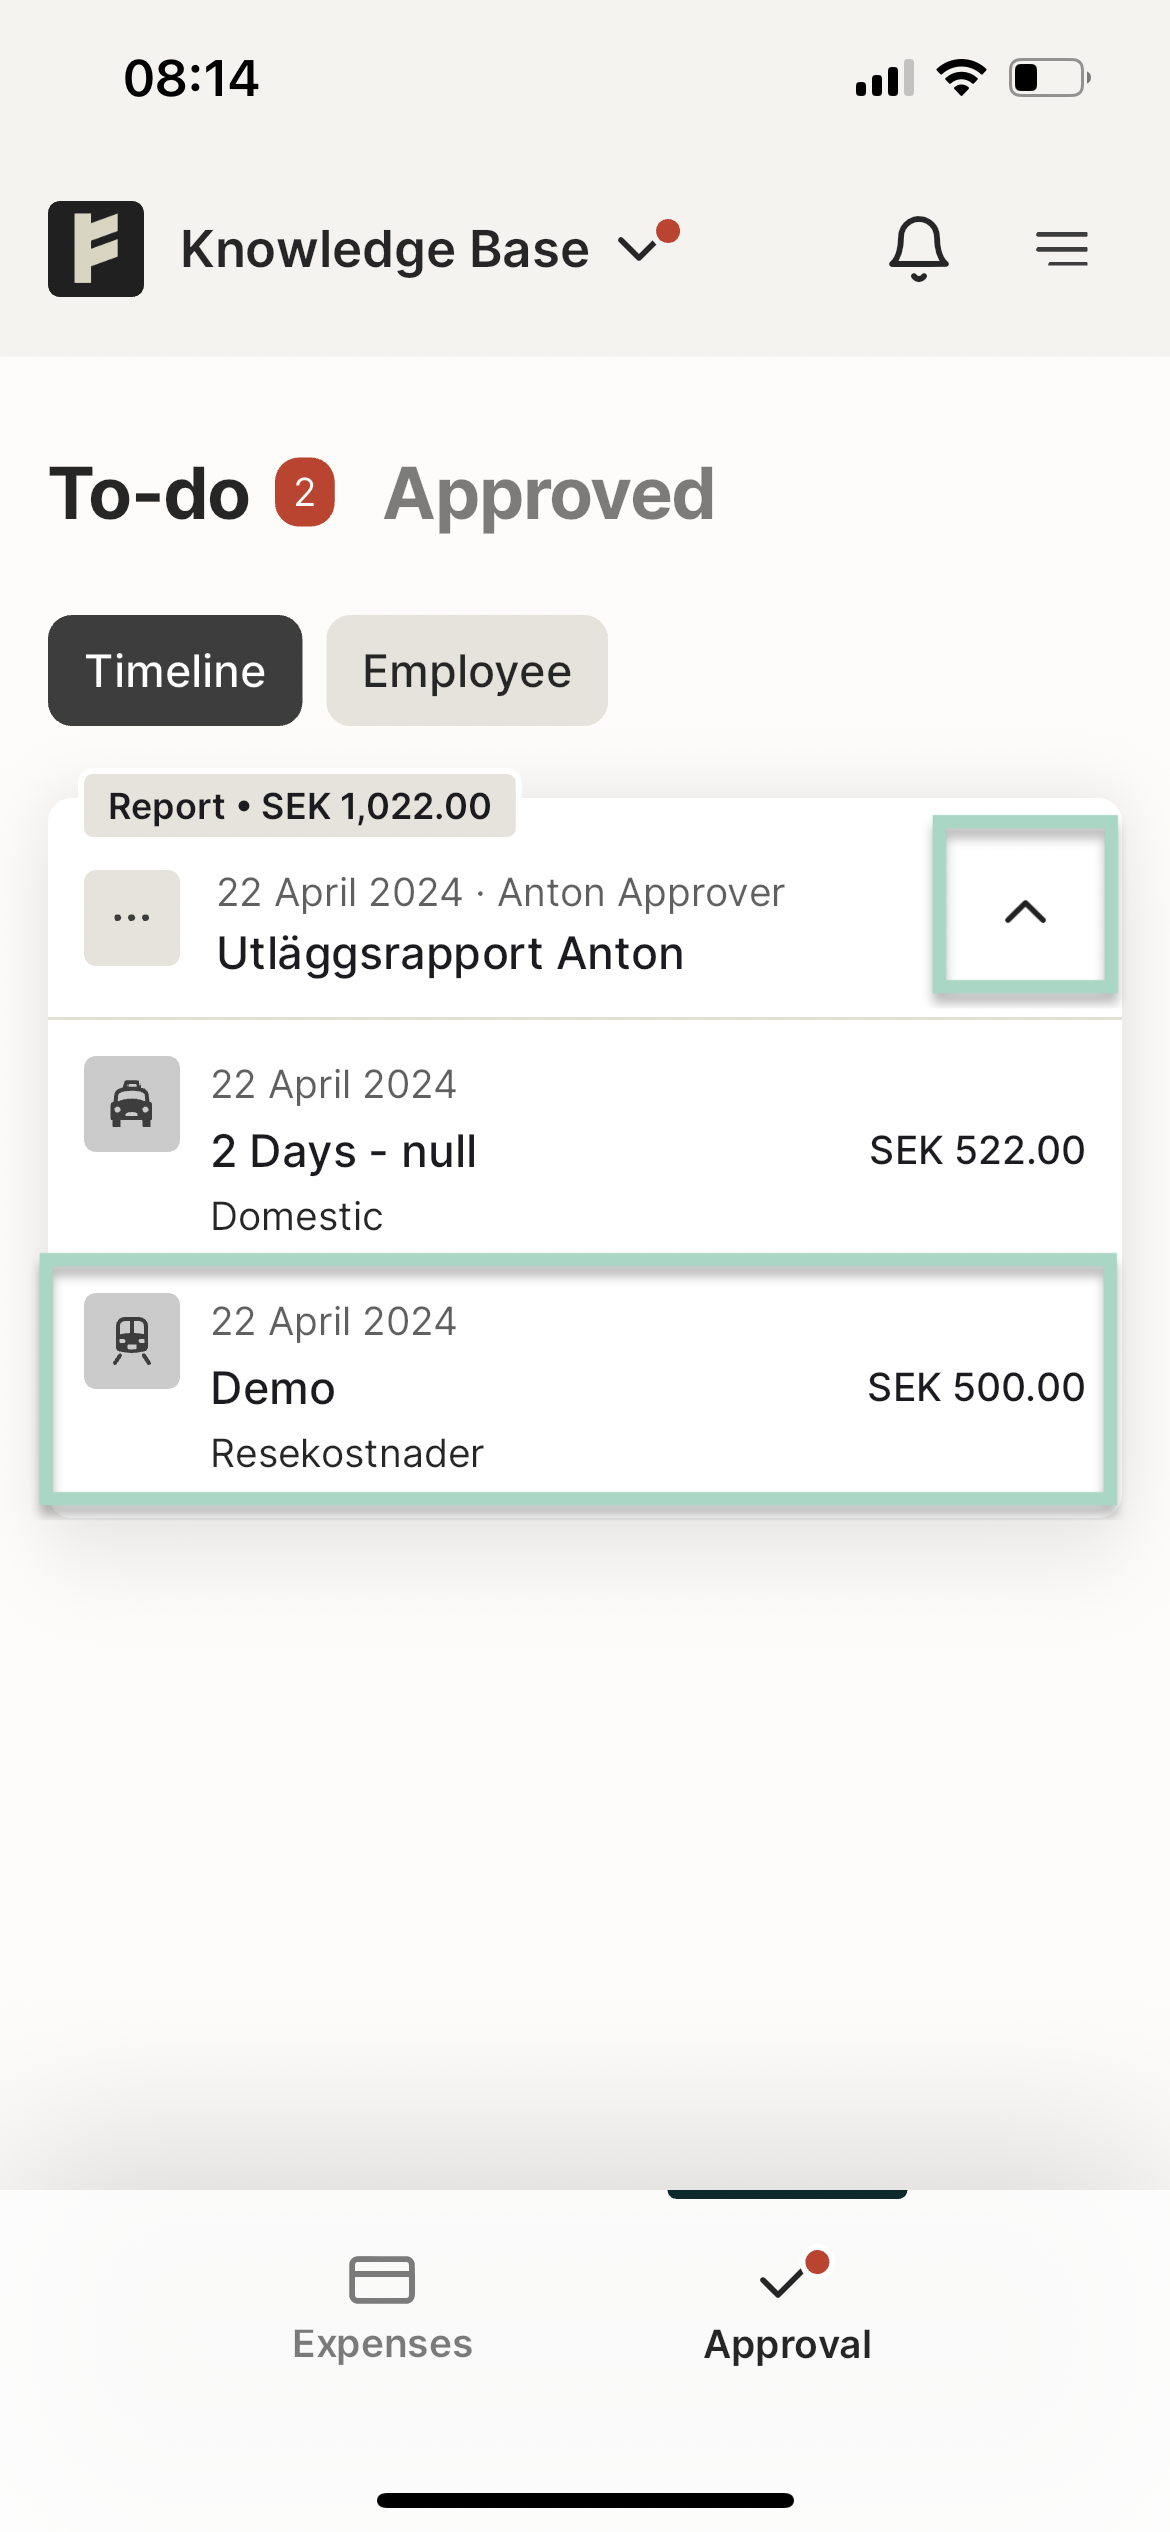
If you want to see an overview of the report and expenses, press the arrow down on the right. Click on the expense to preview the expense. In this example we click on the line for expense SEK 500.
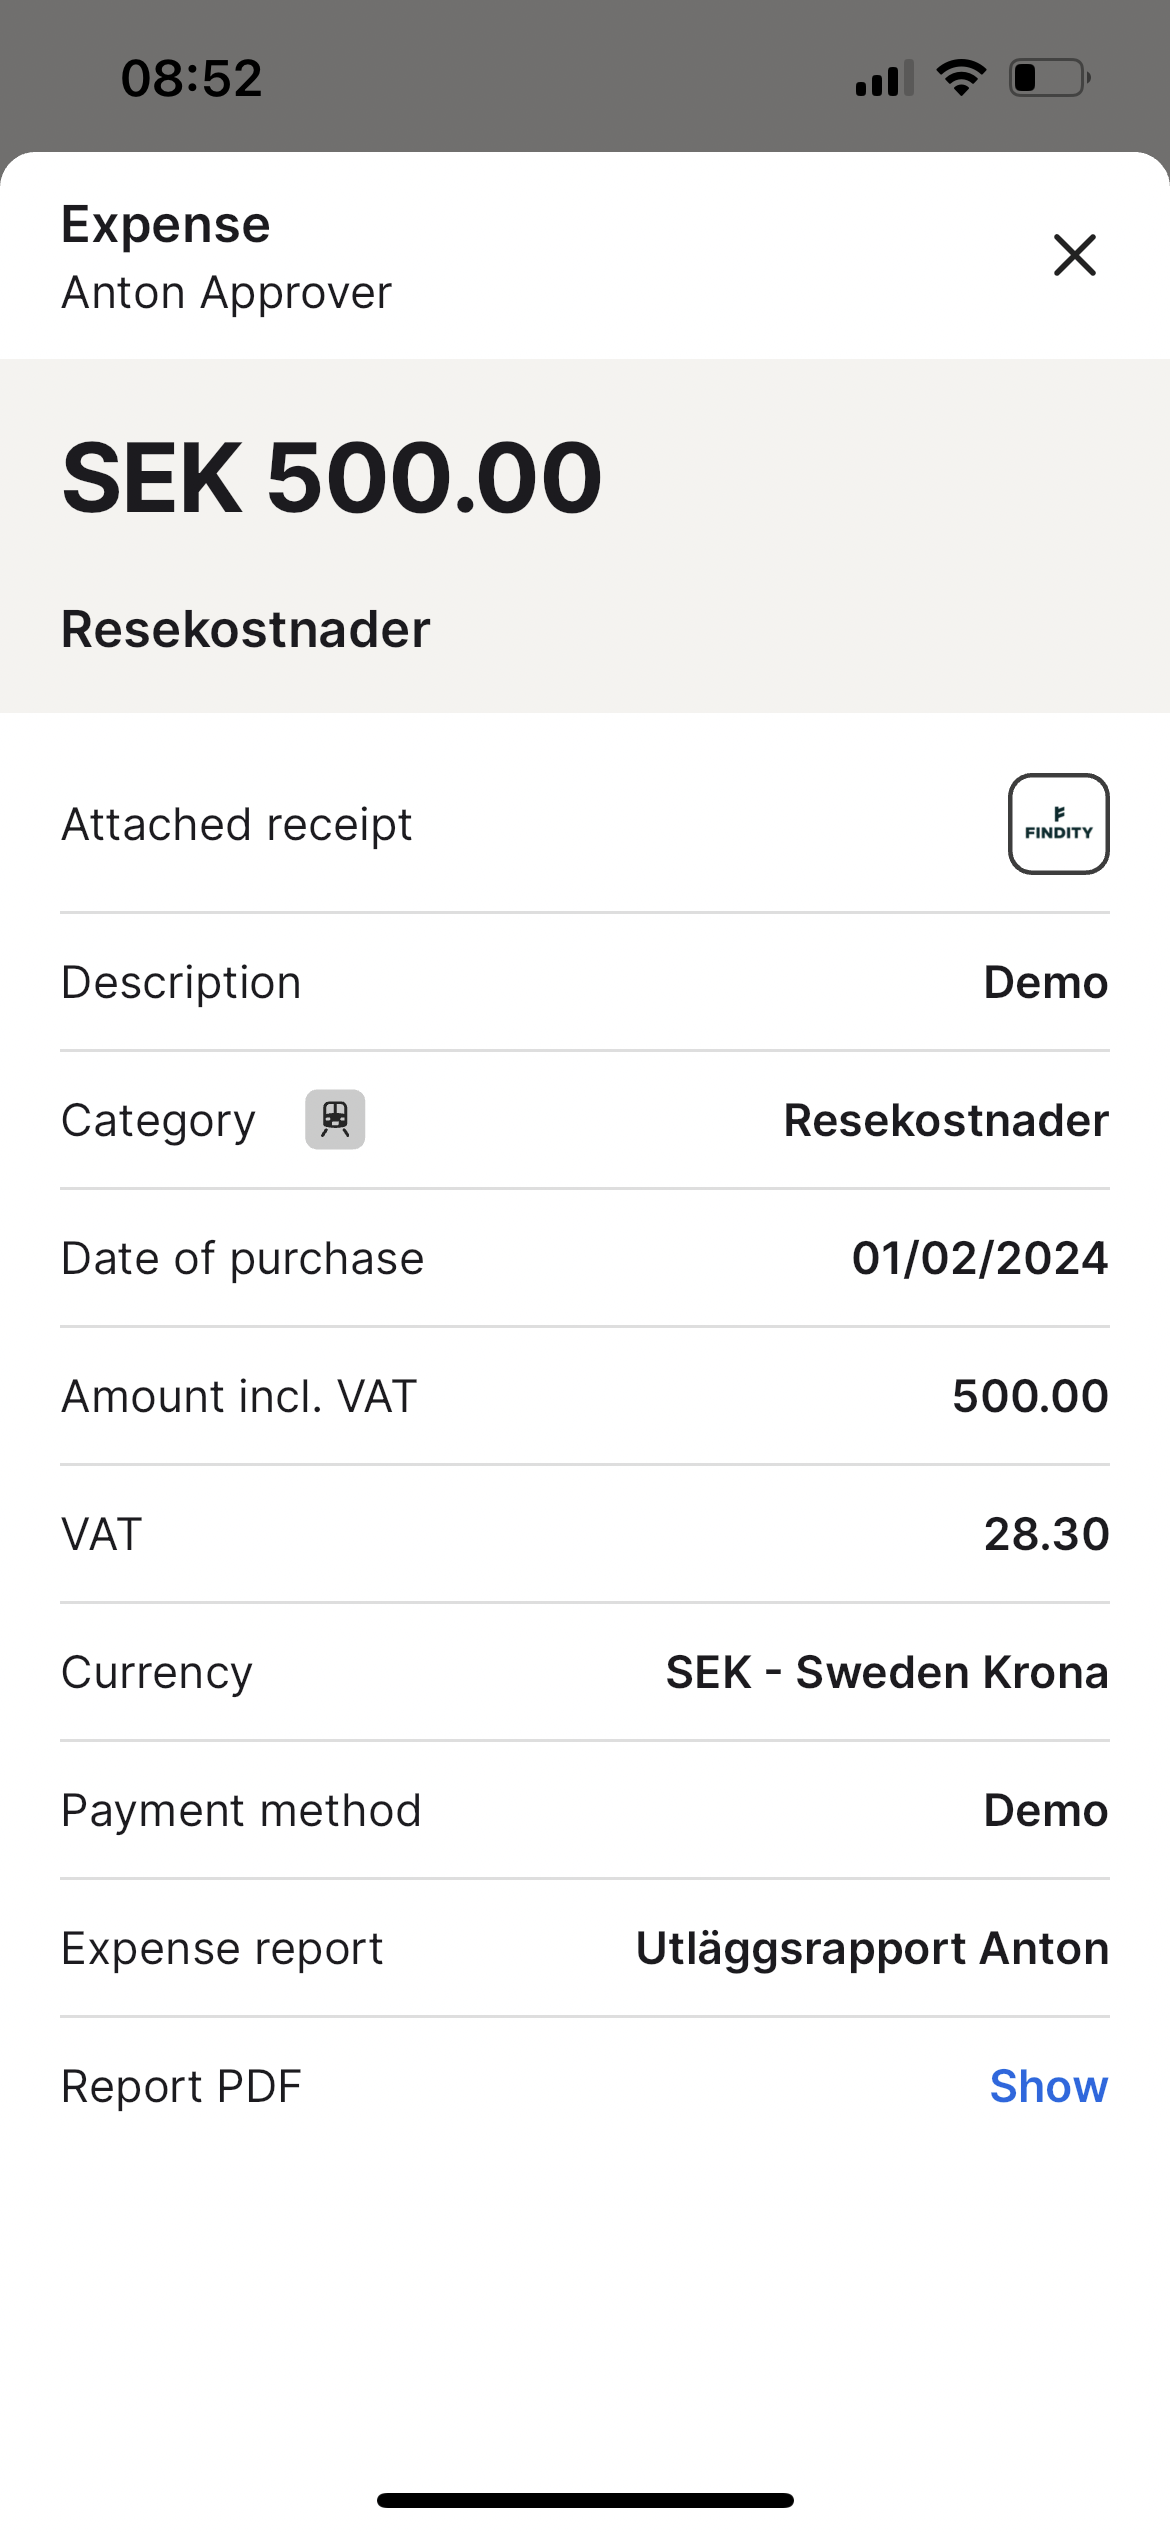
The expenses is now shown on the page and we can click on the attached receipt to see a bigger size of the receipt. It's also possible to show the expense in a PDF file.
Good to know: Users can only change och remove rejected expenses in the report. A rejected report needs to be submitted again by the user.