US English (US)
GB English (UK)
SE Swedish

Contact Us

If you still have questions or prefer to get help directly from an agent, please submit a request.
We’ll get back to you as soon as possible.

Please fill out the contact form below and we will reply as soon as possible.

  • Contact Us
English (UK)
US English (US)
GB English (UK)
SE Swedish
  • Home
  • For administrators
  • Settings – Administrator

How do we activate meal benefits?

Written by Cecilia Bäckström

Updated at January 27th, 2025

Contact Us

If you still have questions or prefer to get help directly from an agent, please submit a request.
We’ll get back to you as soon as possible.

Please fill out the contact form below and we will reply as soon as possible.

  • For users (New app)
    Get started - Users Settings - Users Expense and reports - Users Corporate cards - Users Other - Users What is new in the new app?
  • For users
    Settings – Users Expense and reports – Users
  • For administrators
    Get started – Administrator Settings – Administrator Expense and reports – Administrator Corporate cards – Administrator Other – Administrator
  • For Partner administrator
    Settings – Partners Consultant – Partners Other – Partners
  • Other
  • Videos
+ More

Table of Contents

This article applies to the following countries
Delete

This article applies to the following countries

  • Sweden


The Administrator - Meal benefits

You can report meal benefits outside per diem in the service. The service is based on the tax authorities Skatteverket's standard values and reports to our integrated salary recipients. As an administrator, you simply activate meal benefits under expense categories and select meal types and salary types. A meal benefit normally arises as soon as an employee has eaten a meal paid for by the employer. 

Activate meal benefits

Go to the left-hand side menu in the Organization mode and go to Settings > Expense management > Expense categories and click Add Category.


A new window will open and here you choose Add on Benefit. 

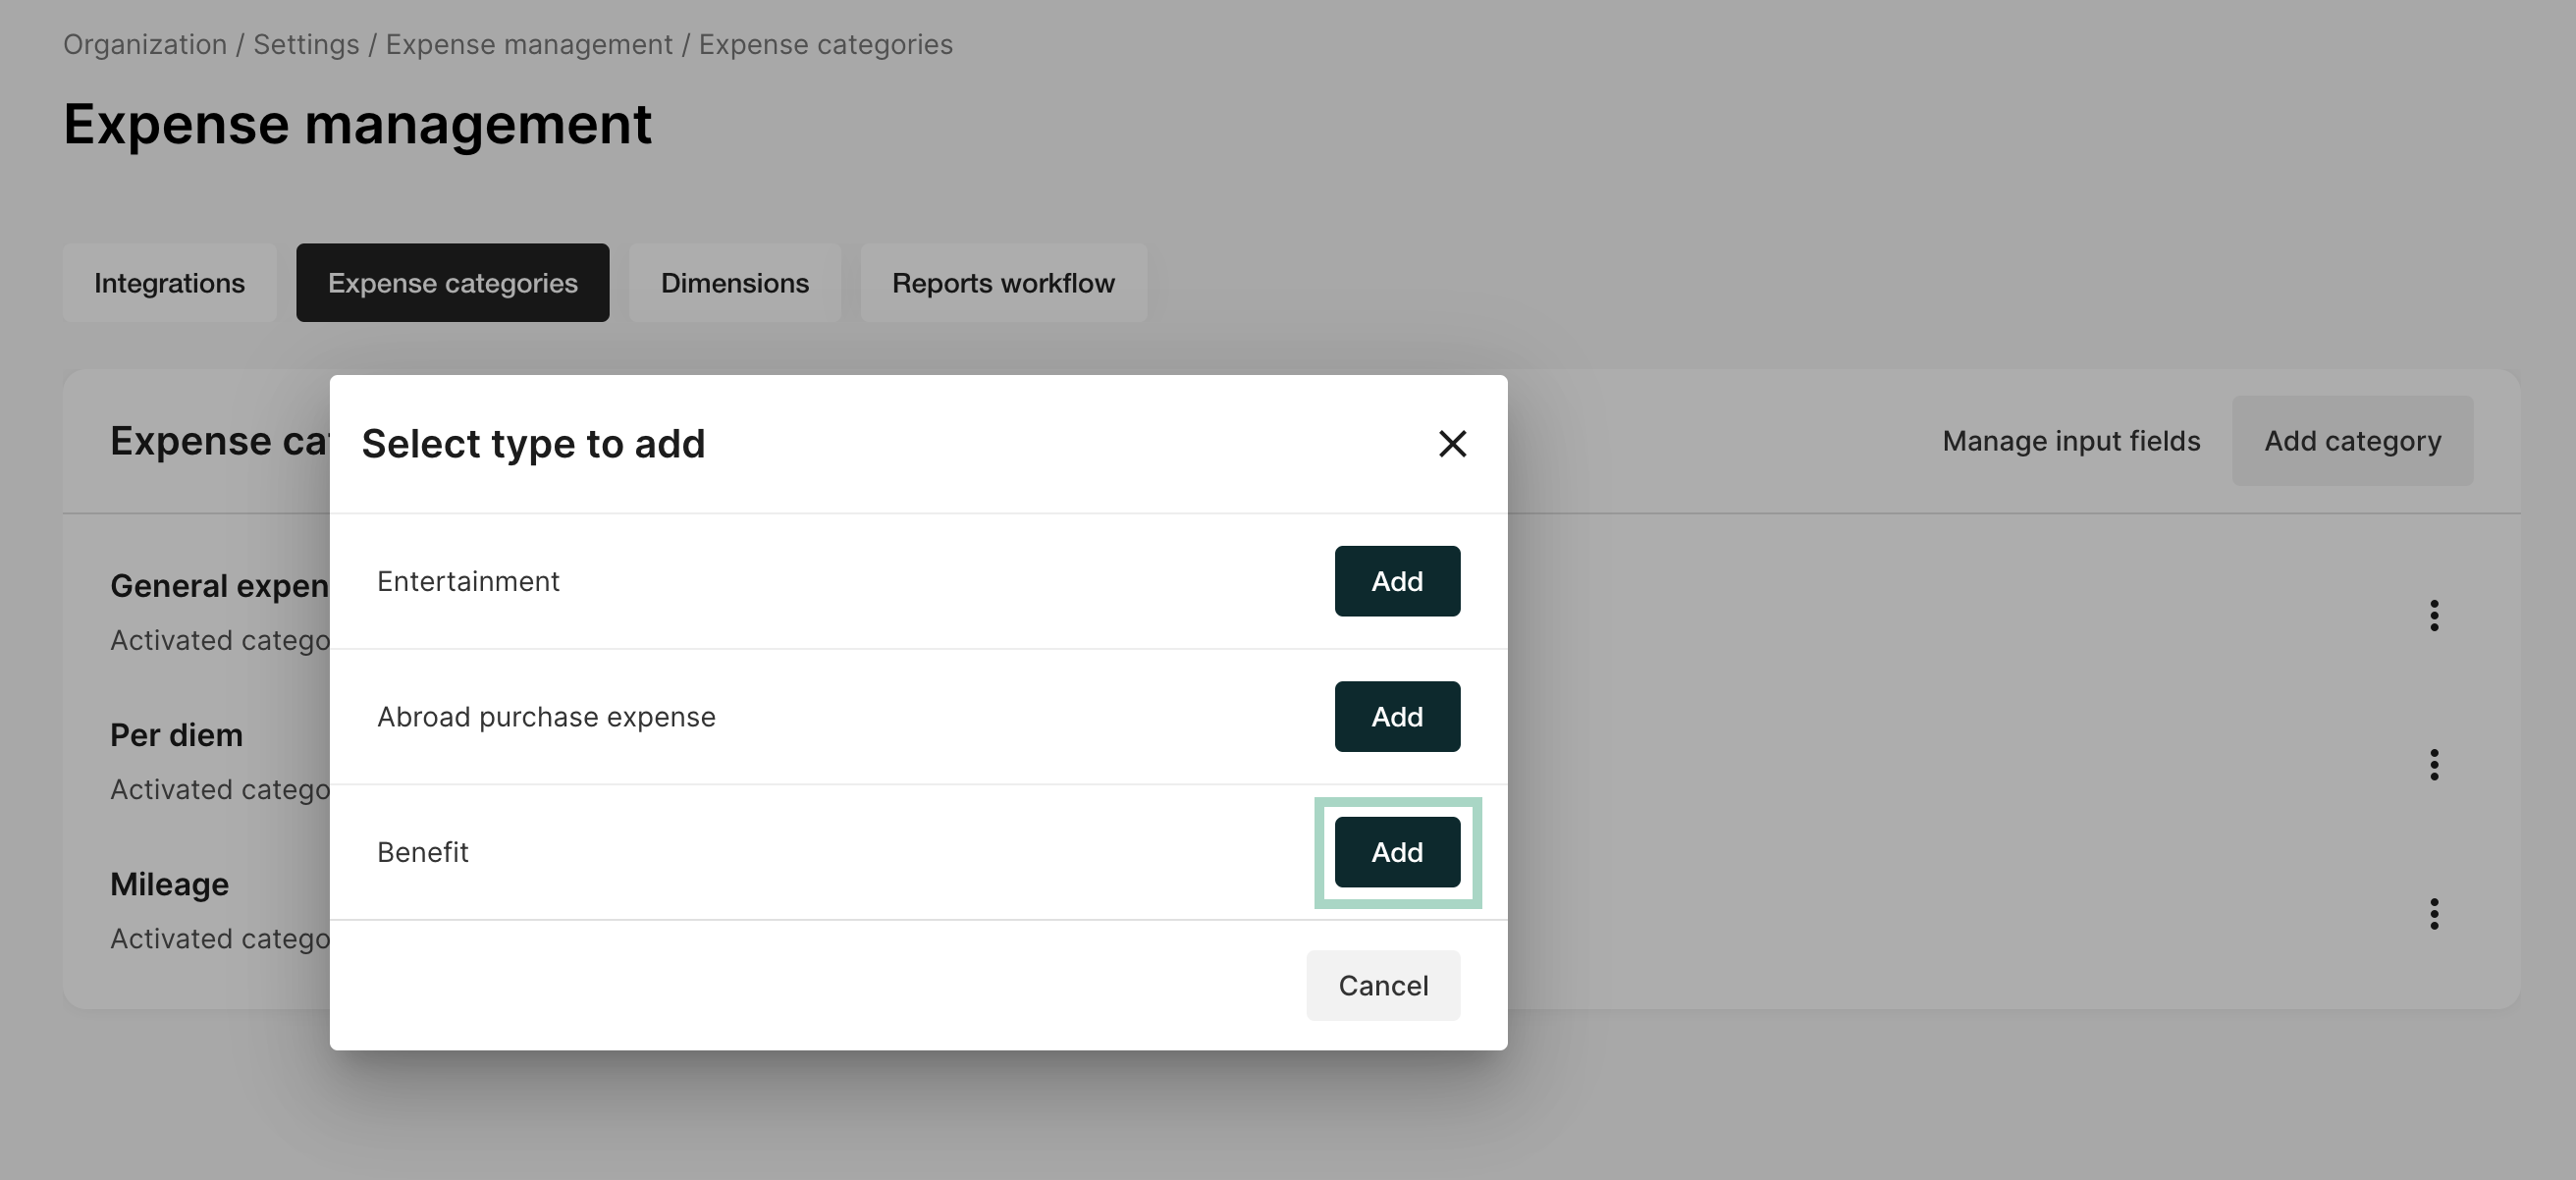
Another new window opens and here you select Create new category and Meal benefit.

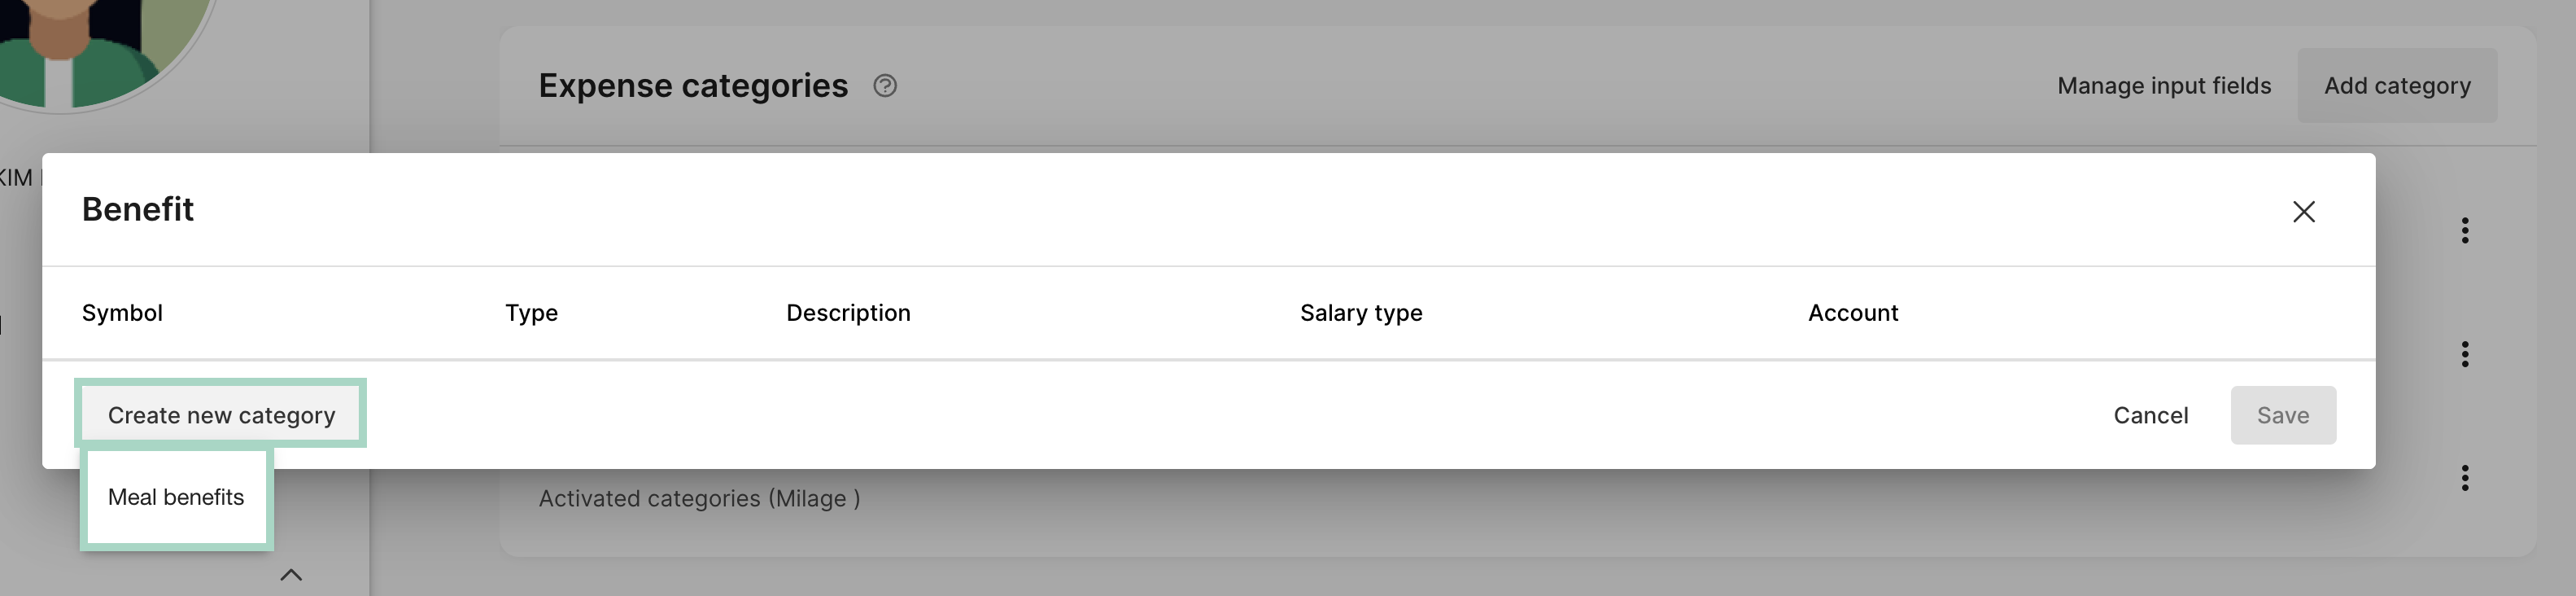
The meal benefit is now added and now it's time to make the settings.

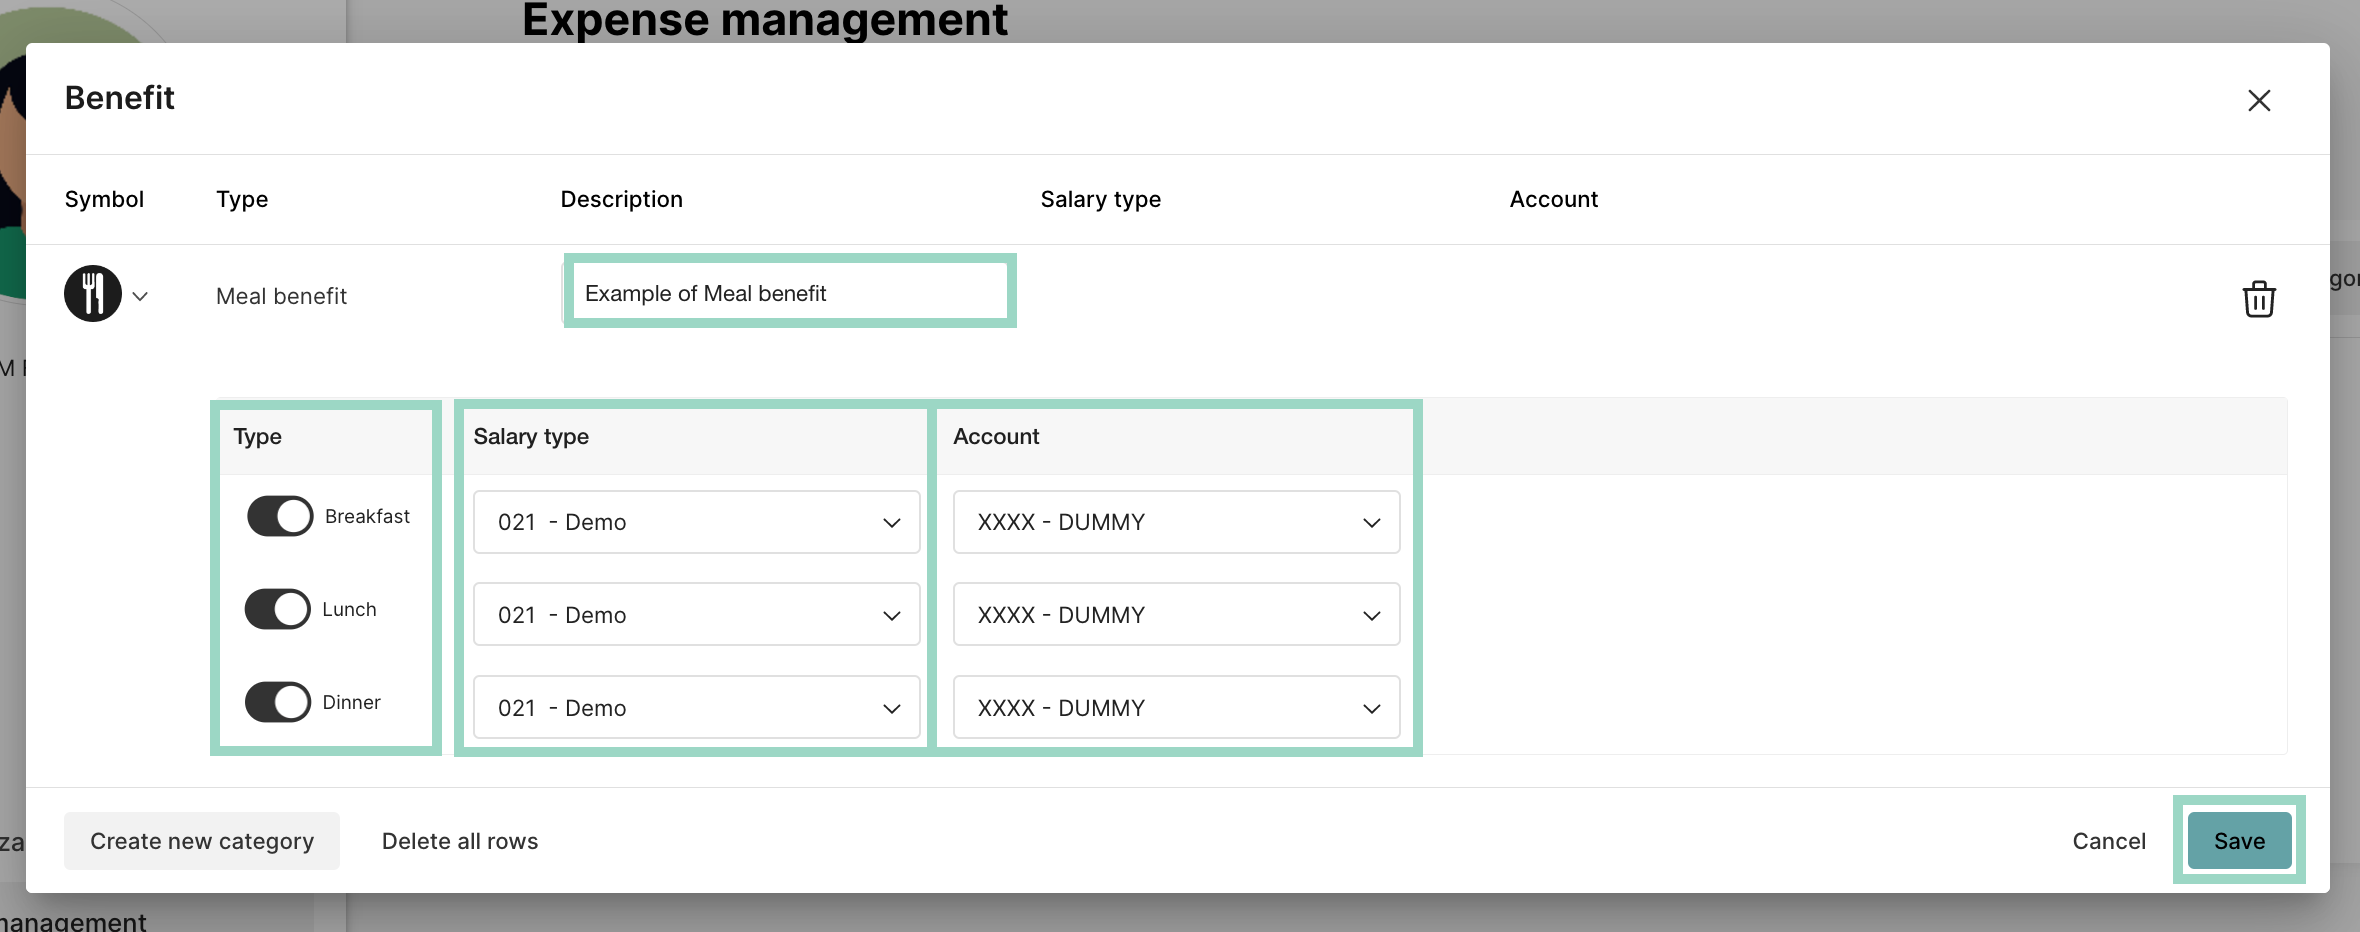
First, choose a description of the meal benefit and turn on the type of meal benefits users should be able to choose from (breakfast, lunch, dinner) by clicking the "on/off switch" next to the type you want to activate.

Then choose which salary type and account (note that even if the meal benefit shouldn't be sent to the accounting, you need to fill in an account here, e.g. a so-called "dummy" account that is not used) that should be linked to the respective benefit.

Save the settings and then you will be able to find the expense category for Benefit under the tab Expense categories.

The user will now see New meal benefit where the options to create new expenses are in Private mode. The user can now fill in which benefit they have received and can then include this in a report.

Finally... Don't forget to set under Settings > Expense management > Integrations to which salary recipient the Food Benefit should be sent.

kostförmån inställningar utläggskategorier

Was this article helpful?

Yes
No
Give feedback about this article

Related Articles

  • How do I switch between private mode and organization?
  • How do I set up approvers?
  • How do I add yearly budget for a category?
  • What is marketplace?
  • Product
    • Expense claims
    • Per diem
    • Mileage
    • Integrations
    • White label
    • Reseller
  • Partner solution
    • Accounting & Payroll
    • Financial Software
    • Card Providers
  • Why Findity
    • Contact
    • Newsroom
    • Careers
  • Resources
    • Blog
    • Integration & API
    • Terms of Use
  • Pricing
    • Pay per user, not by license. Scale up and down as you need.
  • Facebook
  • LinkedIn
  • Privacy policy
  • Privacy policy UK
  • Support

Knowledge Base Software powered by Helpjuice

Expand