US English (US)
GB English (UK)
SE Swedish

Contact Us

If you still have questions or prefer to get help directly from an agent, please submit a request.
We’ll get back to you as soon as possible.

Please fill out the contact form below and we will reply as soon as possible.

  • Contact Us
English (UK)
US English (US)
GB English (UK)
SE Swedish
  • Home
  • For users (New web interface)
  • Expense and reports - Users (New web interface)

How do I add an expense? (New web)

Written by Robin Göransson

Updated at September 24th, 2025

Contact Us

If you still have questions or prefer to get help directly from an agent, please submit a request.
We’ll get back to you as soon as possible.

Please fill out the contact form below and we will reply as soon as possible.

  • For users
    Get started - Users Settings - Users Expense and reports - Users Corporate cards - Users Other - Users
  • For users (New web interface)
    Get started - Users (New web interface) Settings - Users (New web interface) Expense and reports - Users (New web interface) Corporate cards - Users (New web interface) Other - Users (New web interface) What is new in the new app? New Web Interface
  • For administrators
    Get started – Administrator Settings – Administrator Expense and reports – Administrator Corporate cards – Administrator Other – Administrator
  • For Partner administrator
    Settings – Partners Consultant – Partners Other – Partners
  • Other
  • Videos
  • Kvitto & Resa
+ More

Table of Contents

This article applies to the following countries

This article applies to the following countries

  • All countries


The following text in this article shows how you, as a user, can add new expenses in the app and on the web. Click on the tabs below to read more.


App

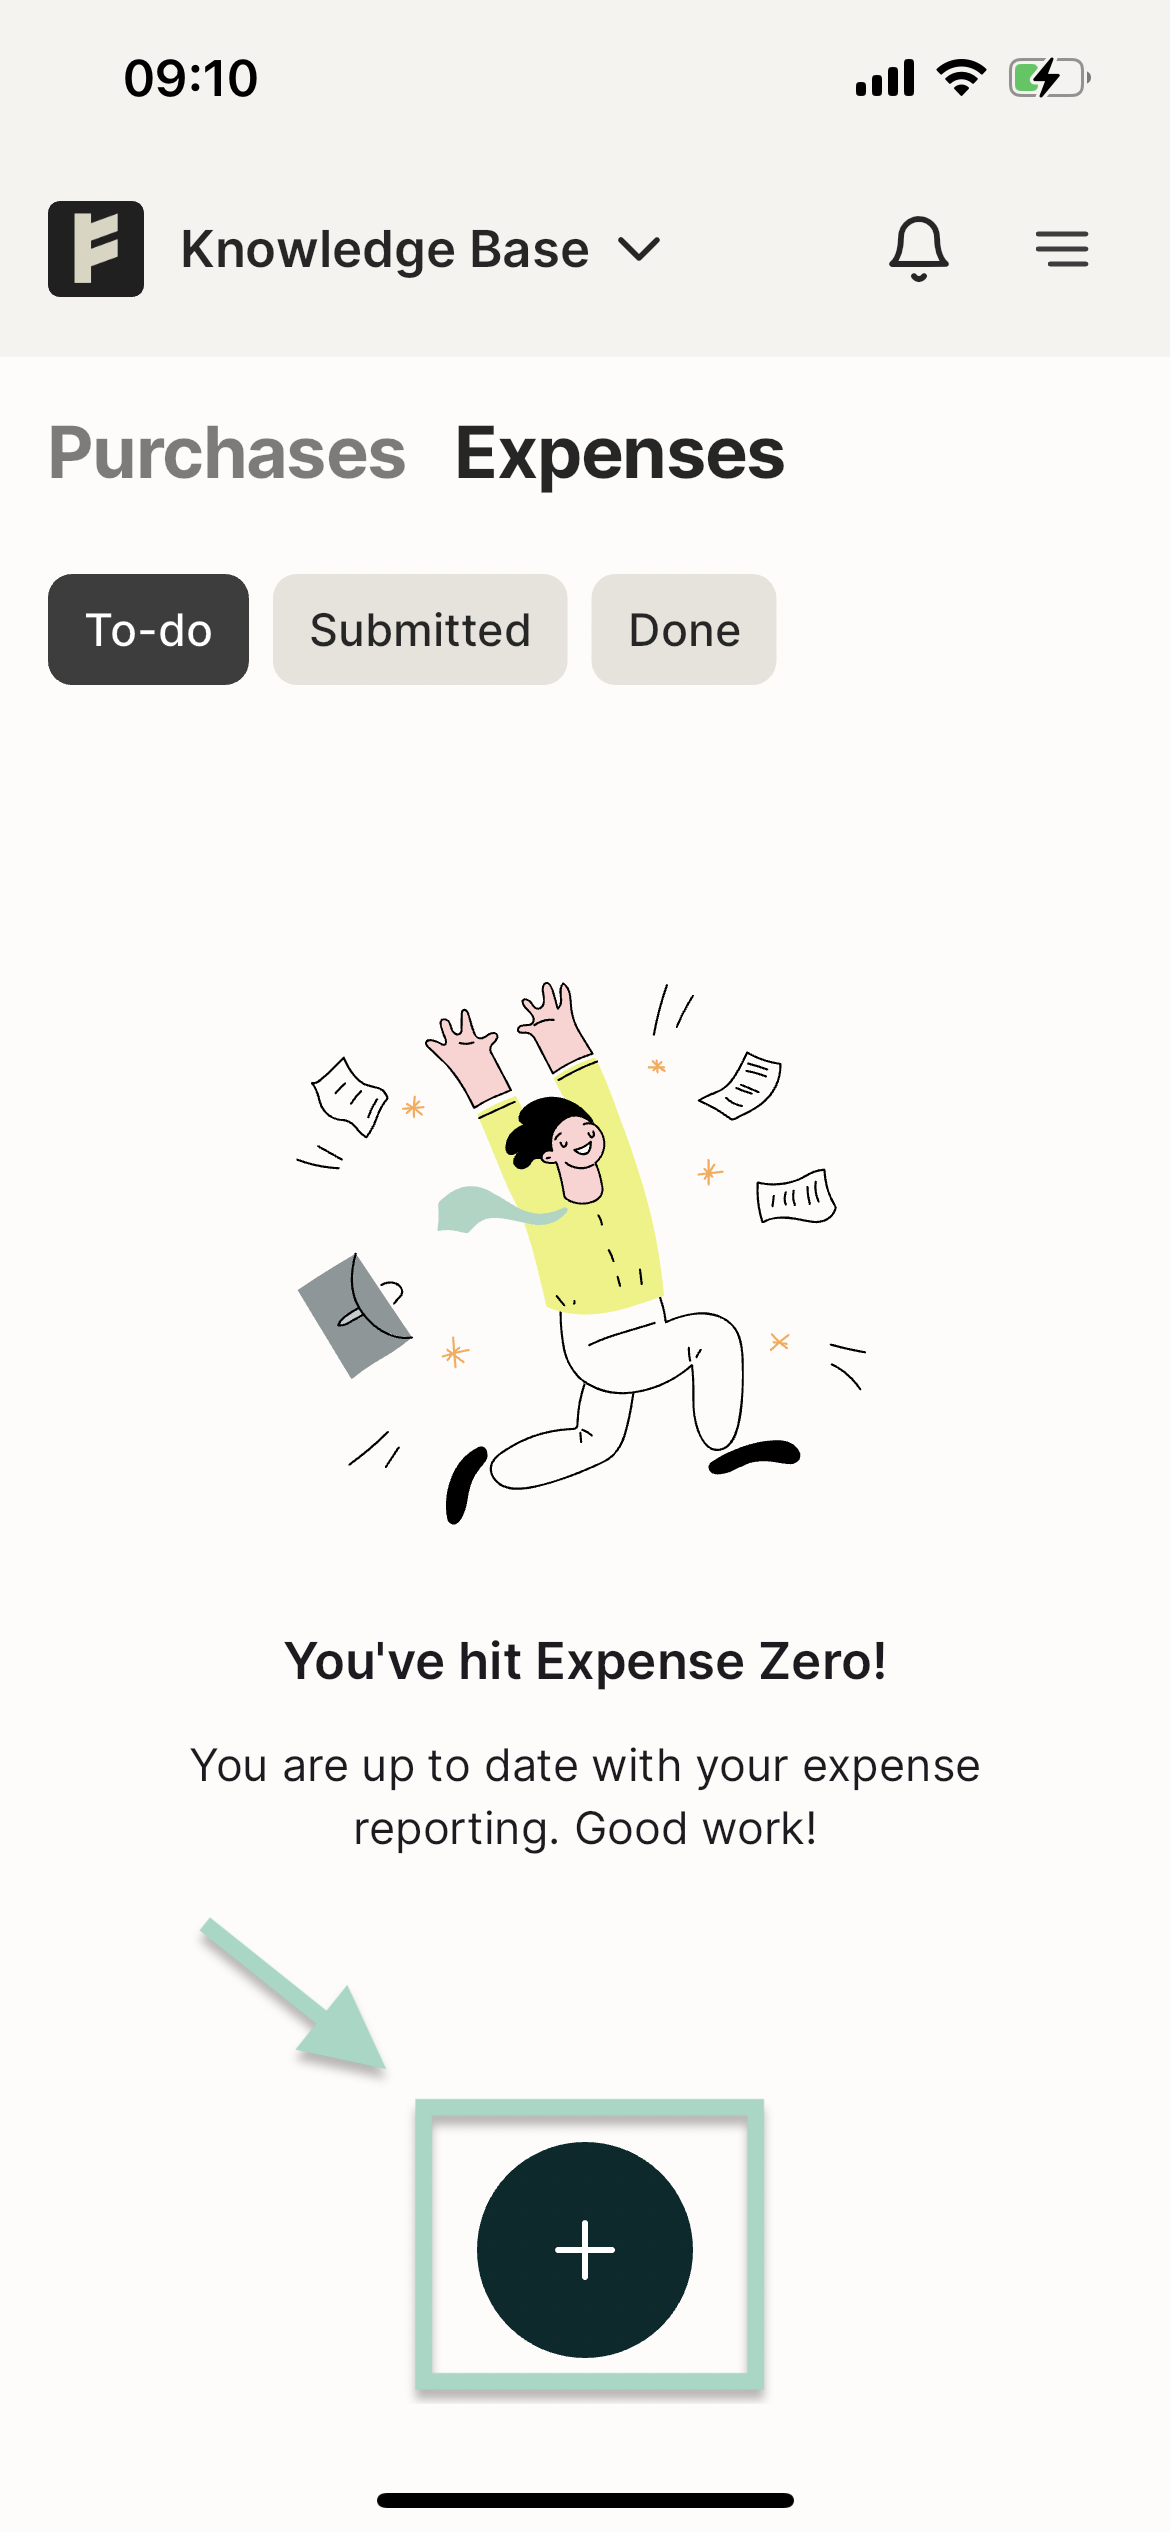
Click on the plus-sign to create a new expense (depending on your organisation's setting this pop up might have different alternatives). Choose to create a new expense. 


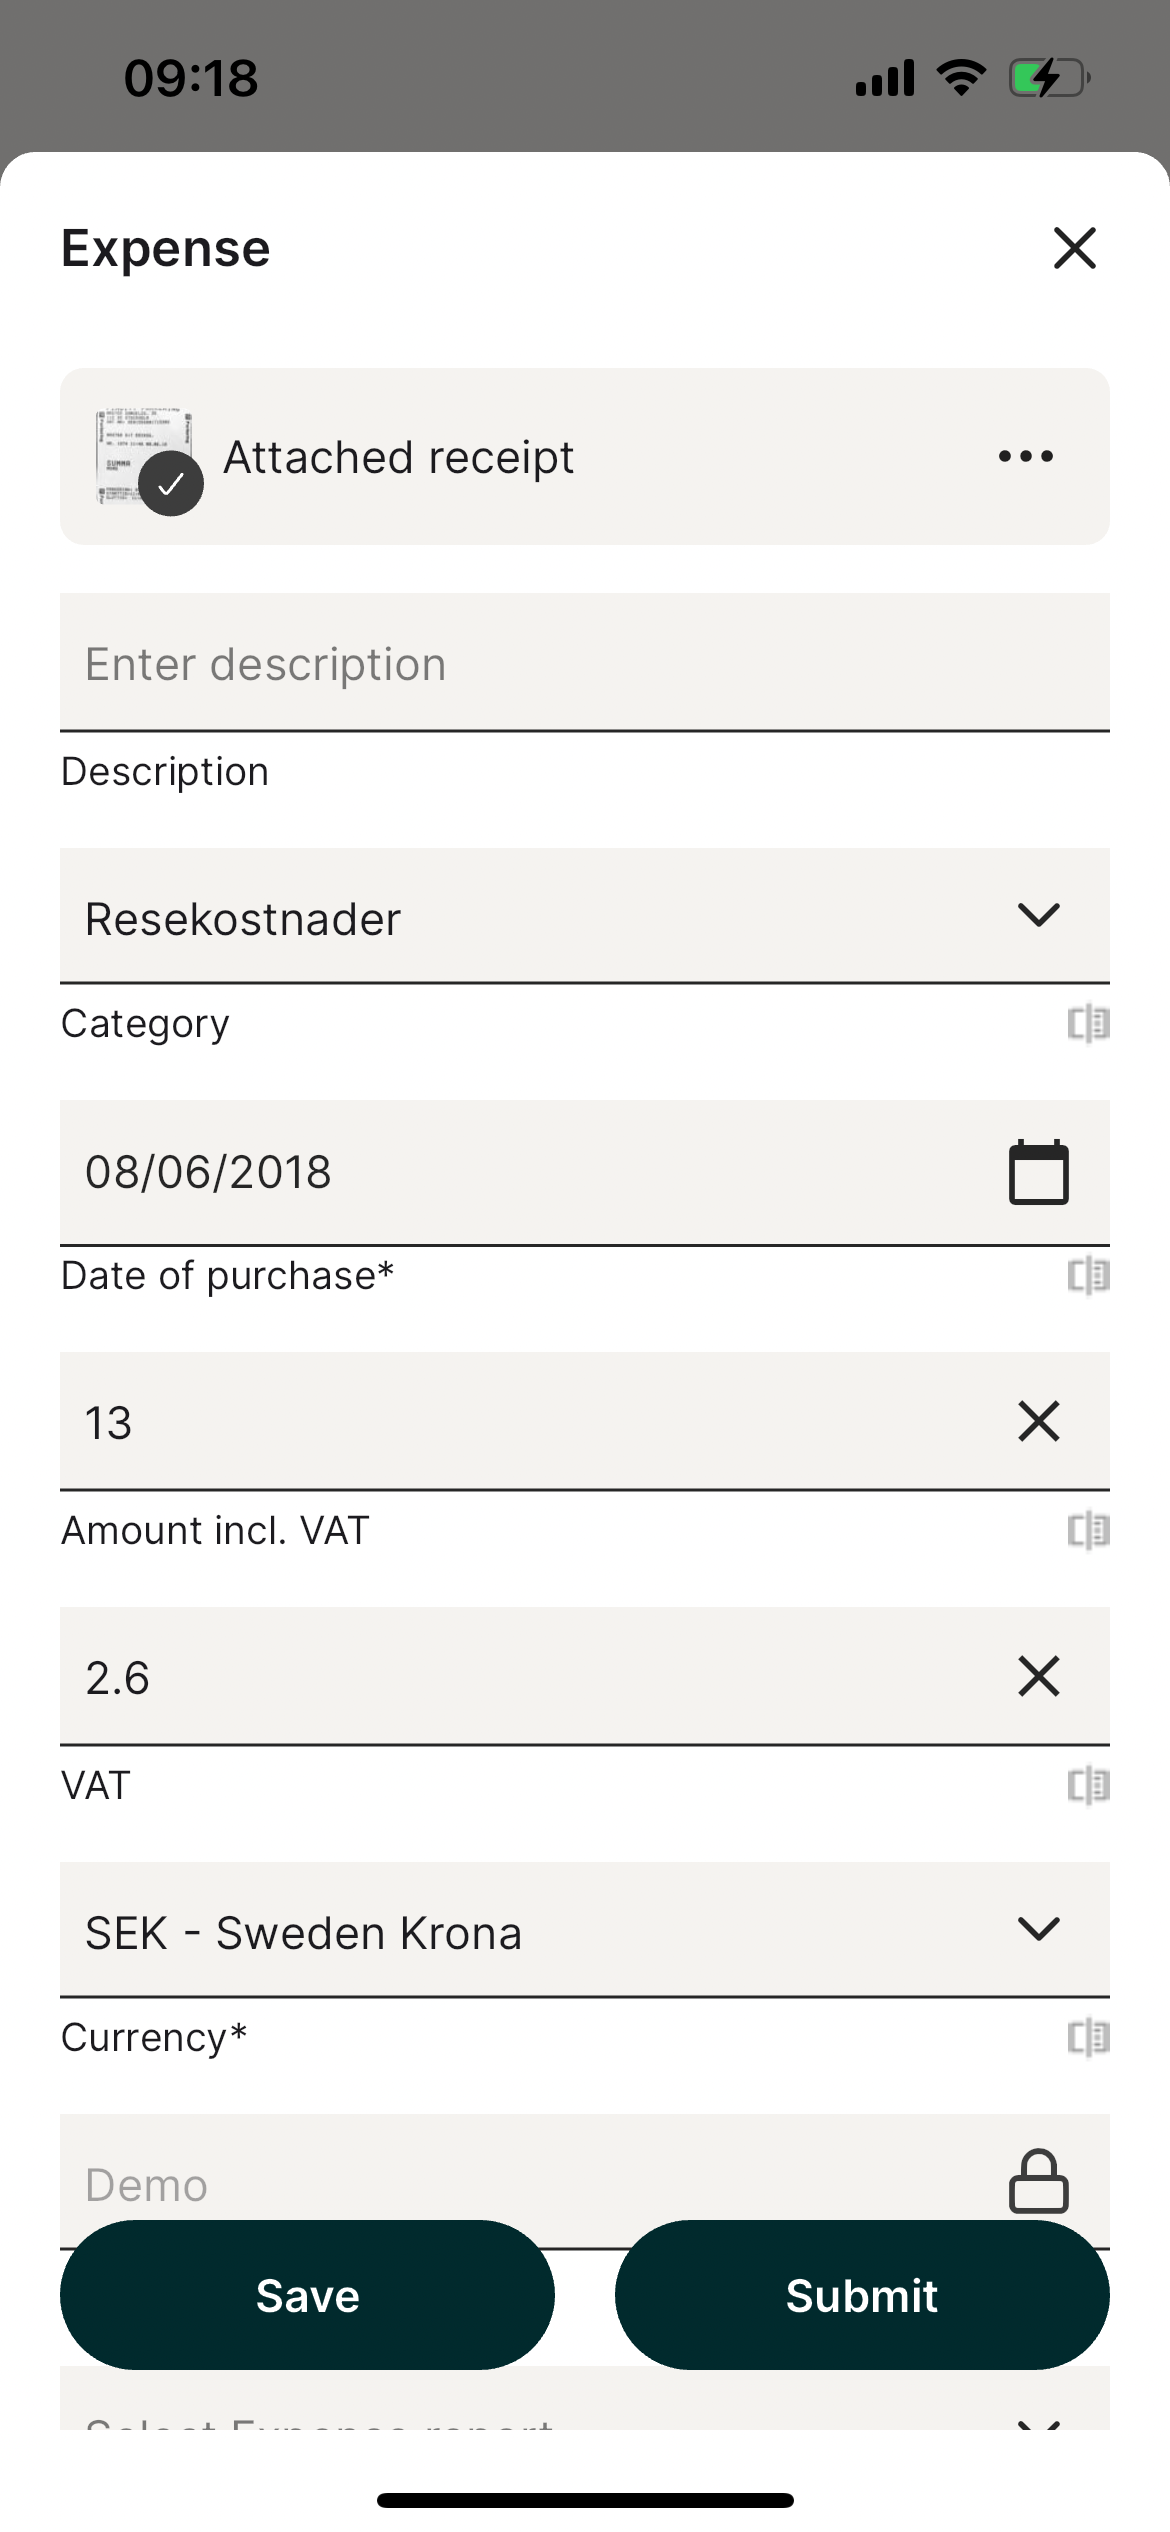
Your camera will now open automatically. Take a photo of your receipt or add from photos or file. Fill in relevant fields and verify that Category, Purchase date, Amount, VAT and Currency is correct (the fields will be filled automatically after the receipt is scanned). Please note that what visible fields might differ due to your organisation's settings.

Choose to Save when you are done. 
 

Your expense till now be saved under your To-Do tab. 


Web

Click the plus sign at the bottom to create a new expense (depending on your organization’s settings, the pop-up window may have different options).
Select to create a new expense.


Attach your receipt image by dragging and dropping the file into the box on the right, or click in the box and select your saved receipt image.

Fill in the relevant fields and verify that Category, Purchase Date, Amount, VAT, and Currency are correct (the fields will be filled in automatically after the receipt has been scanned). Please note that the visible fields may vary depending on your organization’s settings.

Select Save when you are finished.


Your expense has now been saved under the To-do tab.


new purchase add expense create expense

Was this article helpful?

Yes
No
Give feedback about this article

Related Articles

  • I made a mistake in my expense report, how can I get my report back so I can make the changes? (New web)
  • I have registered my receipt in the wrong organisation, can I move that to another organisation? (New web)
  • Can I email my receipts to the service? (New web)
  • Can I split an expense into two separate expenses? (New web)
  • How can I add an attachment to my expense in Findity? (New web)
  • Product
    • Expense claims
    • Per diem
    • Mileage
    • Integrations
    • White label
    • Reseller
  • Partner solution
    • Accounting & Payroll
    • Financial Software
    • Card Providers
  • Why Findity
    • Contact
    • Newsroom
    • Careers
  • Resources
    • Blog
    • Integration & API
    • Terms of Use
  • Pricing
    • Pay per user, not by license. Scale up and down as you need.
  • Facebook
  • LinkedIn
  • Privacy policy
  • Privacy policy UK
  • Support

Knowledge Base Software powered by Helpjuice

Expand