> ## Documentation Index
> Fetch the complete documentation index at: https://help.findity.com/llms.txt
> Use this file to discover all available pages before exploring further.
# We want to have approval according to cost centers or department structure that is preset on the user. How do we do this set up step by step?
**This article applies to the following countries**
* All countries
This article is a step-by-step guide on how to add an approval structure according to cost centers or departments. The cost center/department will also be a preset value on the user.
Each step will contain information on how you add a approval structure according to dimensions (cost centers in this case) and organisation structure (departments). Click on the tabs below depending on what you want to base your approval structure on:
**Step 1** - Start by adding either a dimension for cost centers or a organisation structure for departments.
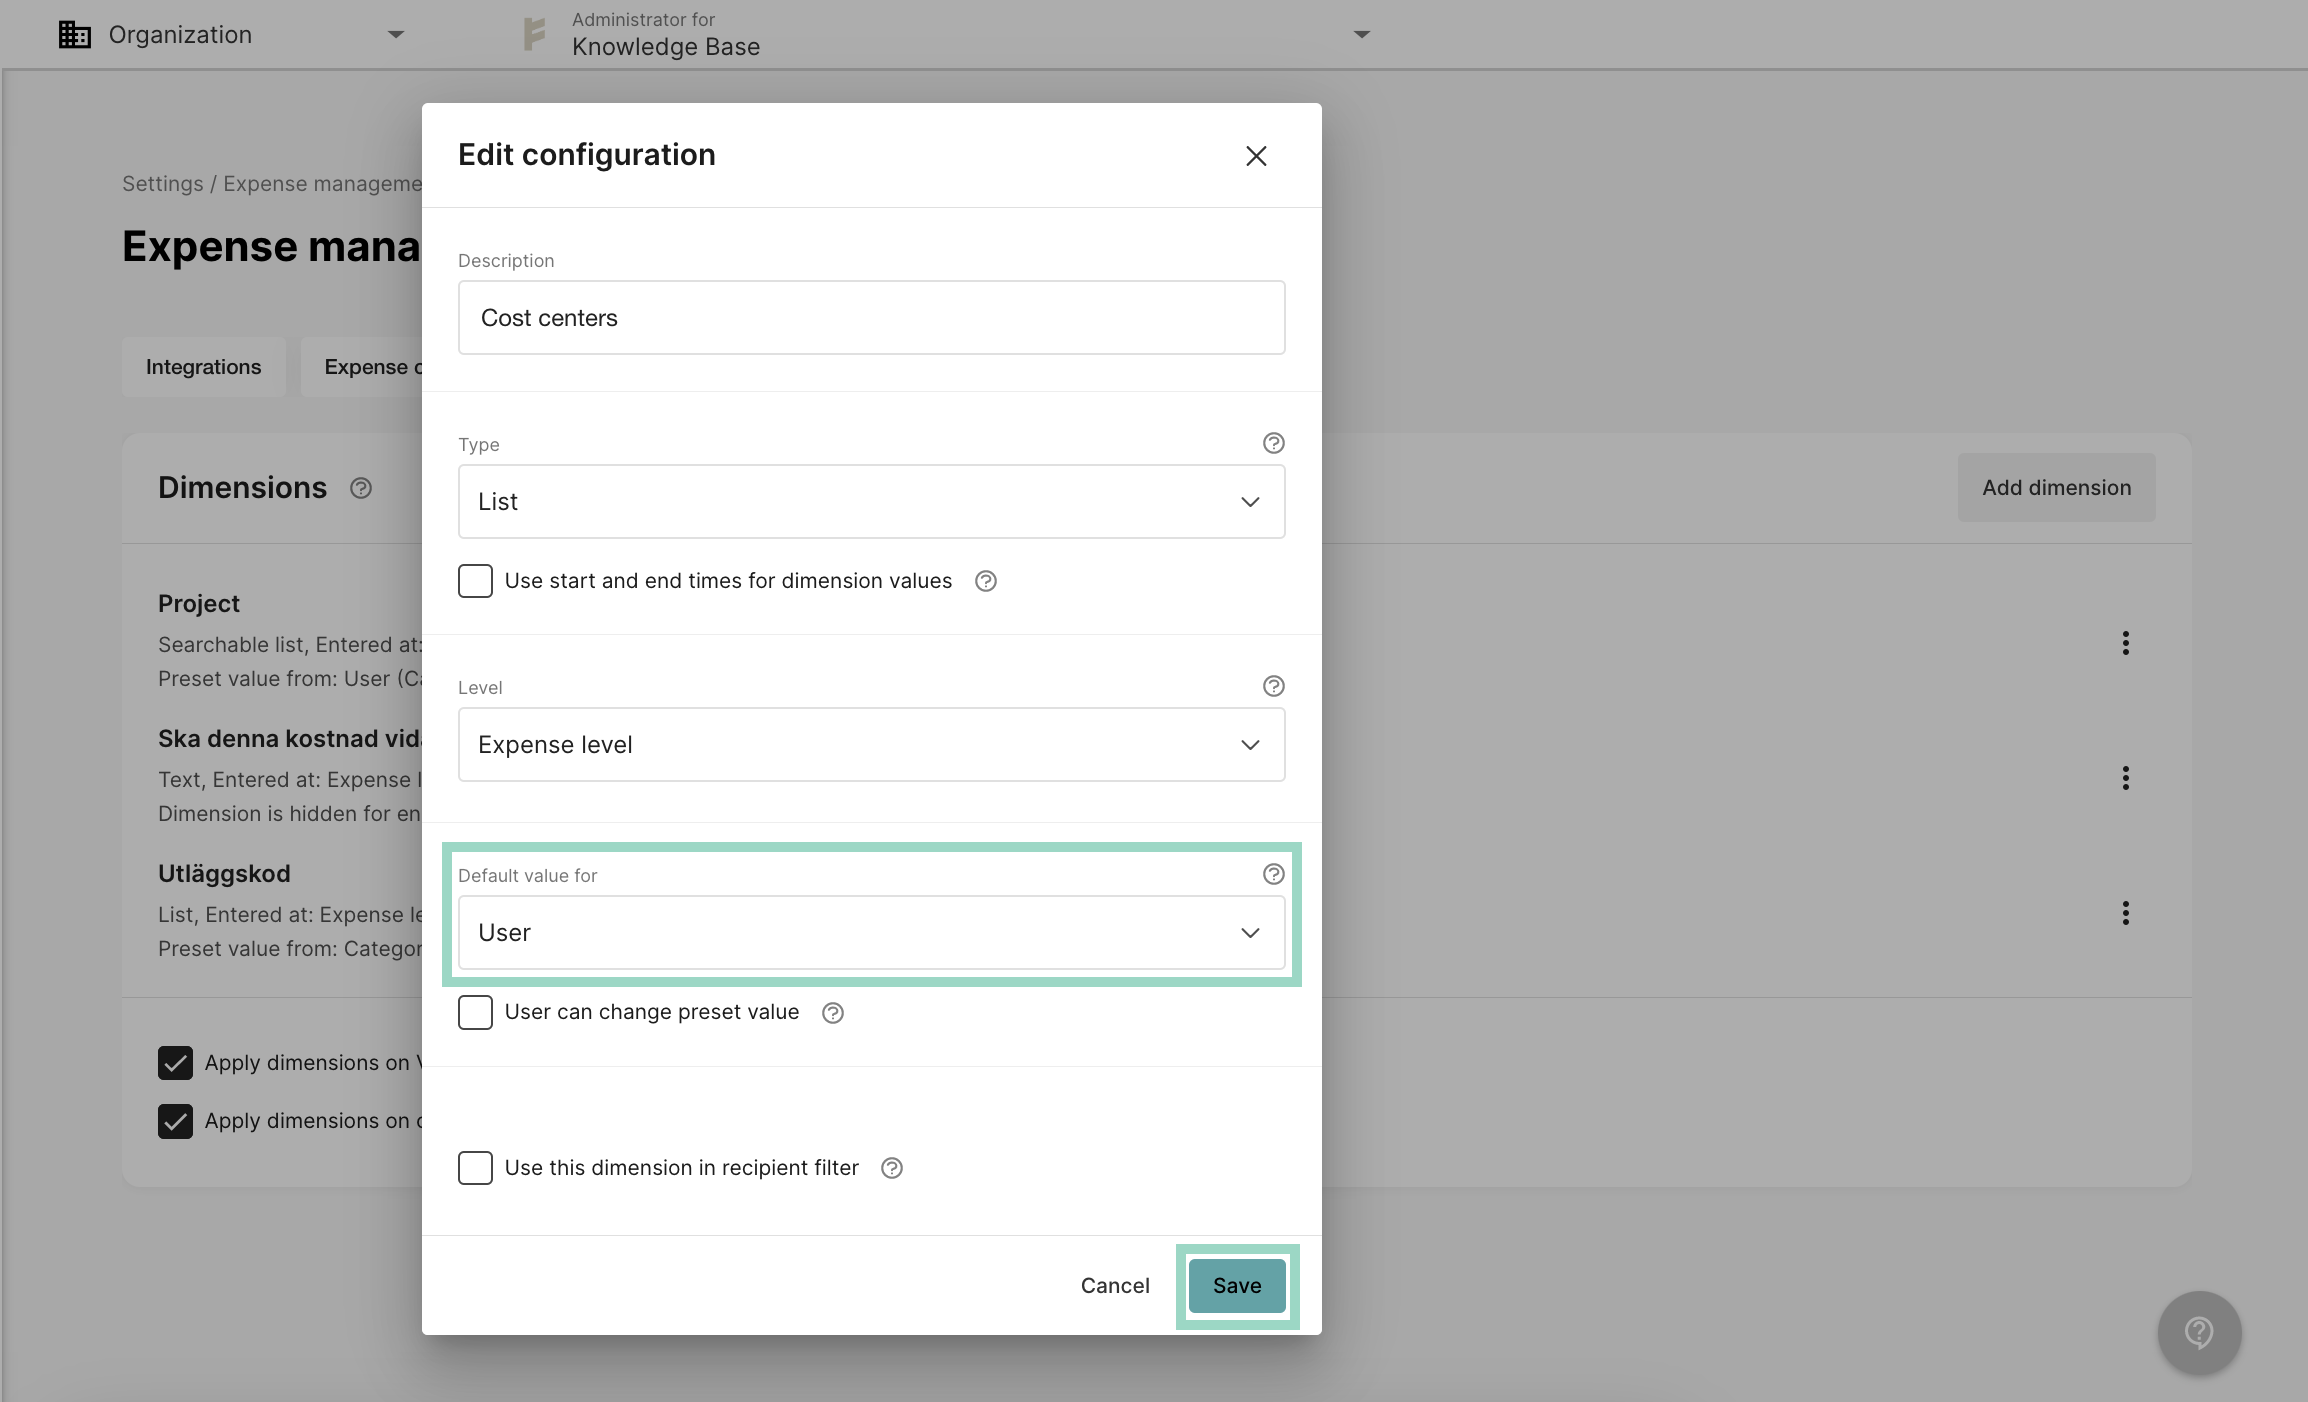
Go to *Settings* - *Expense management* - *Dimensions*. Click on *Add dimension*.
Choose the settings according to your preferences and choose *Default value for - User*. *Save* the settings.
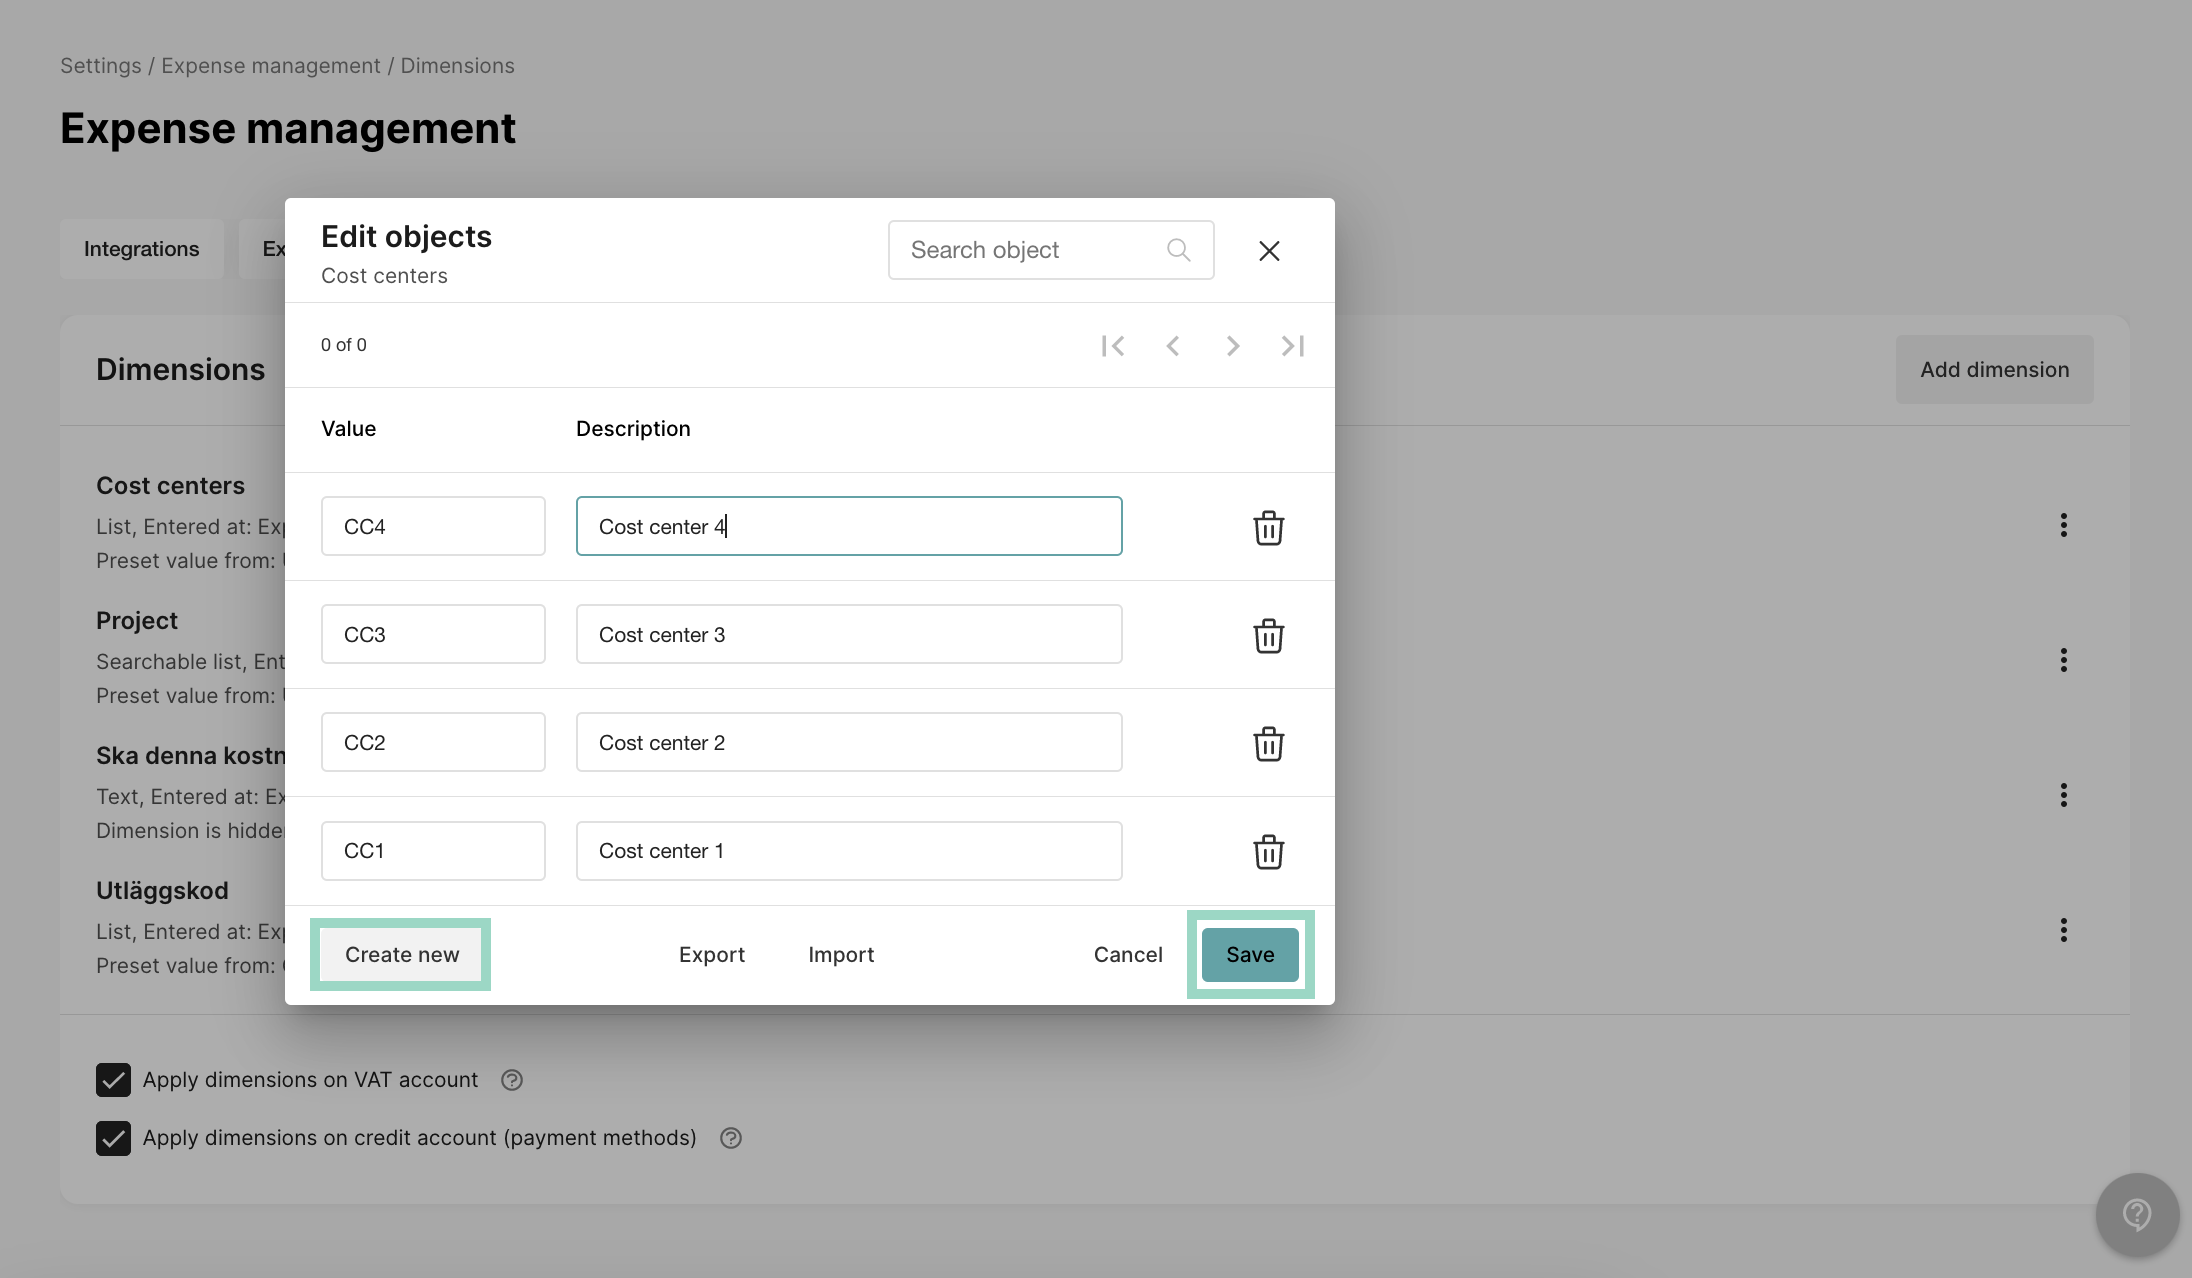
 Now it's time to add the values to the cost center dimension. Click on "the three dots” to the right of your newly added dimension and choose *Edit values*.
In the new pop-up window, click on Create newand create as many cost centers as you would like. Just clickCreate new again, to add another value. *Save* the settings when you're done.
Now it's time to add the values to the cost center dimension. Click on "the three dots” to the right of your newly added dimension and choose *Edit values*.
In the new pop-up window, click on Create newand create as many cost centers as you would like. Just clickCreate new again, to add another value. *Save* the settings when you're done.
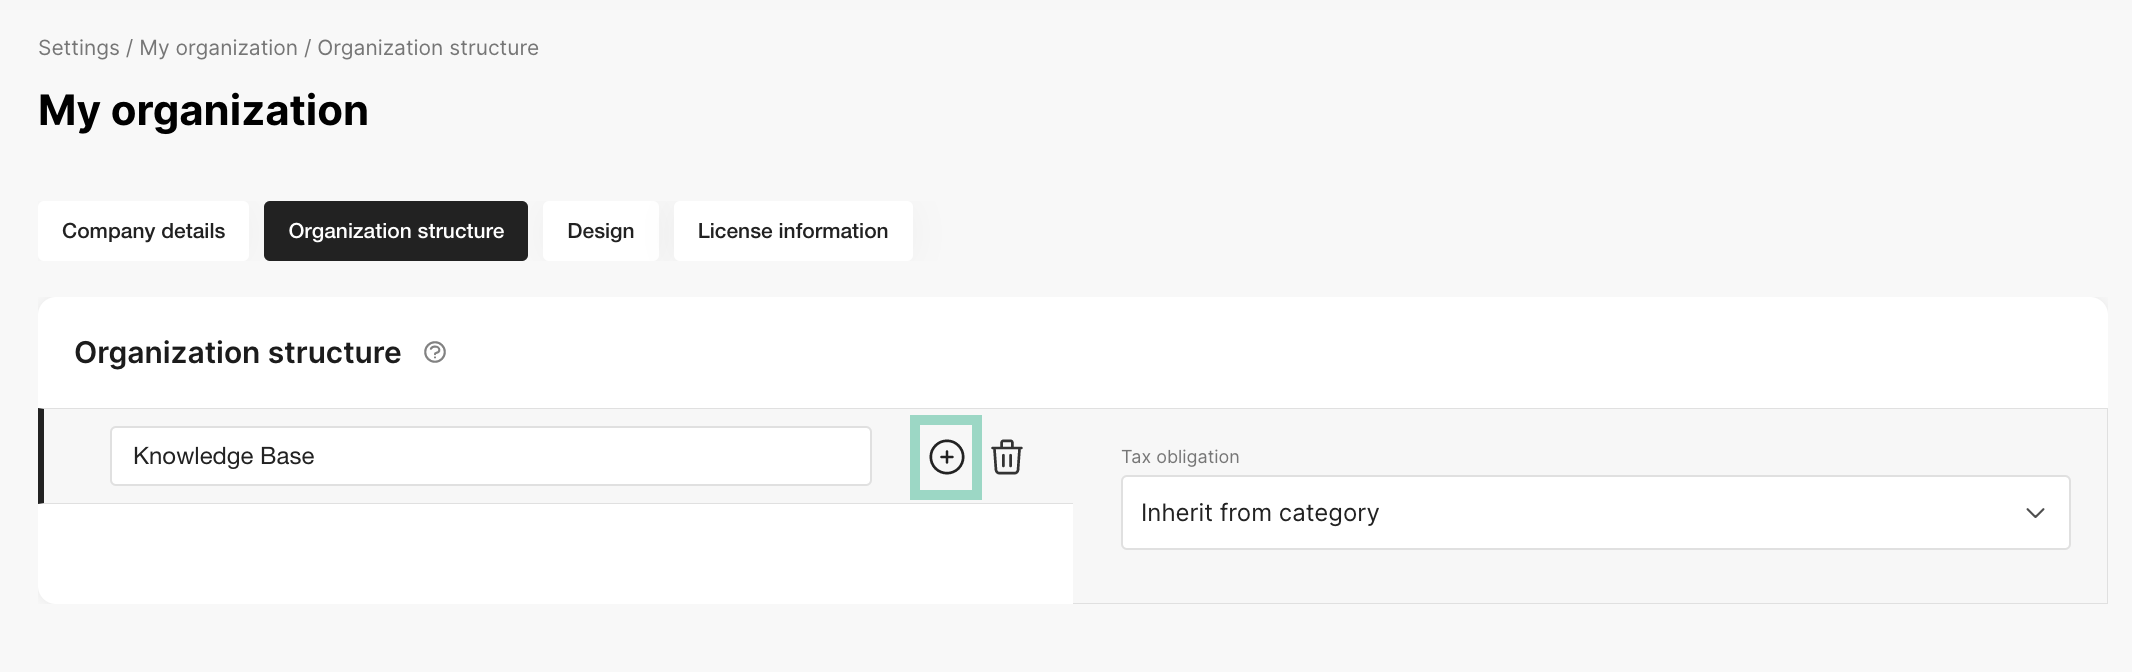
 Go to *Settings* - *My organisation* - *Organisation structure*. Click on the *Plus* *sign* to add your departments. To add several departments, click on the Plus signagain.
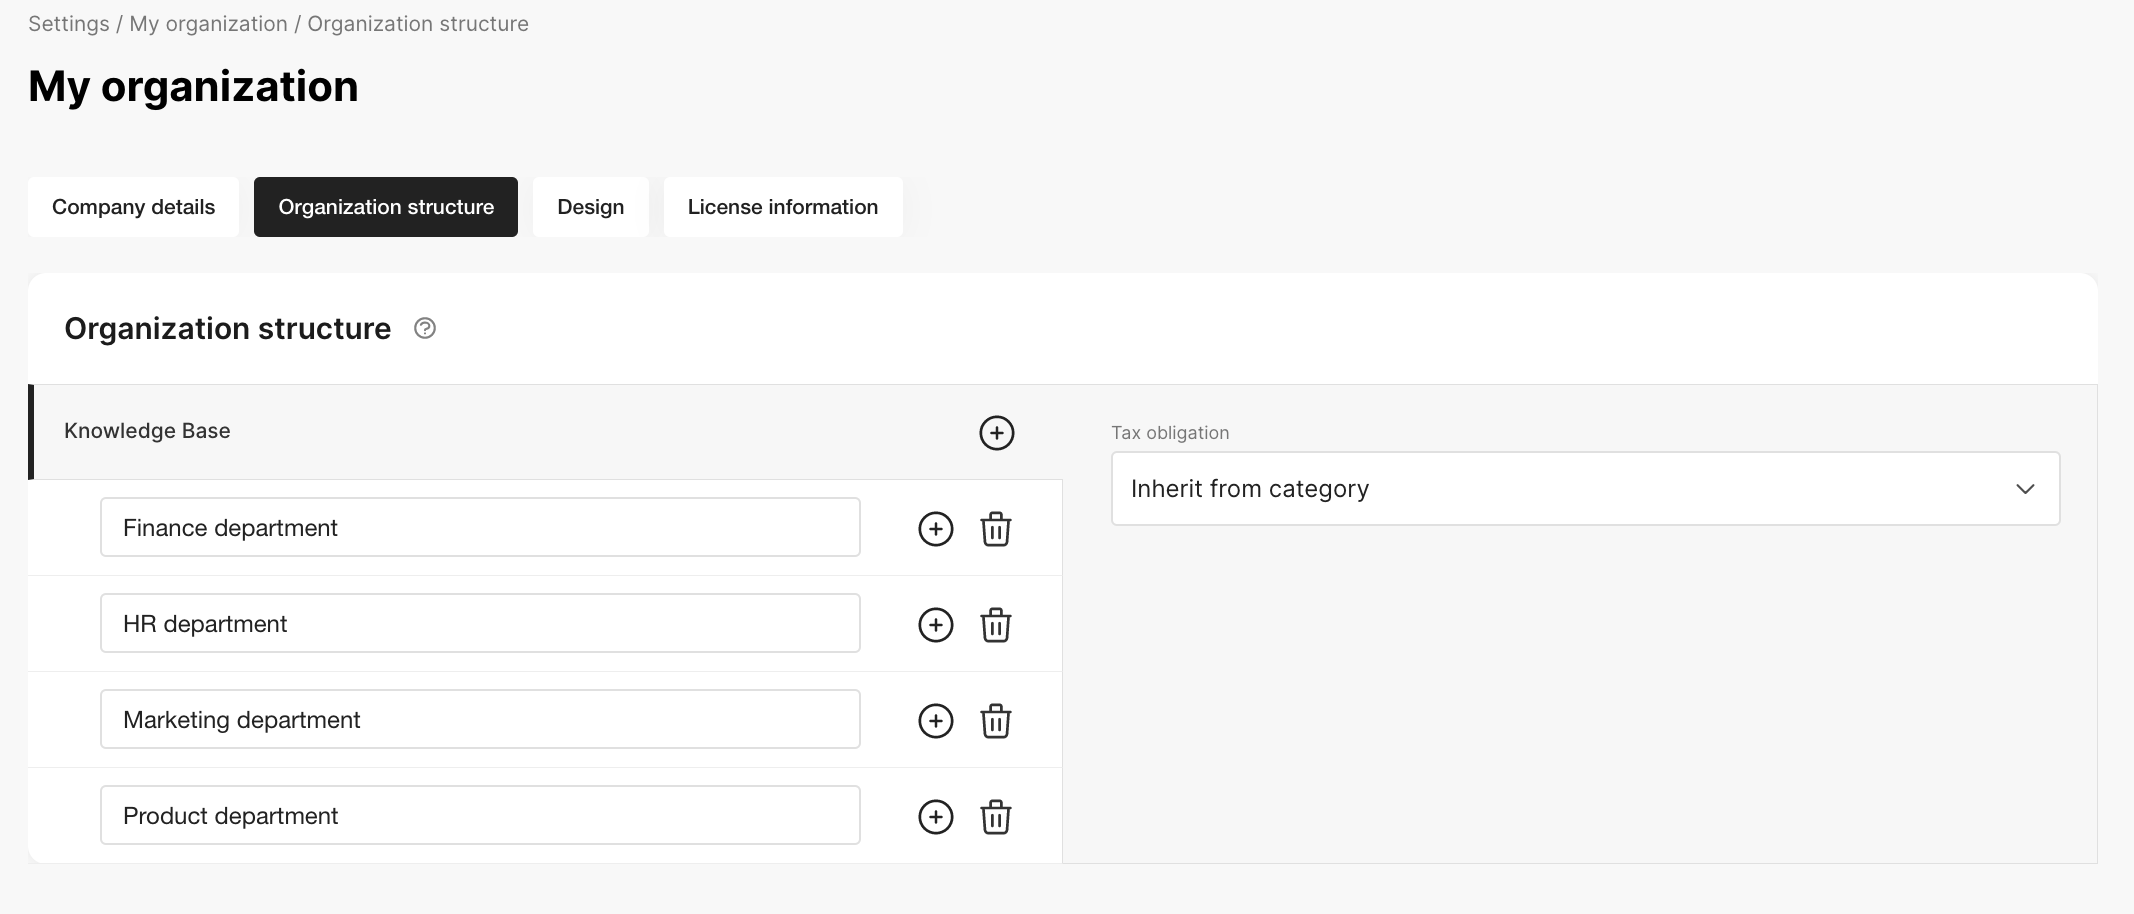
 In this example, we have added 4 different departments.
 **Step 2** - Preset the value on users.
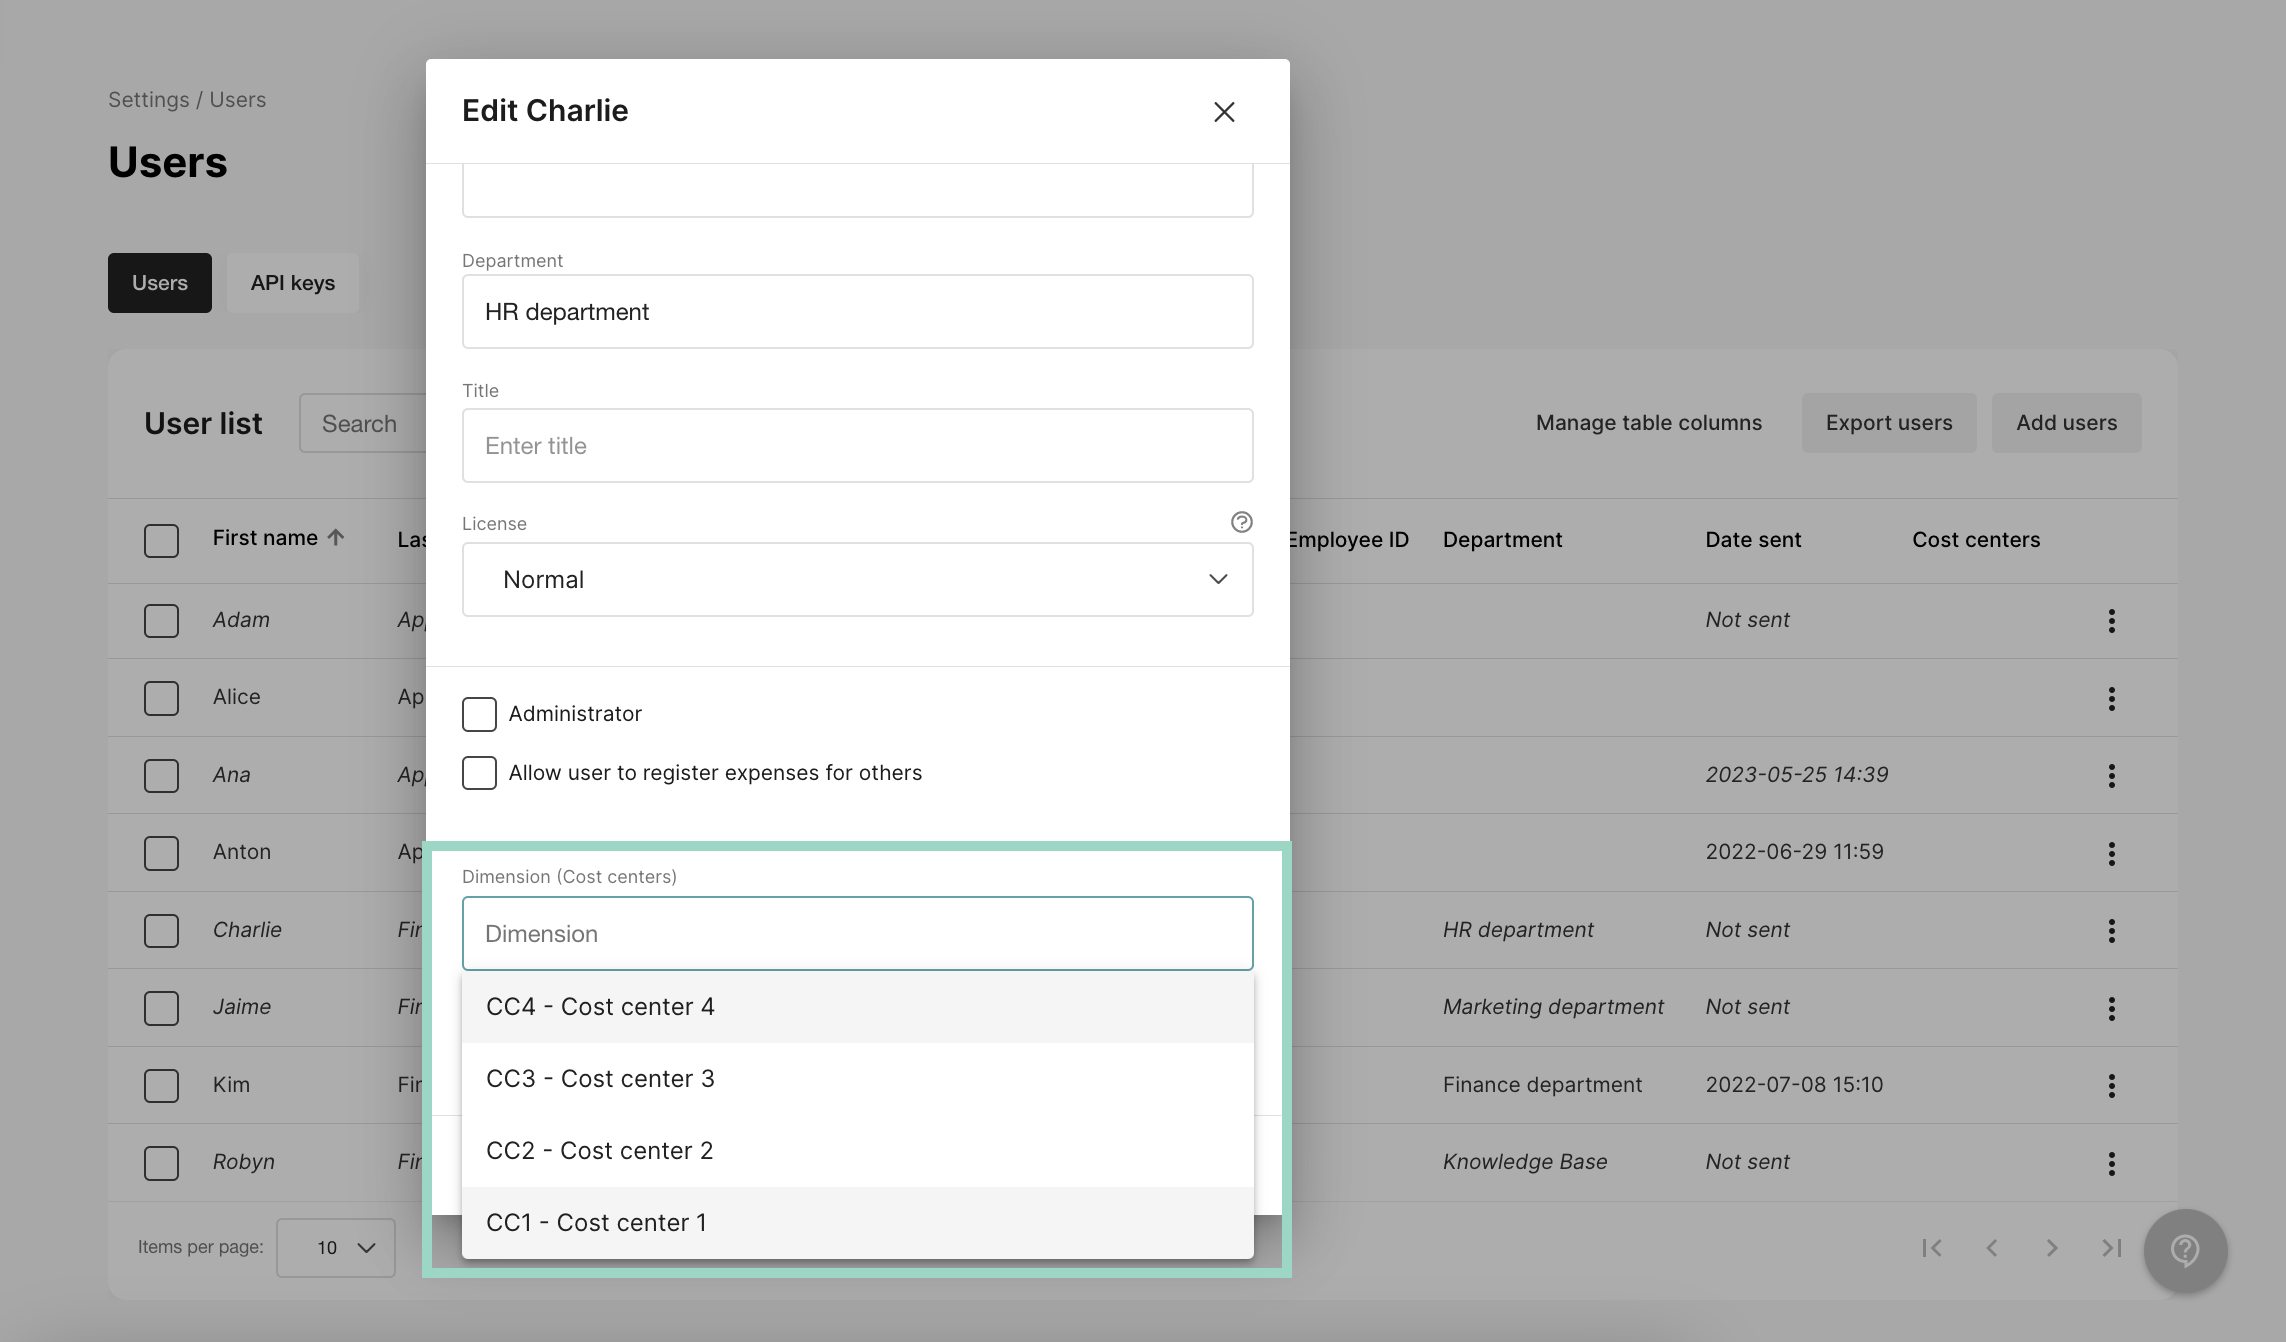
Go to *Users* and click on the user(s) that you want to add a cost center to.
Add the cost center that should be used for the employee and remember that this is **not** who should approve on the cost center (that is added later in **Step 3**). This is which cost center that the employee belongs to.
*Save* settings when you're done.
**Step 2** - Preset the value on users.
Go to *Users* and click on the user(s) that you want to add a cost center to.
Add the cost center that should be used for the employee and remember that this is **not** who should approve on the cost center (that is added later in **Step 3**). This is which cost center that the employee belongs to.
*Save* settings when you're done.
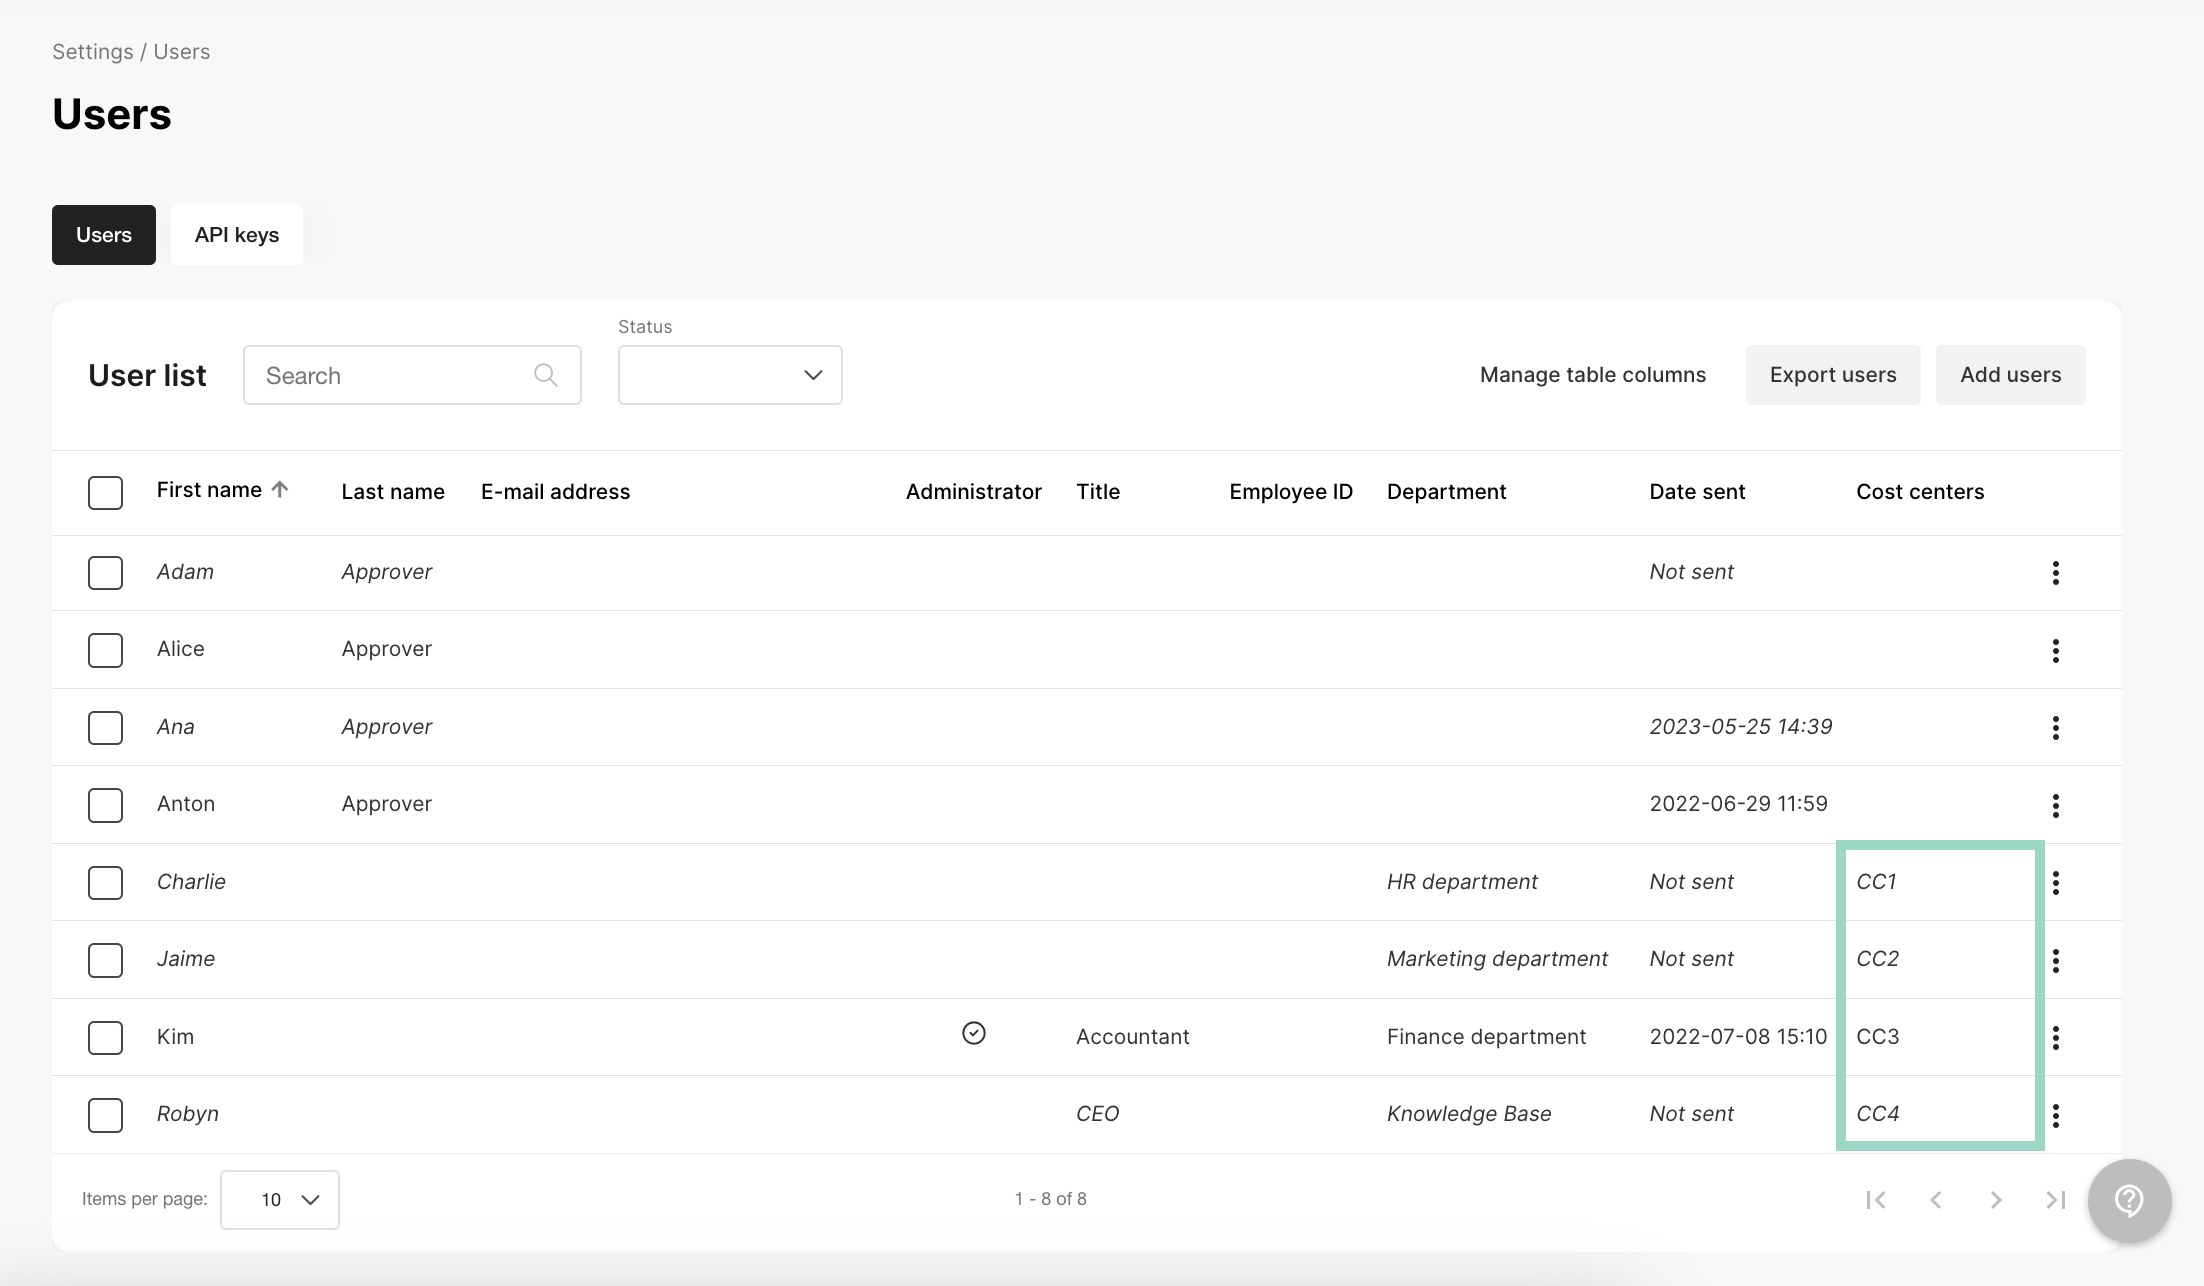
 In the example below, we have added 4 different cost centers to the employees/users.
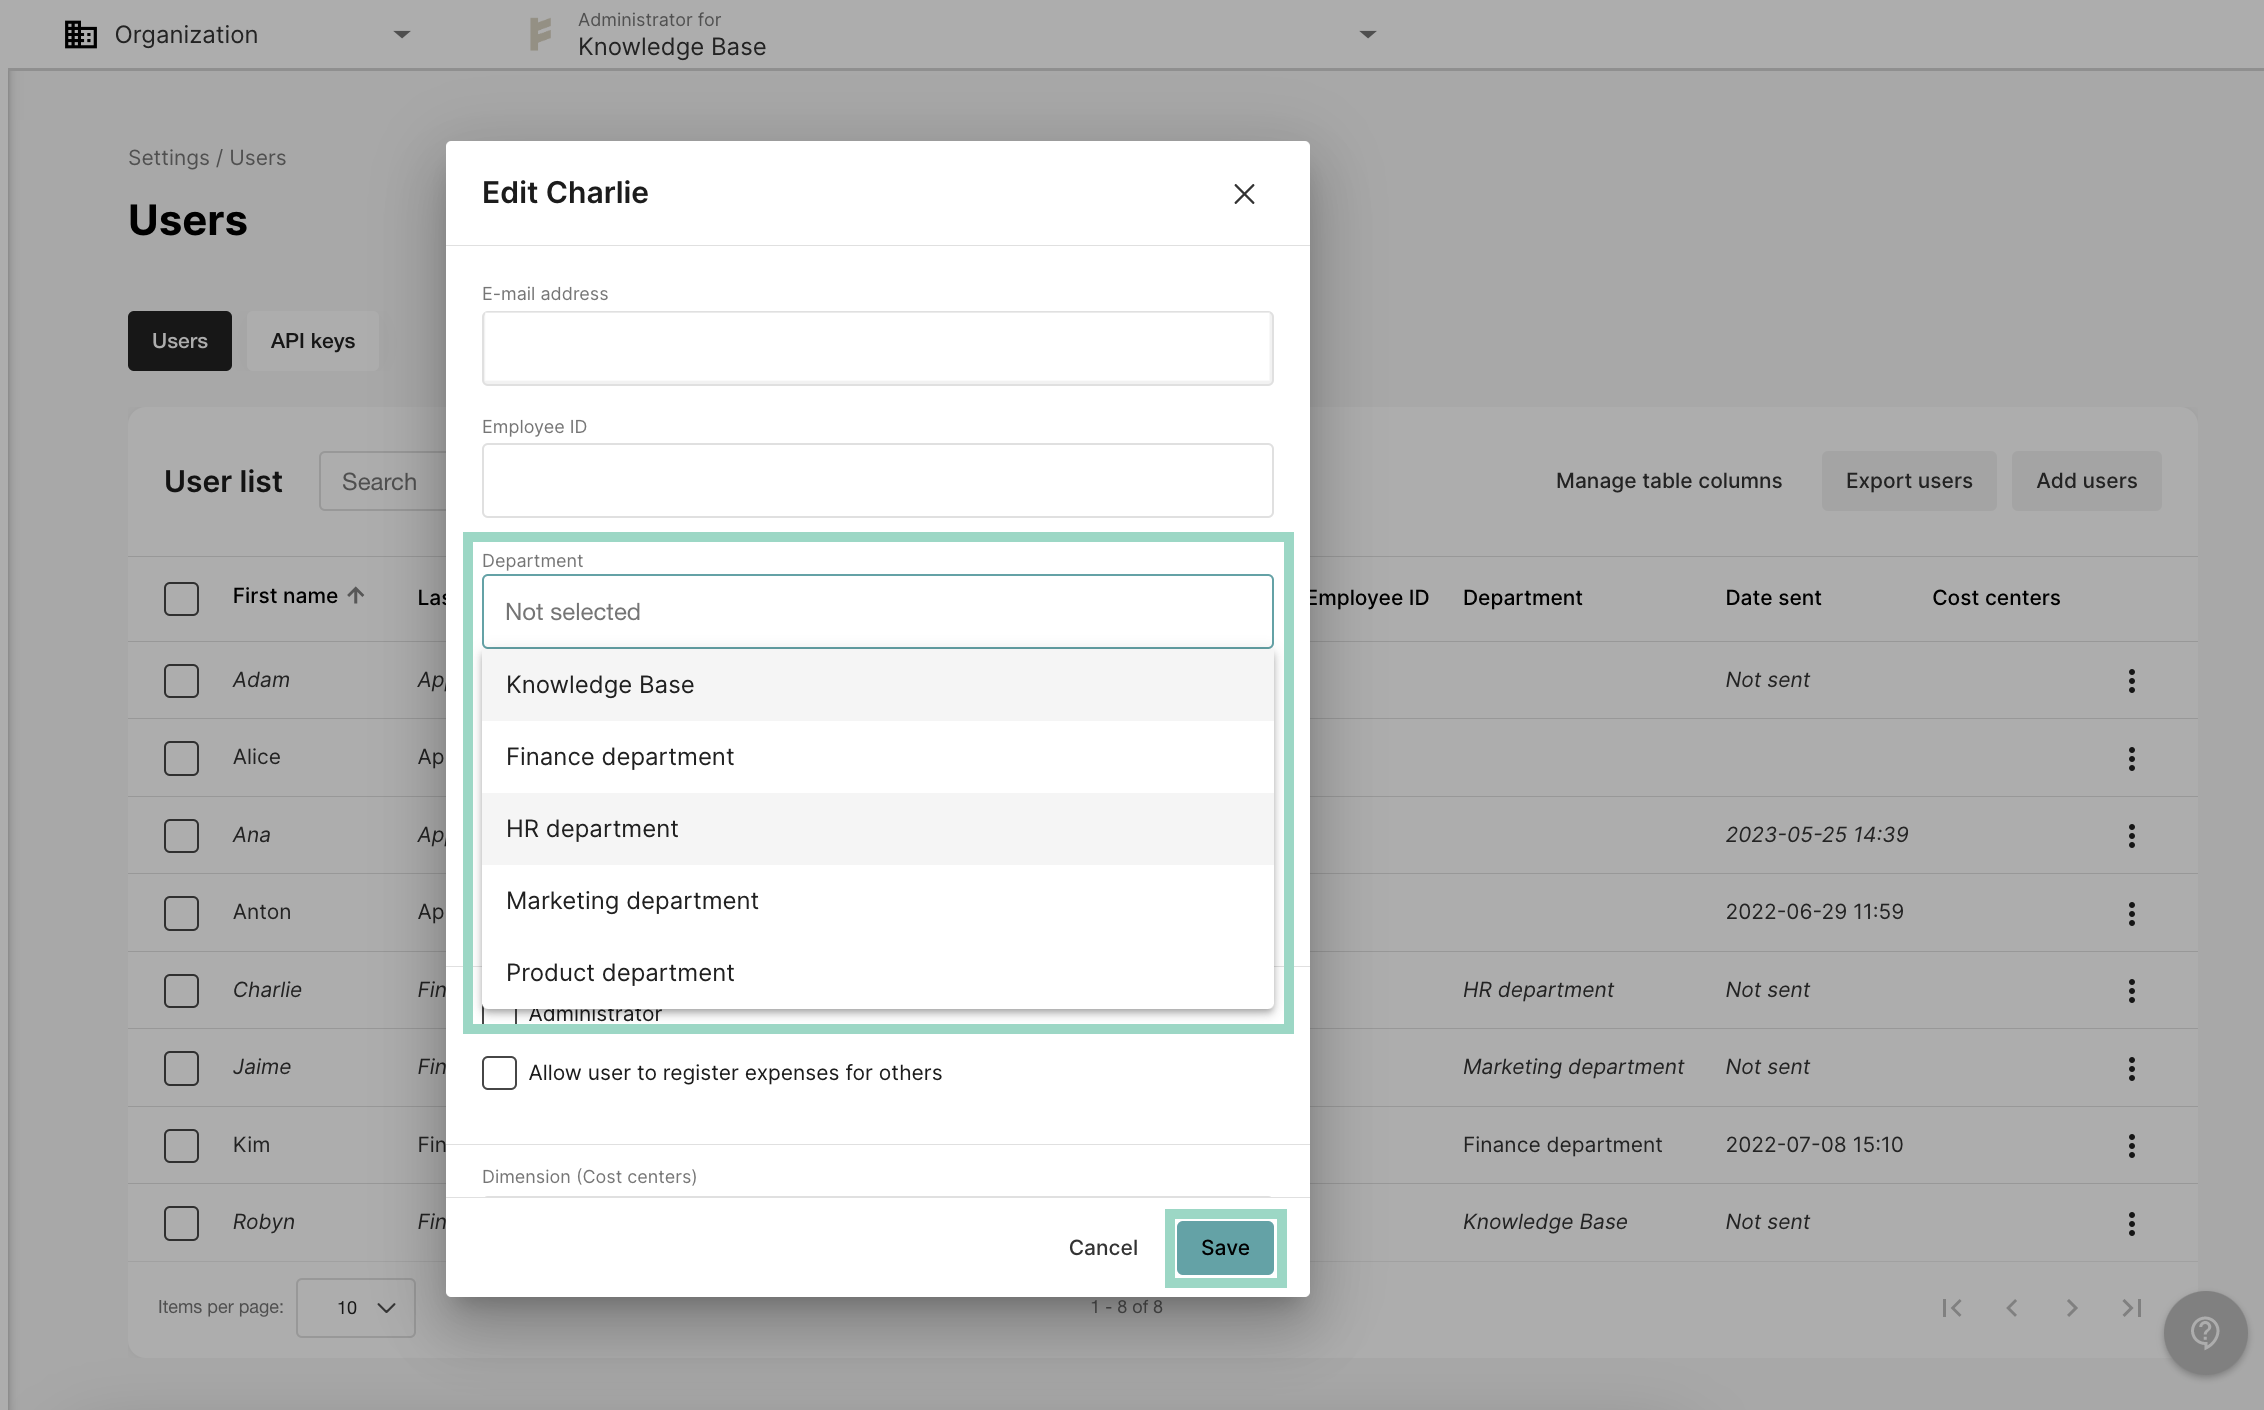
 Go to *Users* and click on the user(s) that you want to add a department to.
Add the department that the employee belongs to and remember that this is **not** who should approve on the department (that is added later in **Step 3**). This is which department the user is employed at.
*Save* settings when you're done.
Go to *Users* and click on the user(s) that you want to add a department to.
Add the department that the employee belongs to and remember that this is **not** who should approve on the department (that is added later in **Step 3**). This is which department the user is employed at.
*Save* settings when you're done.
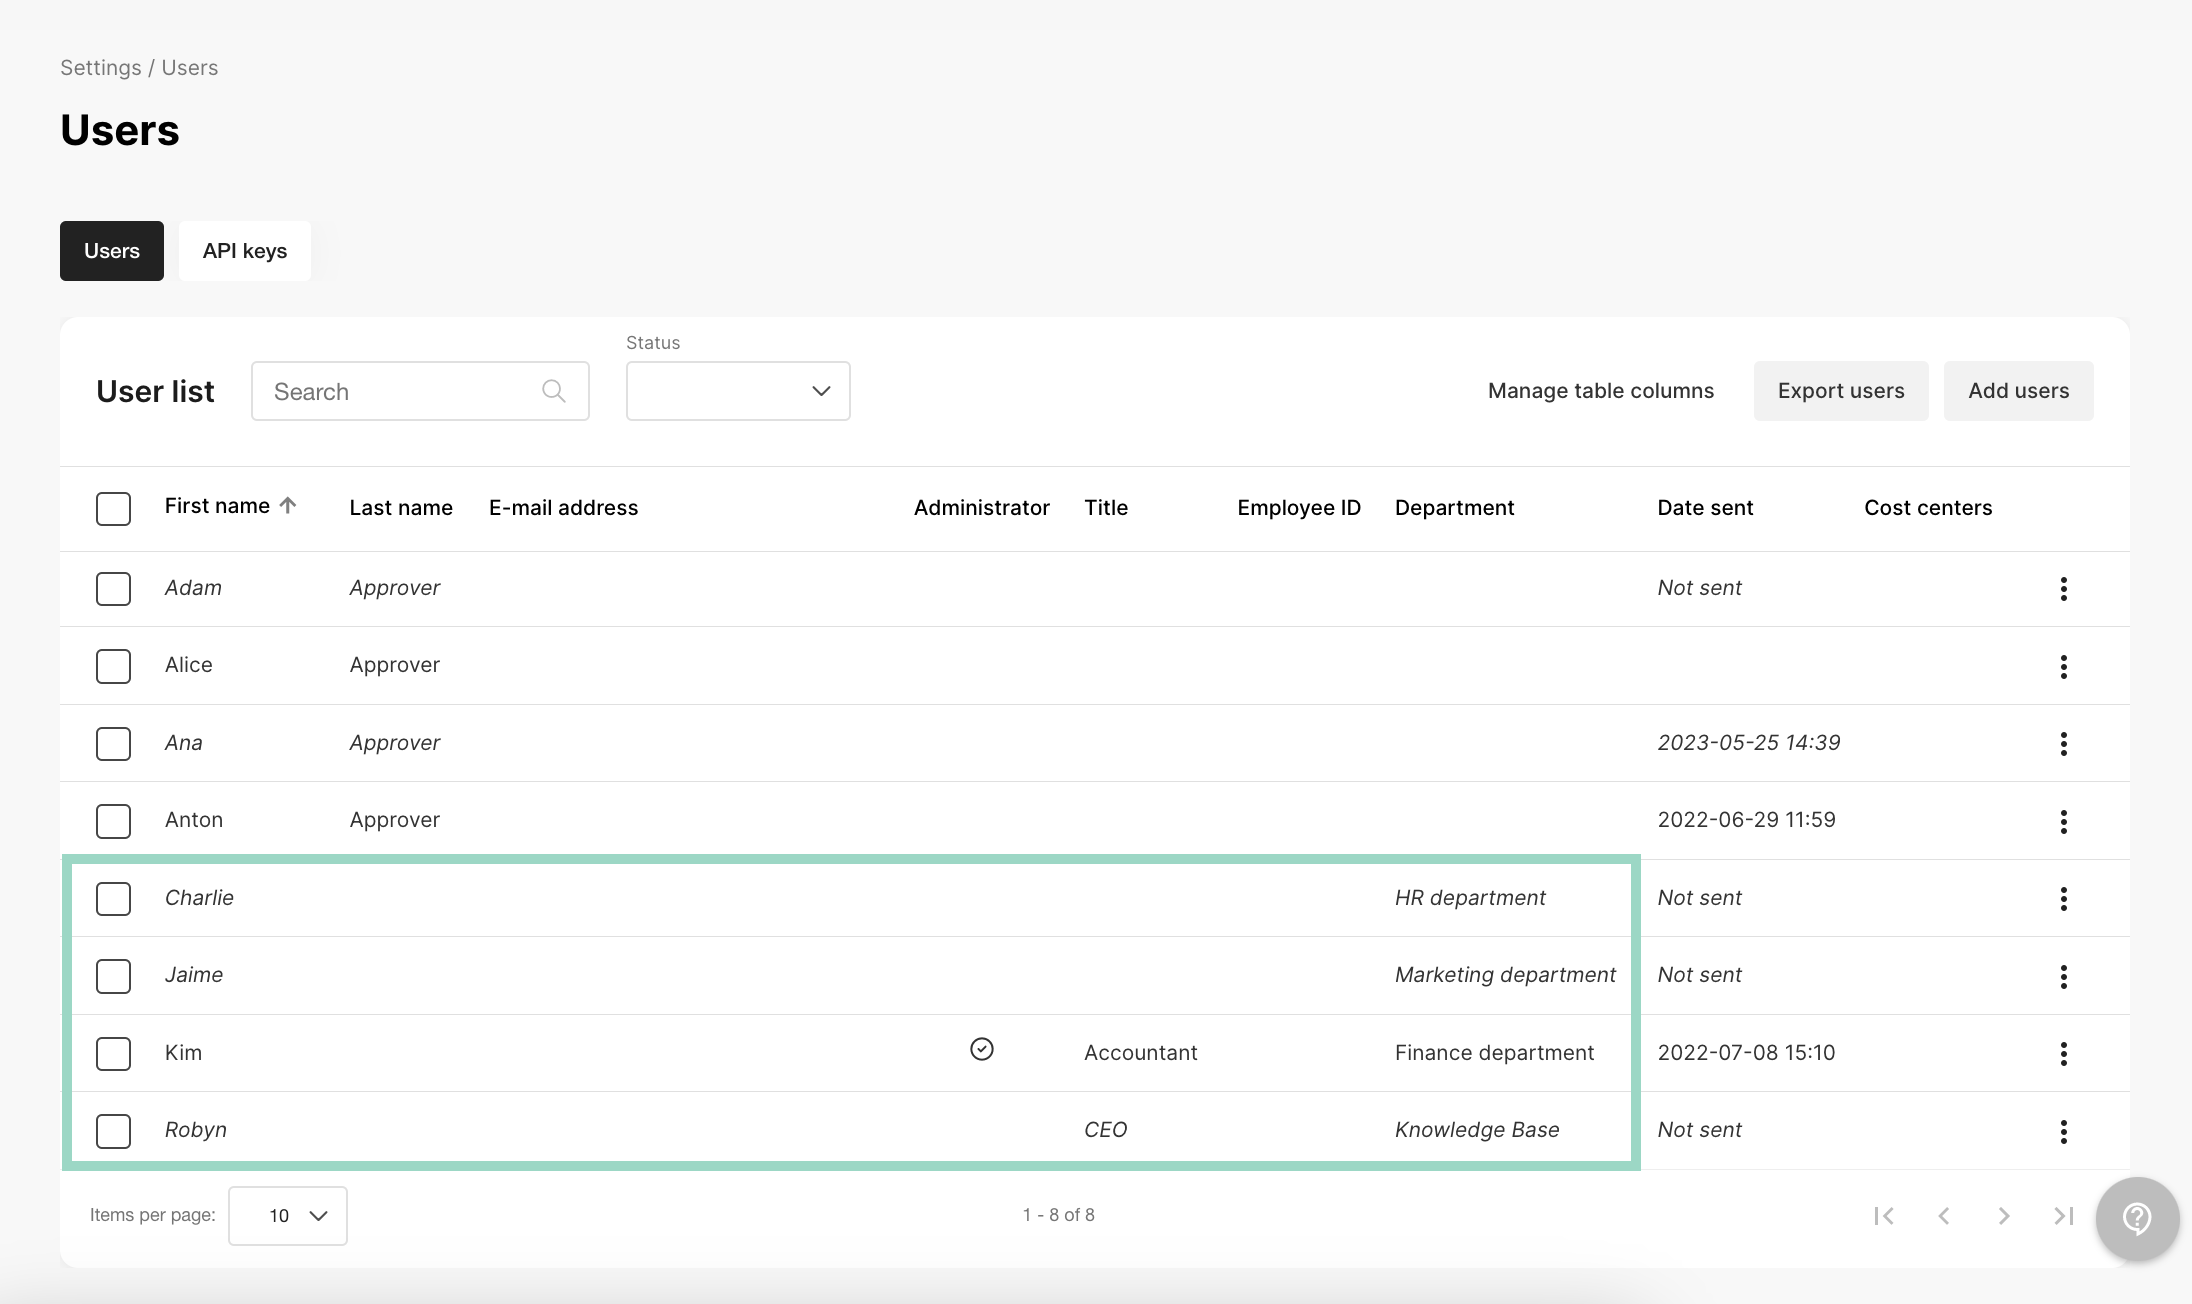
 In the example below, we have added 4 different departments to the employees/users.
 **Step 3** - Choose your approval structure and add approvers to the departments/cost centers.
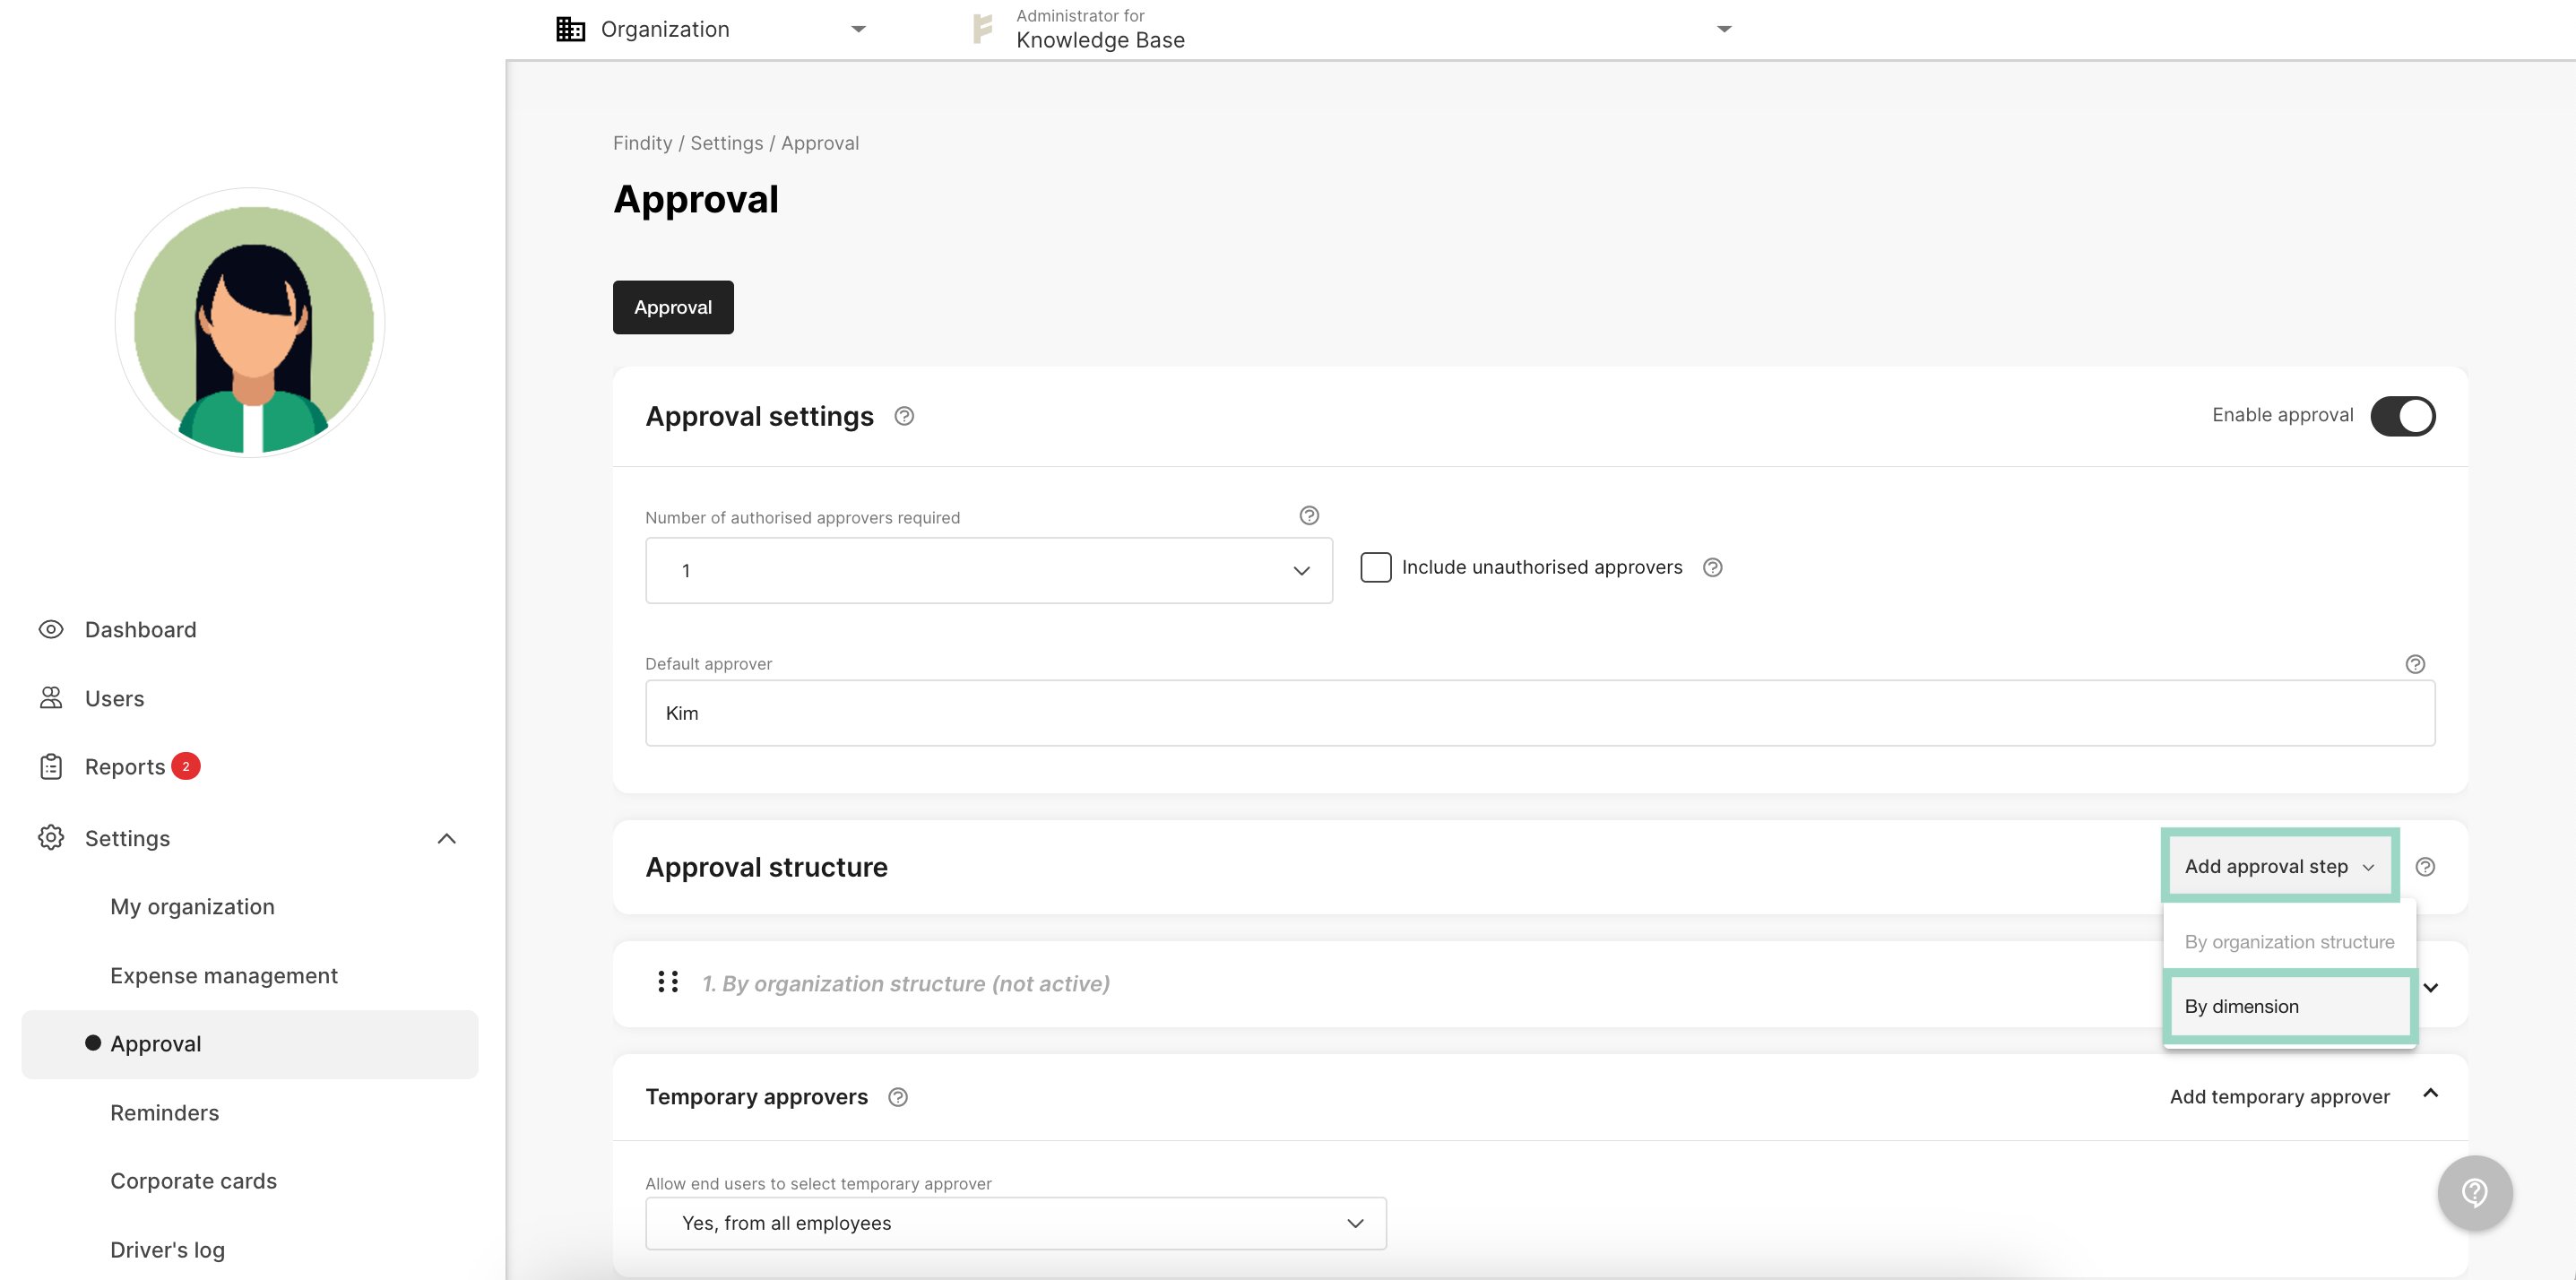
Go to *Settings* - *Approval*. Click on *Add approval step* and choose *By dimension*.
**Step 3** - Choose your approval structure and add approvers to the departments/cost centers.
Go to *Settings* - *Approval*. Click on *Add approval step* and choose *By dimension*.
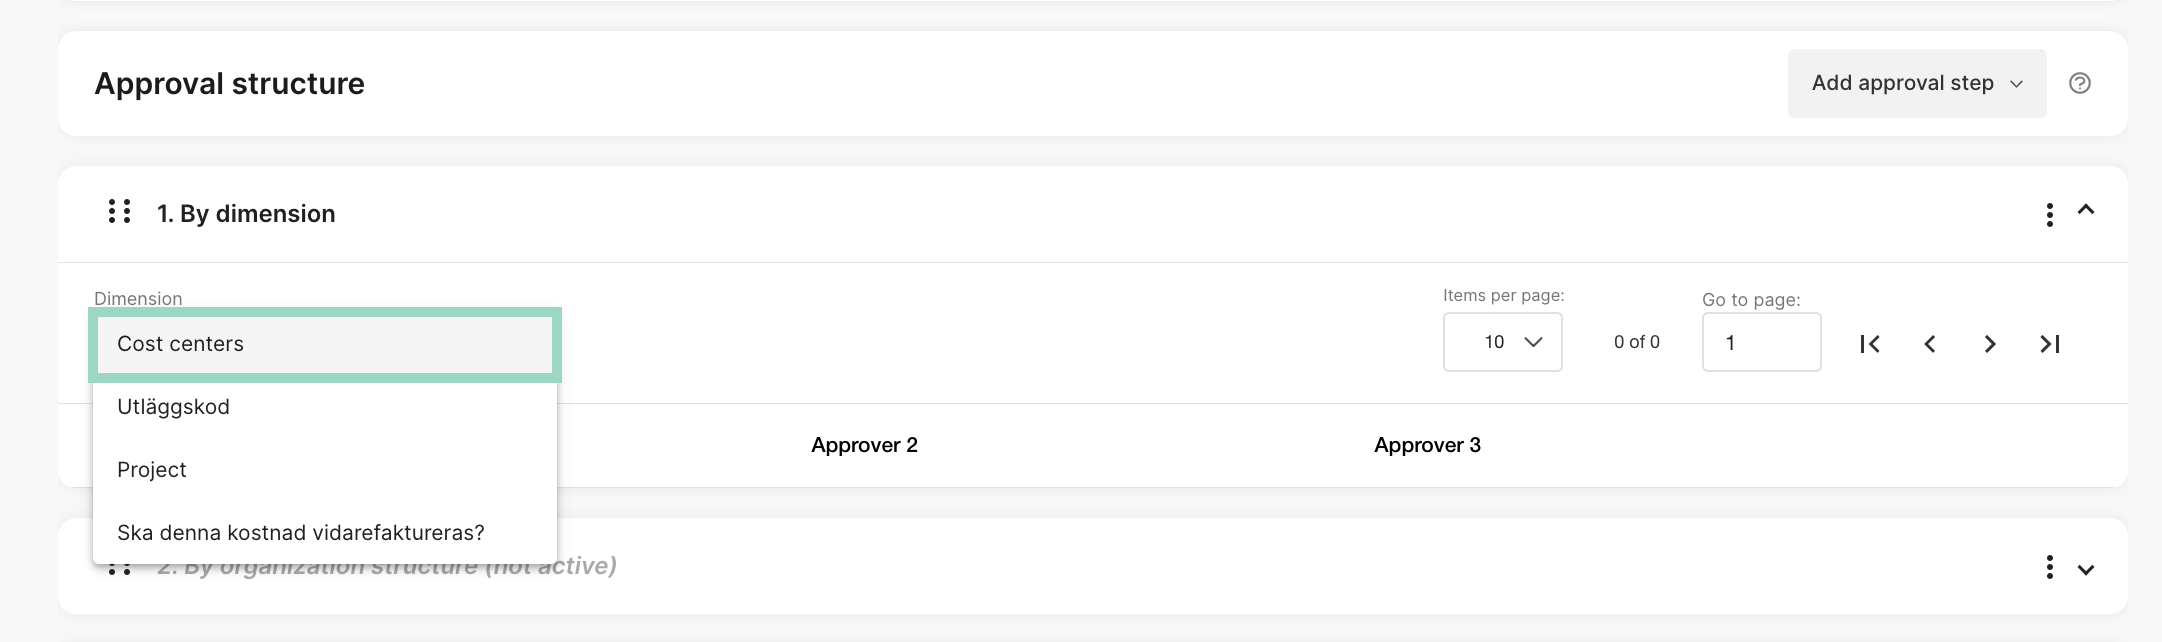
 Then choose Cost centersin the *Dimension* box.
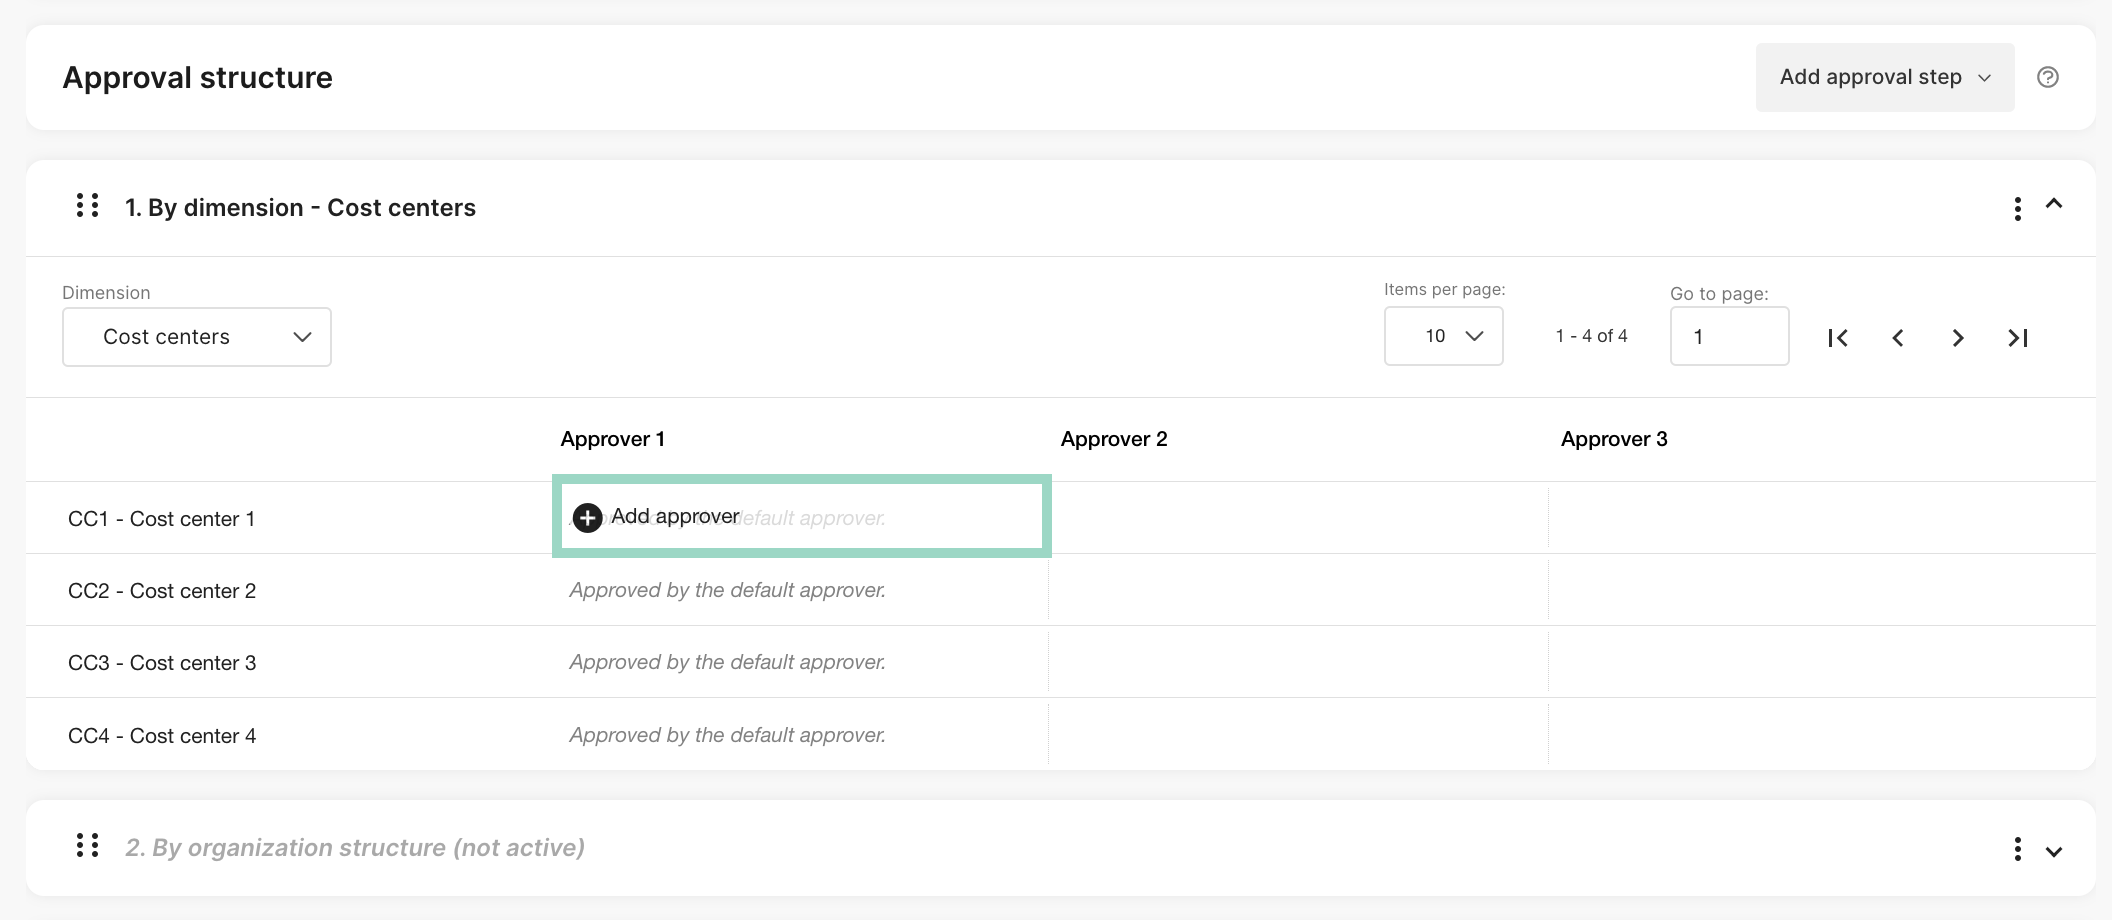
 Now you will see all your dimension values (cost centers) that you added to your dimension and it's time to choose which one that should approve reports for the specific cost centers.
Click in the field for the specific cost center under “Approver 1” to add an approver for that cost center.
Now you will see all your dimension values (cost centers) that you added to your dimension and it's time to choose which one that should approve reports for the specific cost centers.
Click in the field for the specific cost center under “Approver 1” to add an approver for that cost center.
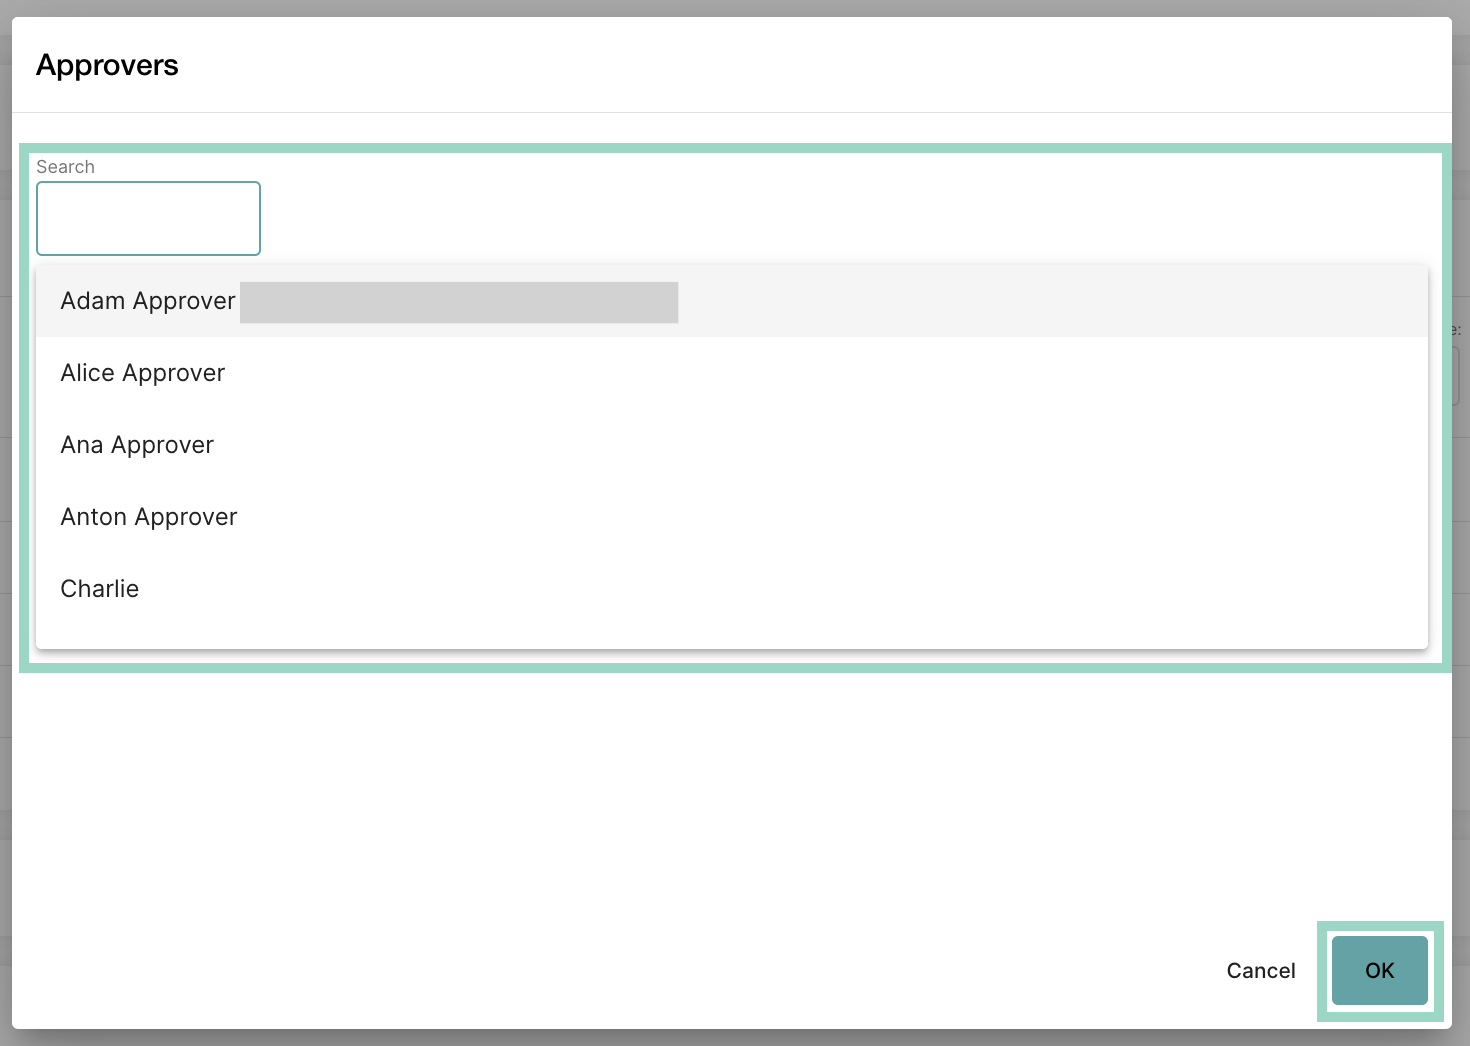
 Search for and choose the user that you want as an approver for this cost center and press *OK* when done.
 Repeat this for all the cost centers. Press *Save* to save your settings.
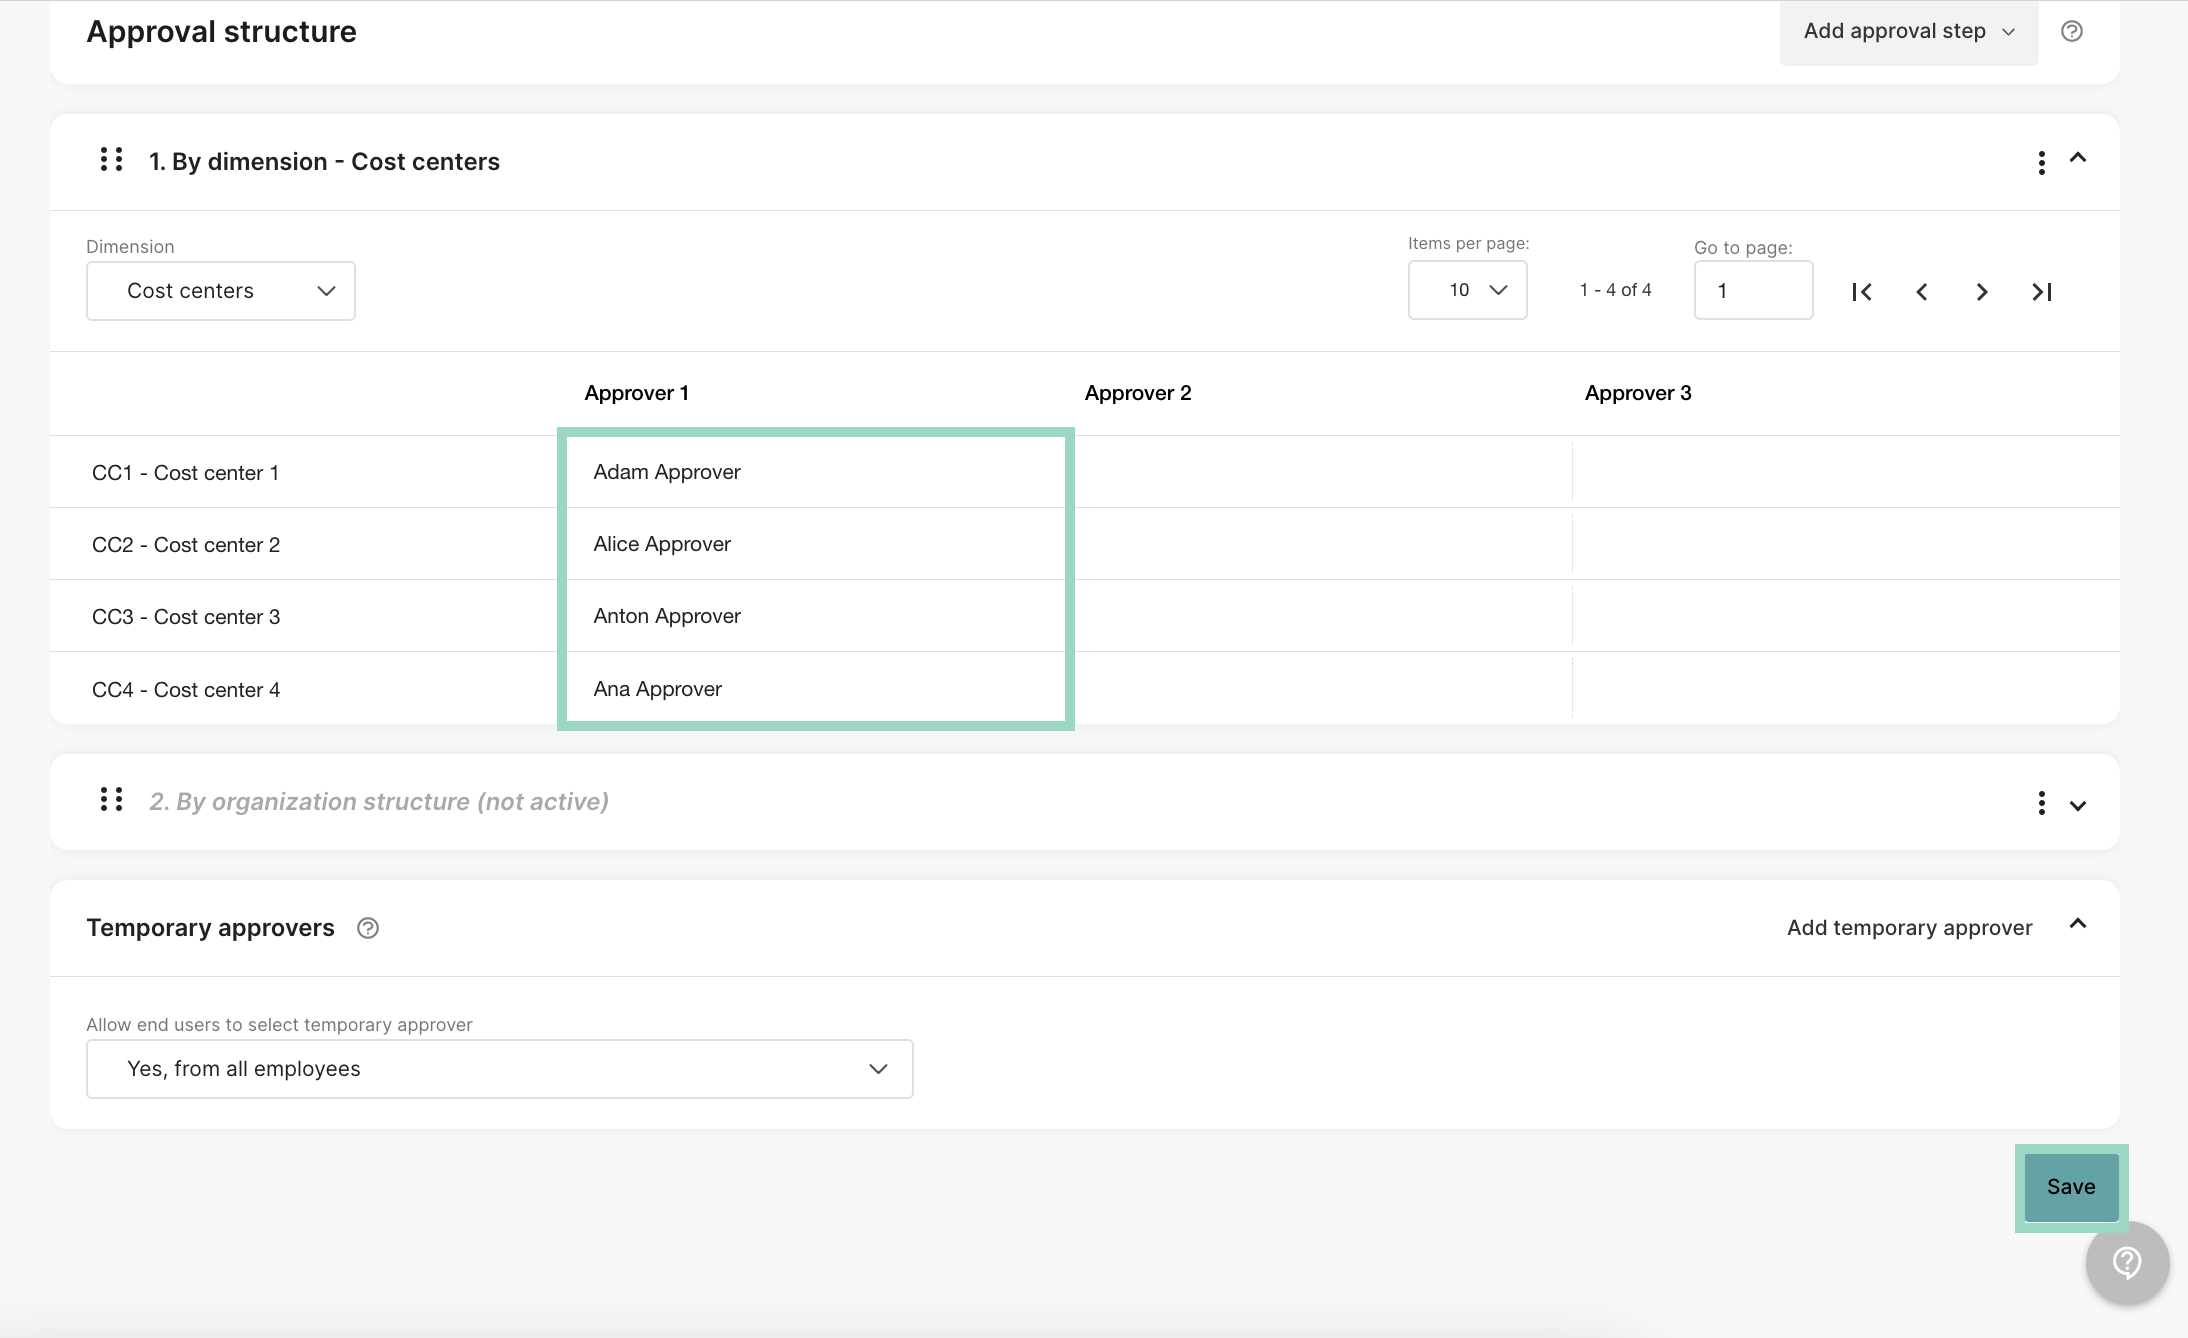 Now you are done with all the settings and you have an approval structure according to your cost centers.
Example - Charlie has "CC1" as a preset cost center. This means that Charlie's reports will be approved by Adam Approver since Adam is the approver on this cost center.
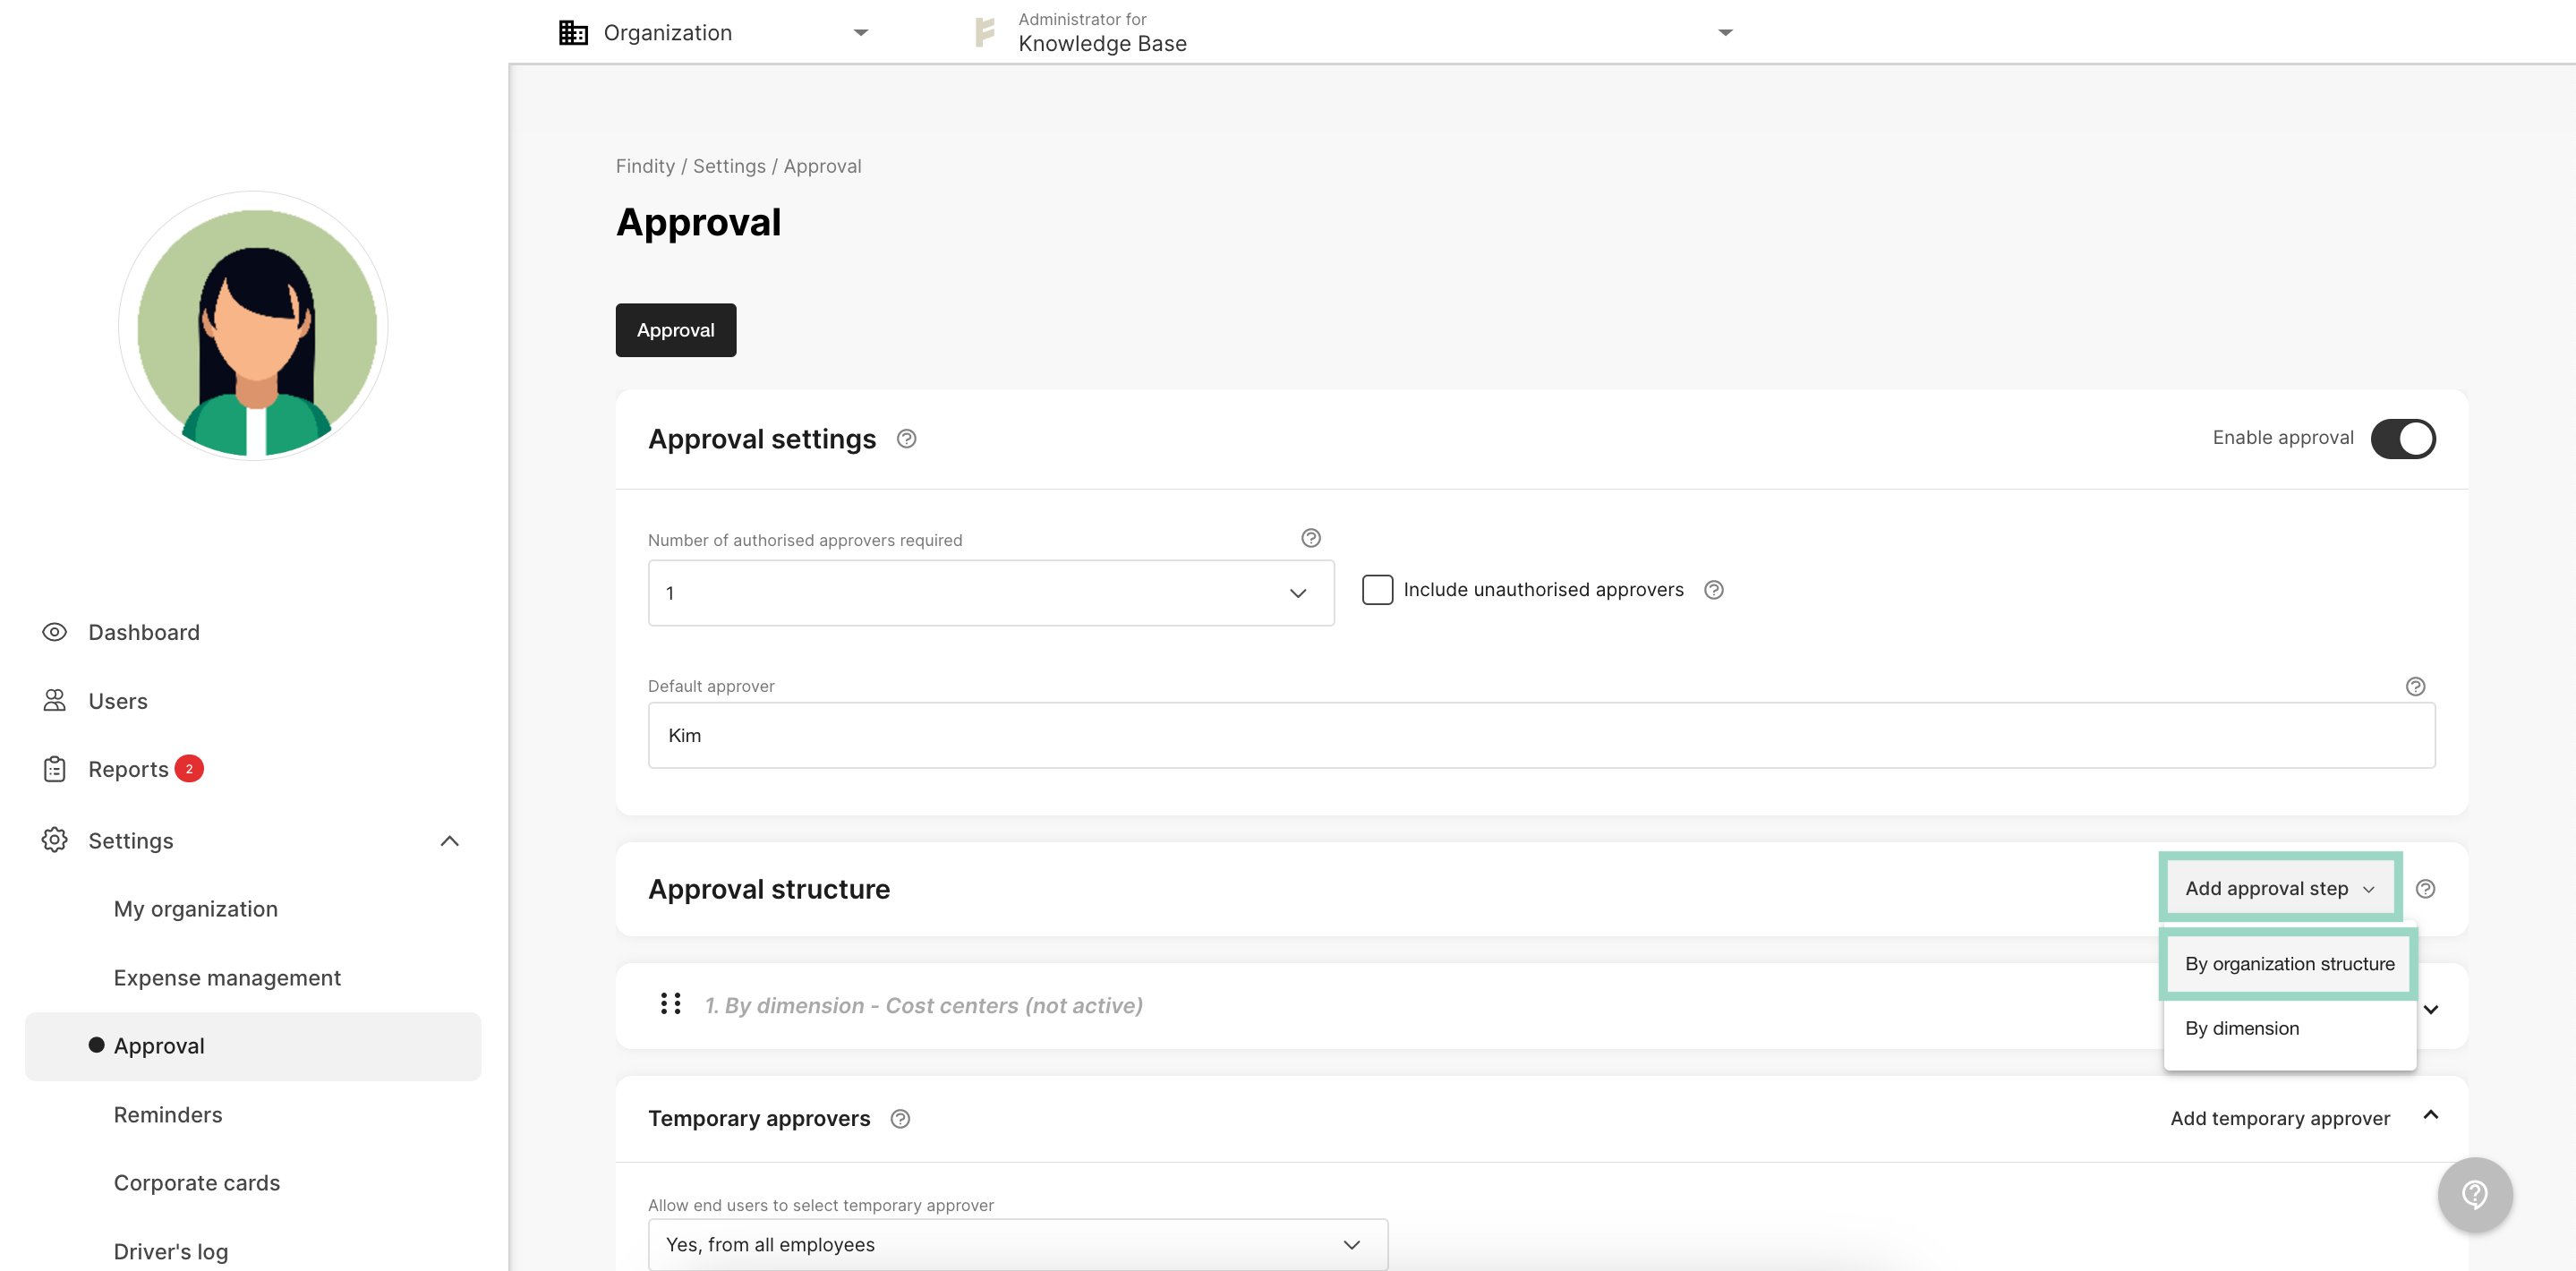
Go to *Settings* - *Approval*. Click on *Add approval step* and choose *By organisation structure*.
Now you are done with all the settings and you have an approval structure according to your cost centers.
Example - Charlie has "CC1" as a preset cost center. This means that Charlie's reports will be approved by Adam Approver since Adam is the approver on this cost center.
Go to *Settings* - *Approval*. Click on *Add approval step* and choose *By organisation structure*.
 Now you will see all the departments that you added to your organisation structure and it's time to choose which one that should approve reports for the specific departments.
Click in the field for the specific department under “Approver 1” to add an approver for that department.
Now you will see all the departments that you added to your organisation structure and it's time to choose which one that should approve reports for the specific departments.
Click in the field for the specific department under “Approver 1” to add an approver for that department.
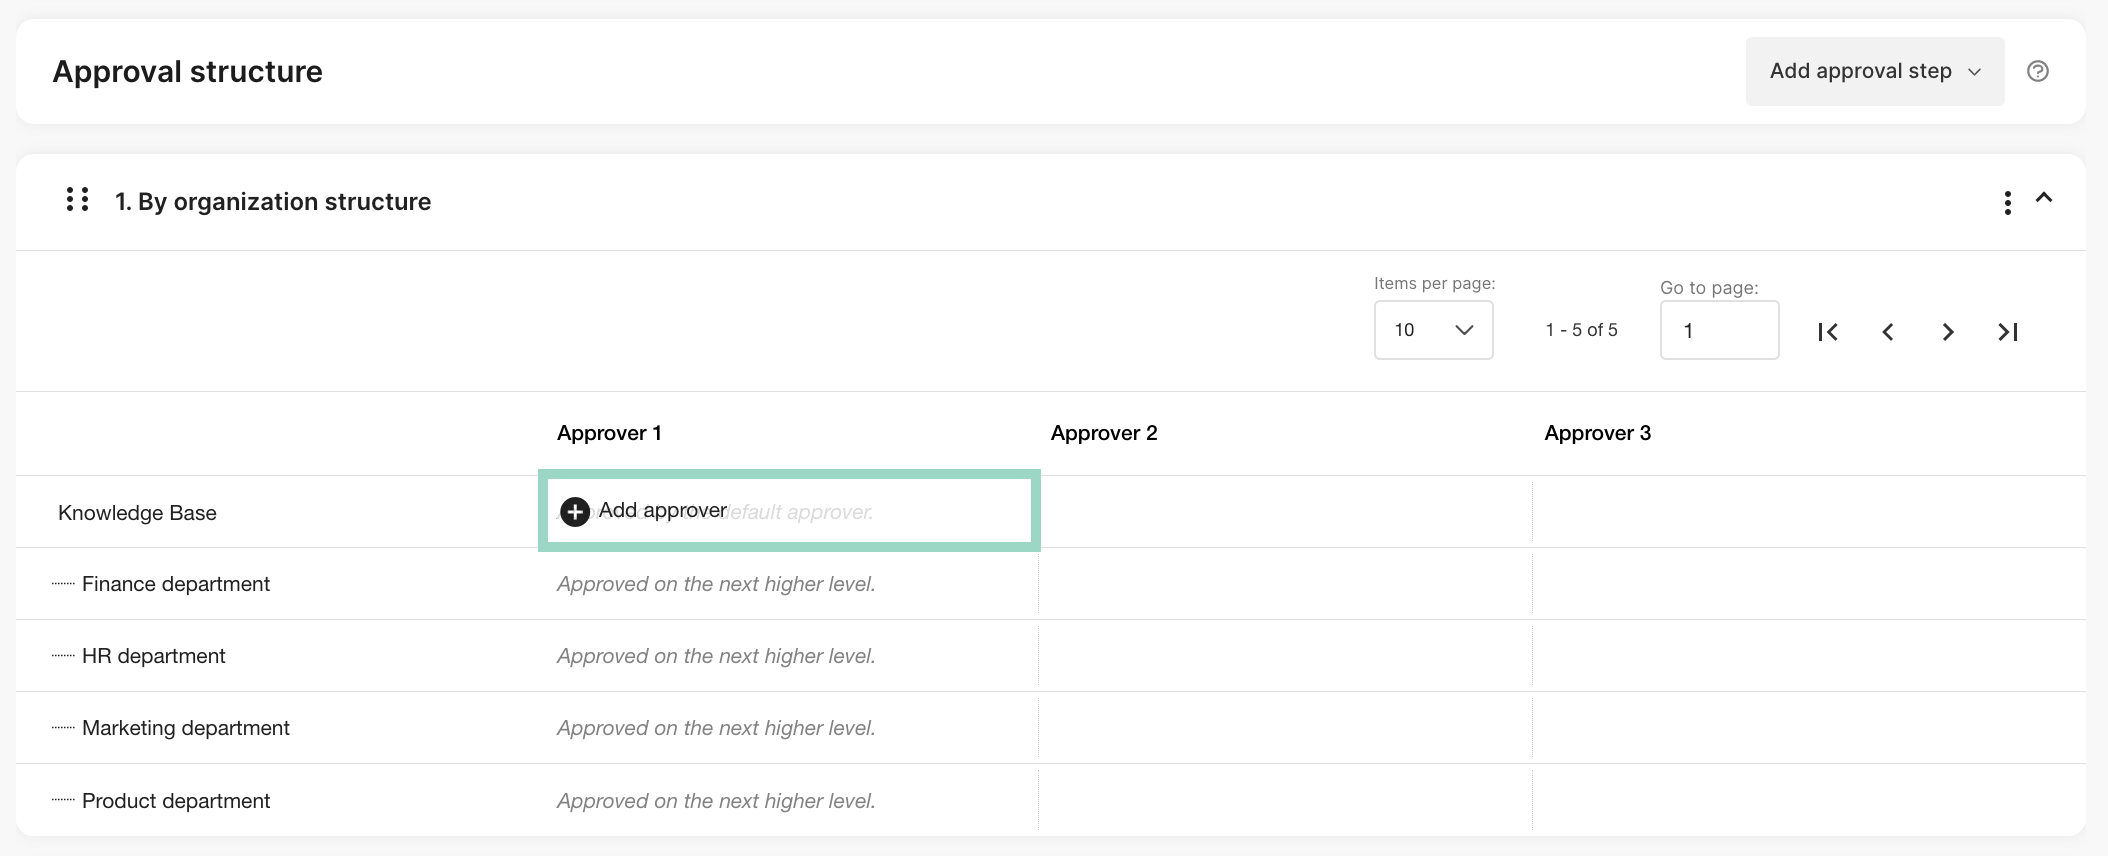 Search for and choose the user that you want as an approver for this cost center and press *OK* when done.
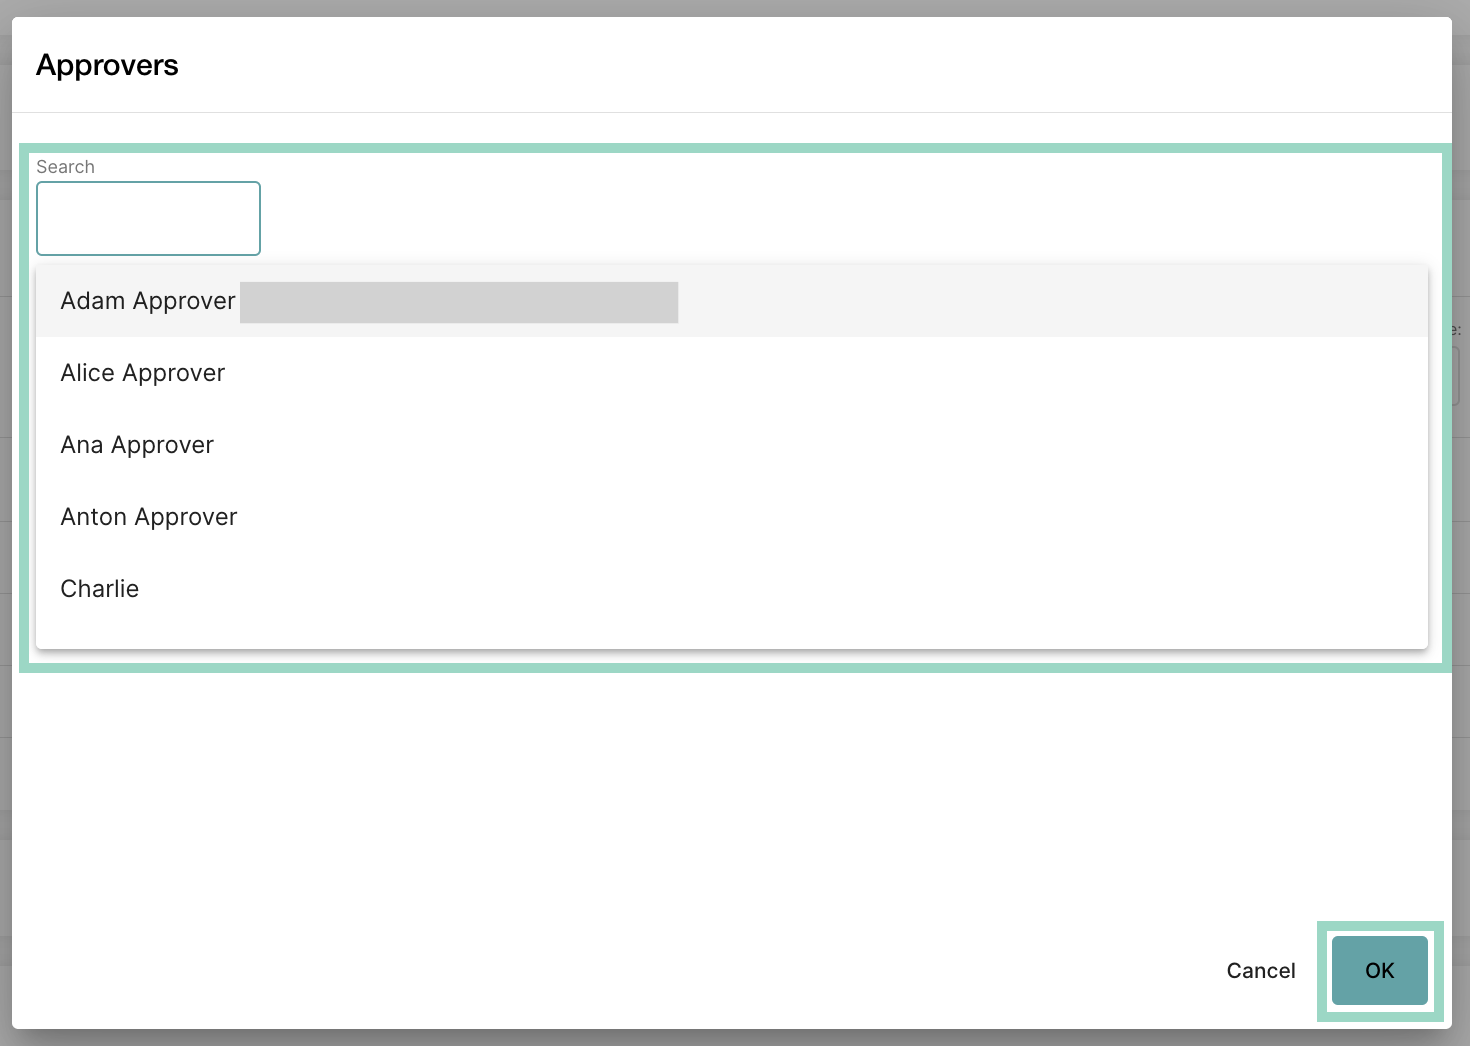 Repeat this for all the departments. Press *Save* to save your settings.
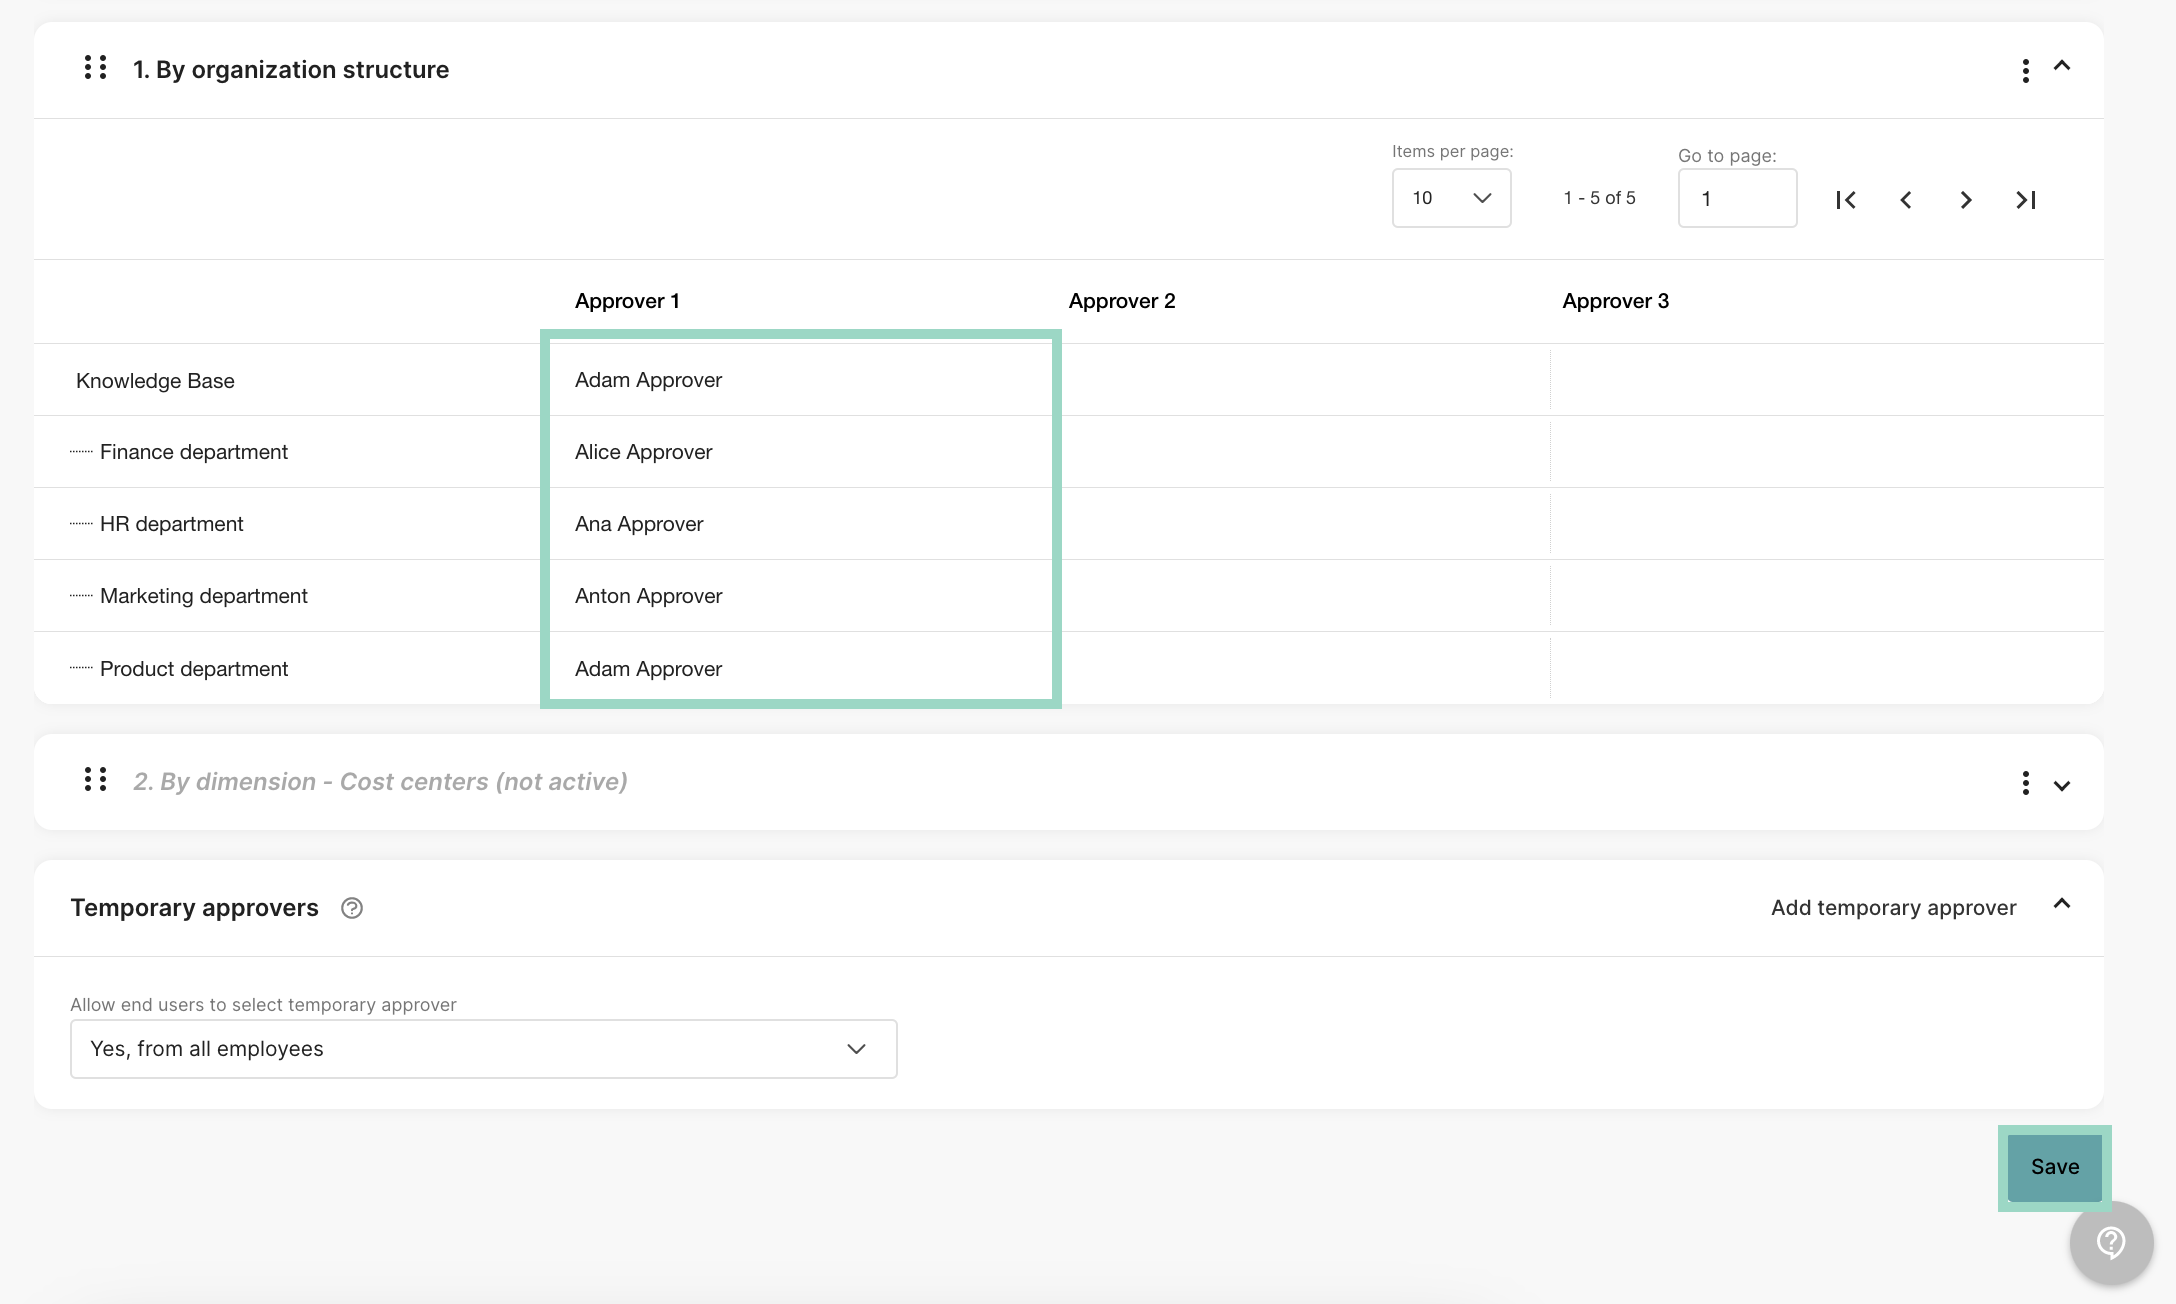 Now you are done with all the settings and you have an approval structure according to your departments.
Example - Charlie has "HR Department" as a preset department. This means that Charlie's reports will be approved by Ana Approver since Ana is the approver on this department.
## Related articles
* [How do I set up approvers?](/en/settings-administrator/how-do-i-set-up-approvers)
* [How do I set up Dimensions?](/en/settings-administrator/how-do-i-set-up-dimensions)
* [How do I set up the organisation structure?](/en/settings-administrator/how-do-i-set-up-the-organisation-structure)
Now you are done with all the settings and you have an approval structure according to your departments.
Example - Charlie has "HR Department" as a preset department. This means that Charlie's reports will be approved by Ana Approver since Ana is the approver on this department.
## Related articles
* [How do I set up approvers?](/en/settings-administrator/how-do-i-set-up-approvers)
* [How do I set up Dimensions?](/en/settings-administrator/how-do-i-set-up-dimensions)
* [How do I set up the organisation structure?](/en/settings-administrator/how-do-i-set-up-the-organisation-structure)