> ## Documentation Index
> Fetch the complete documentation index at: https://help.findity.com/llms.txt
> Use this file to discover all available pages before exploring further.
# How do I add an expense?
**This article applies to the following countries**
* All countries
The following text in this article shows how you, as a user, can add new expenses in the app and on the web. Click on the tabs below to read more.
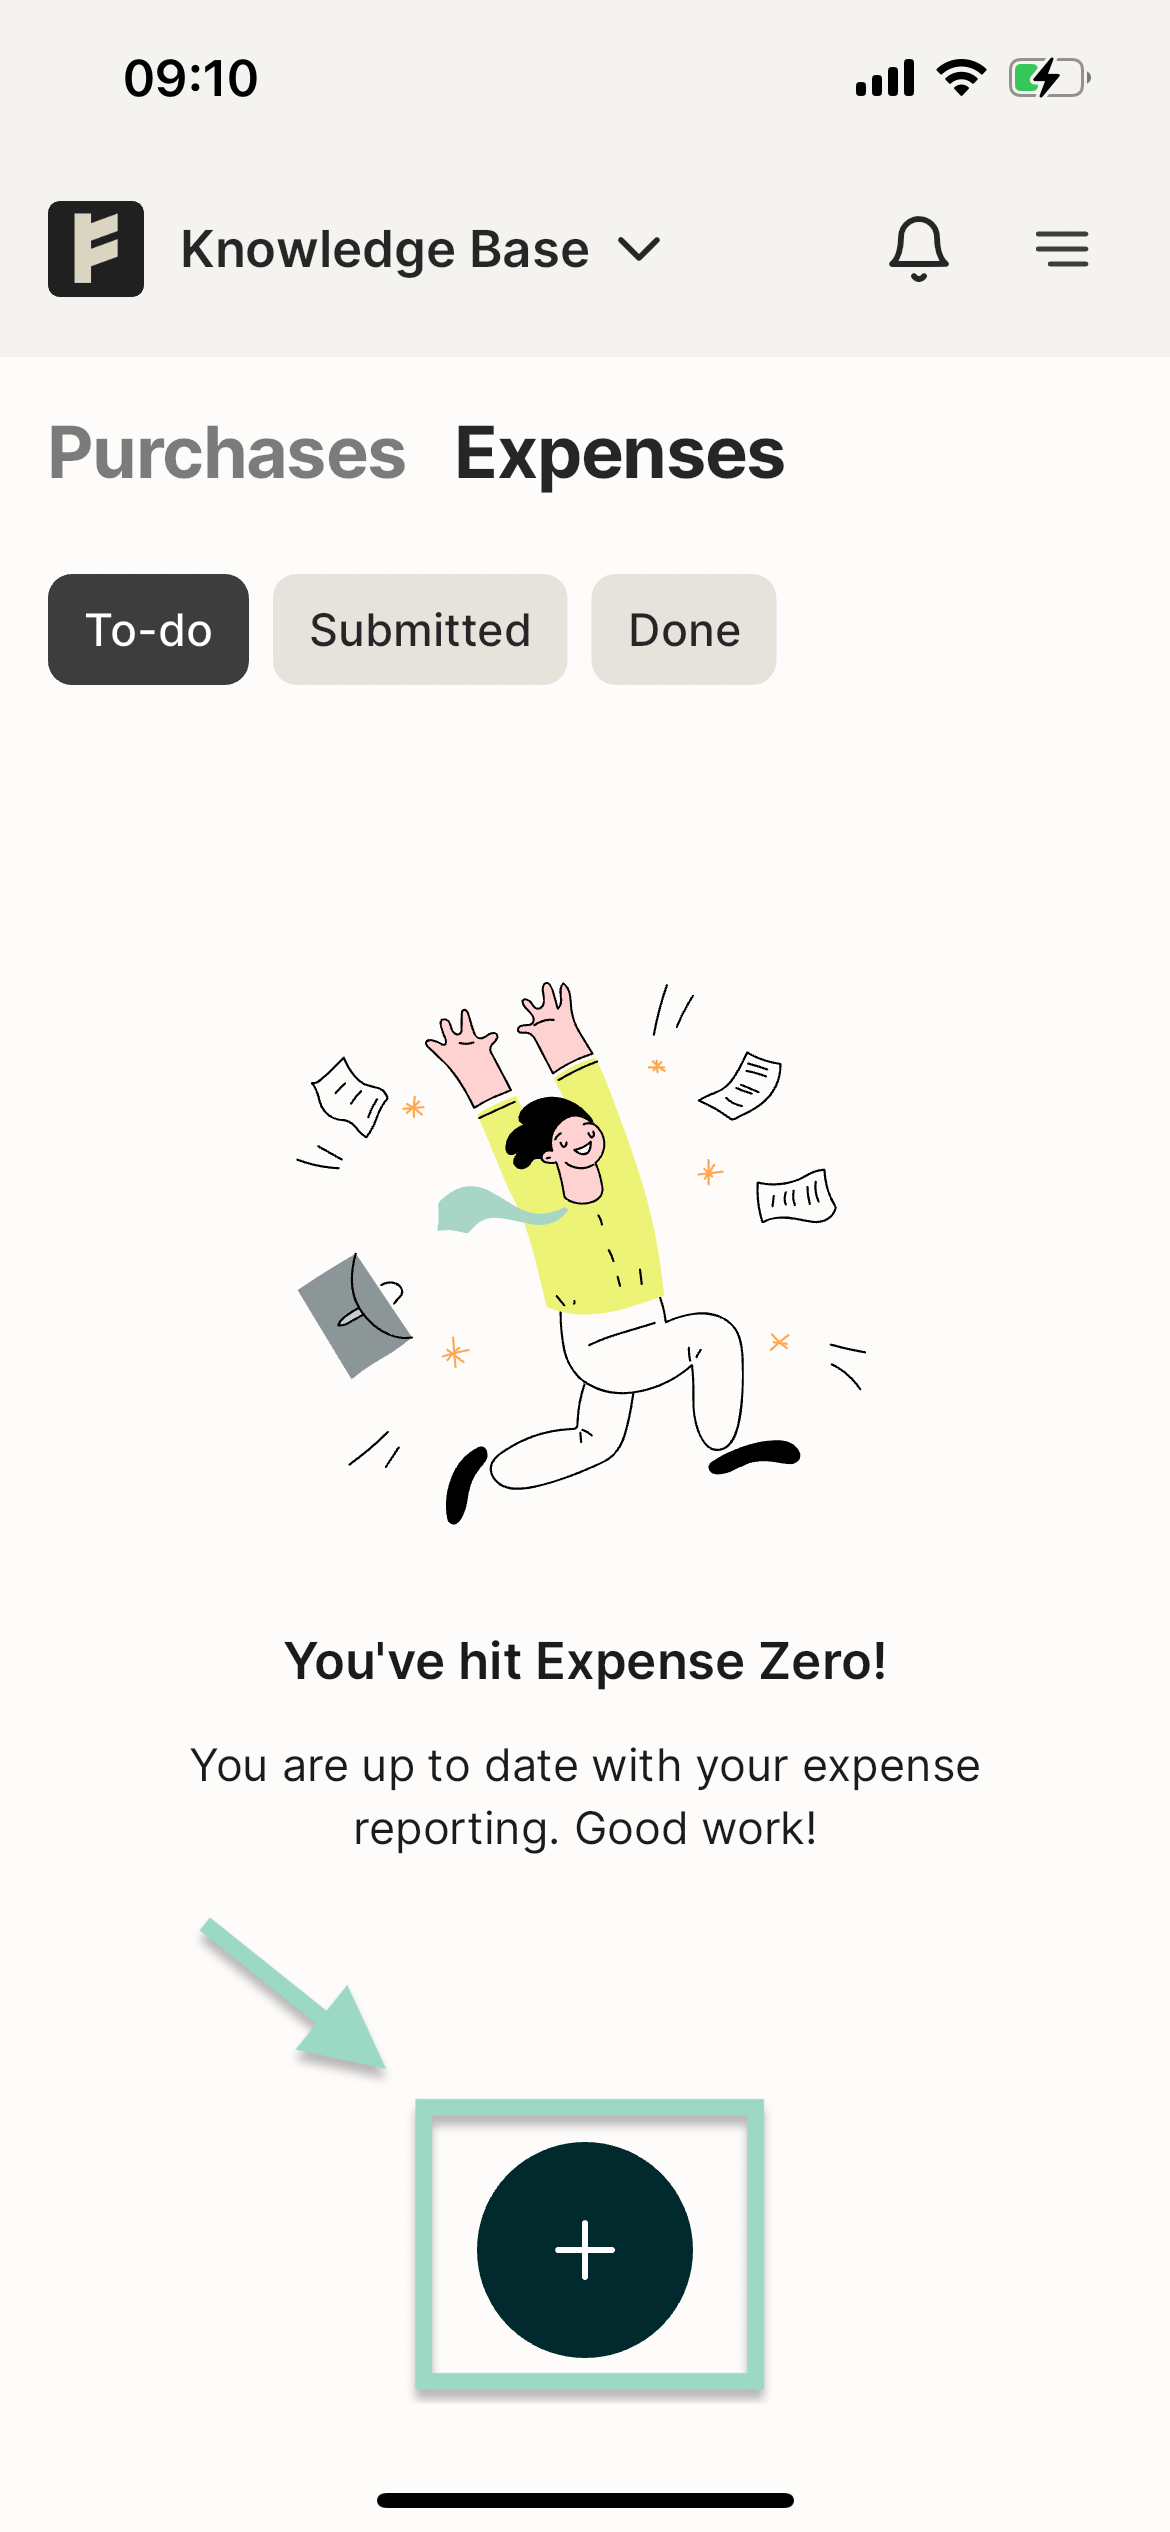
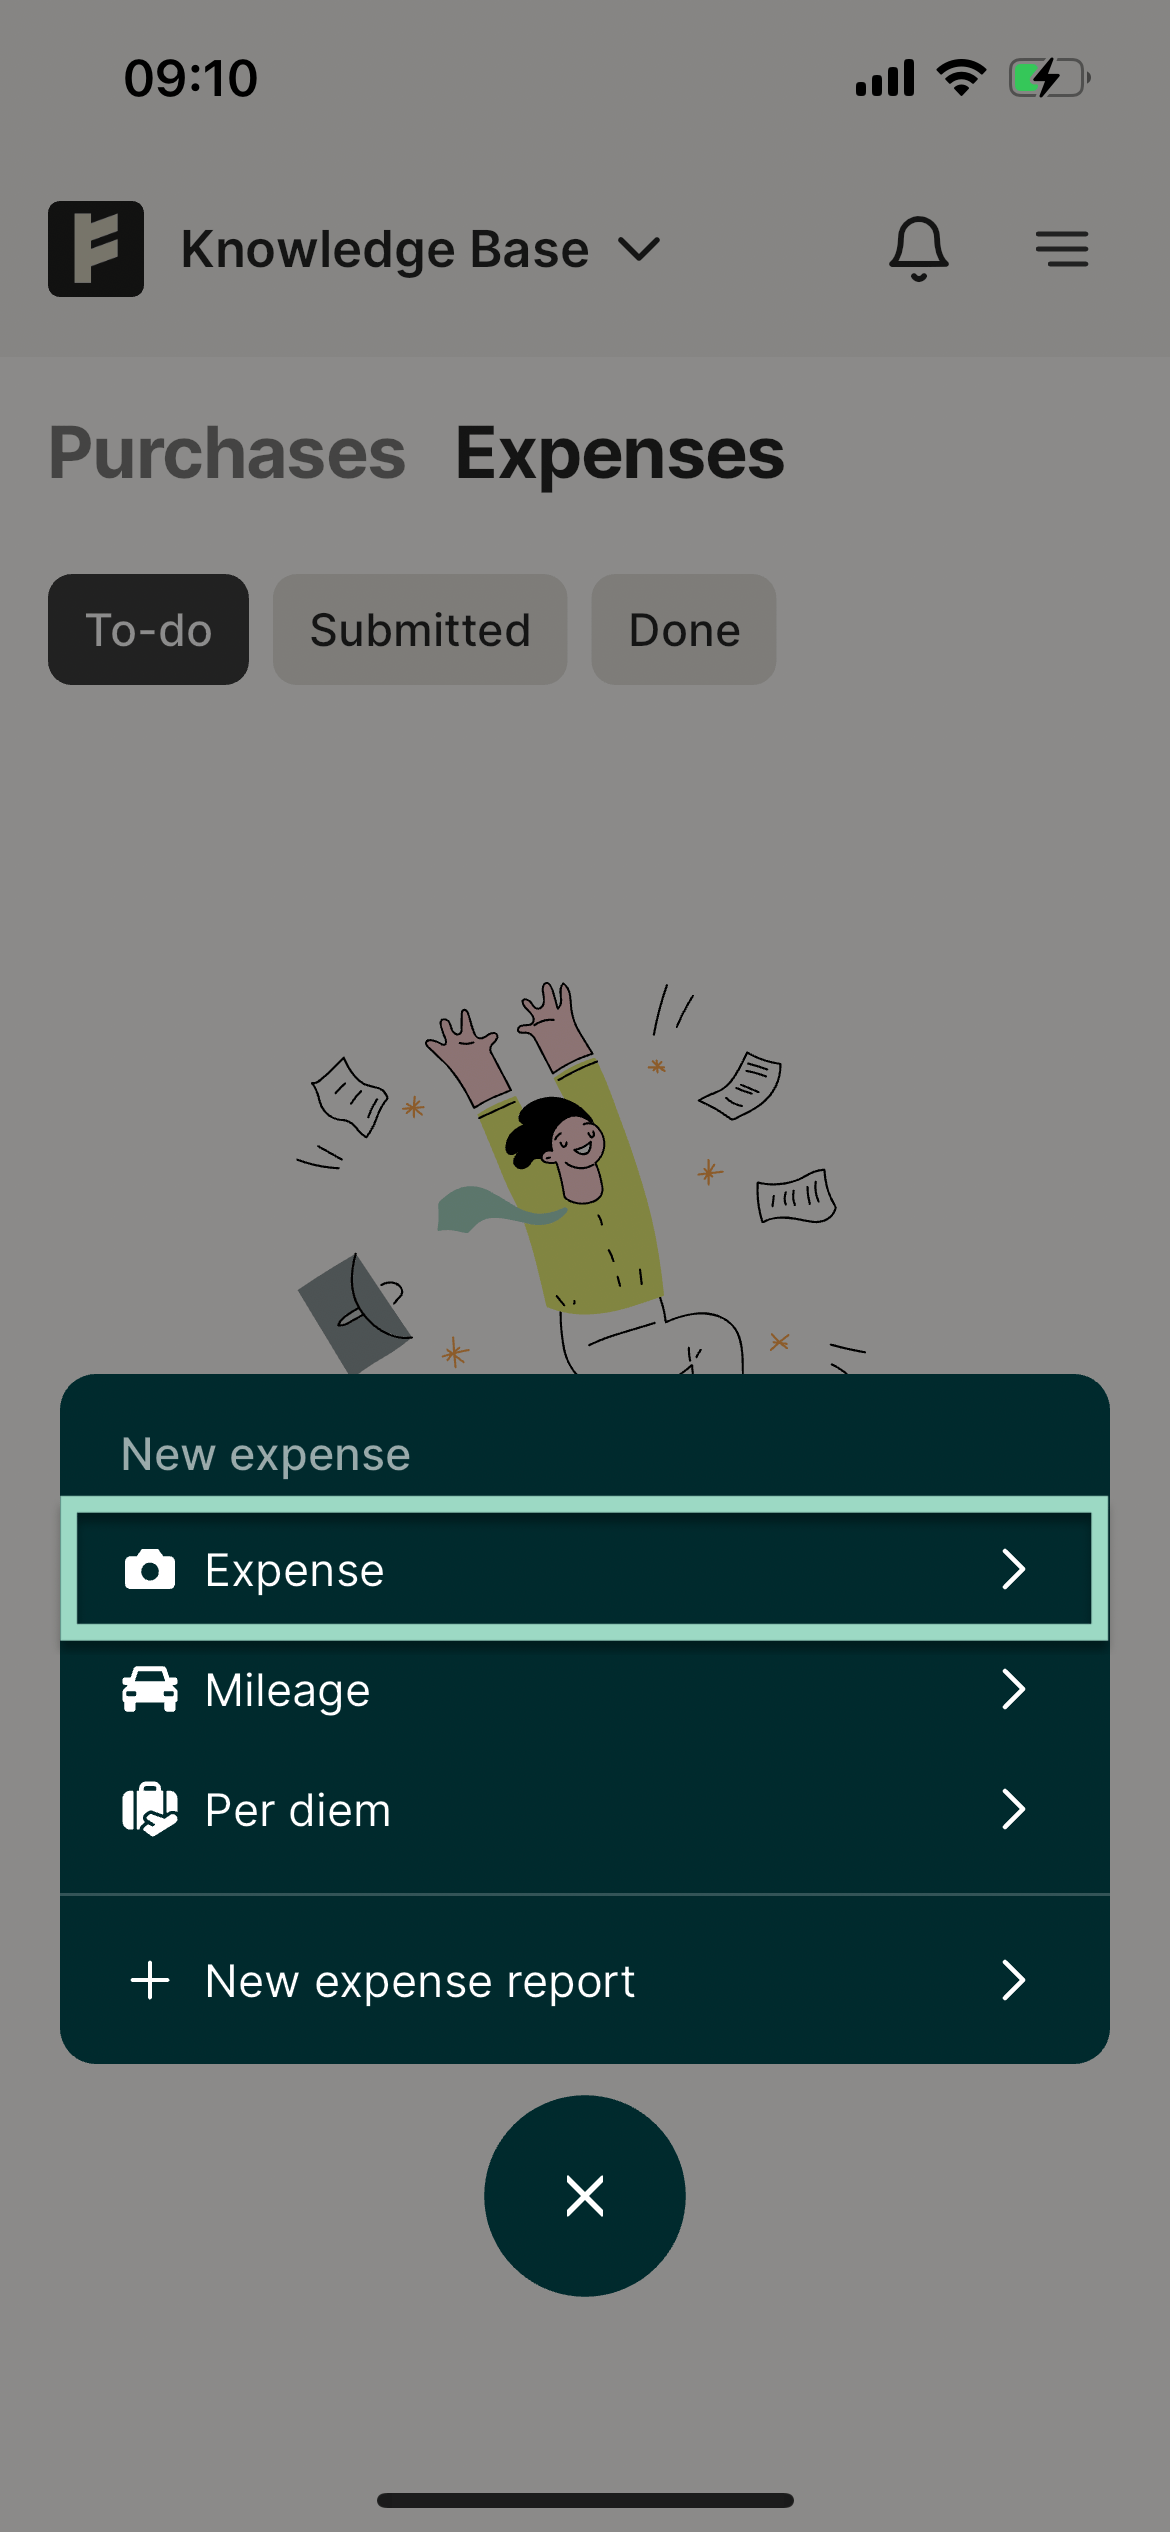
Click on the plus-sign to create a new expense (depending on your organisation's setting this pop up might have different alternatives). Choose to create a new expense.
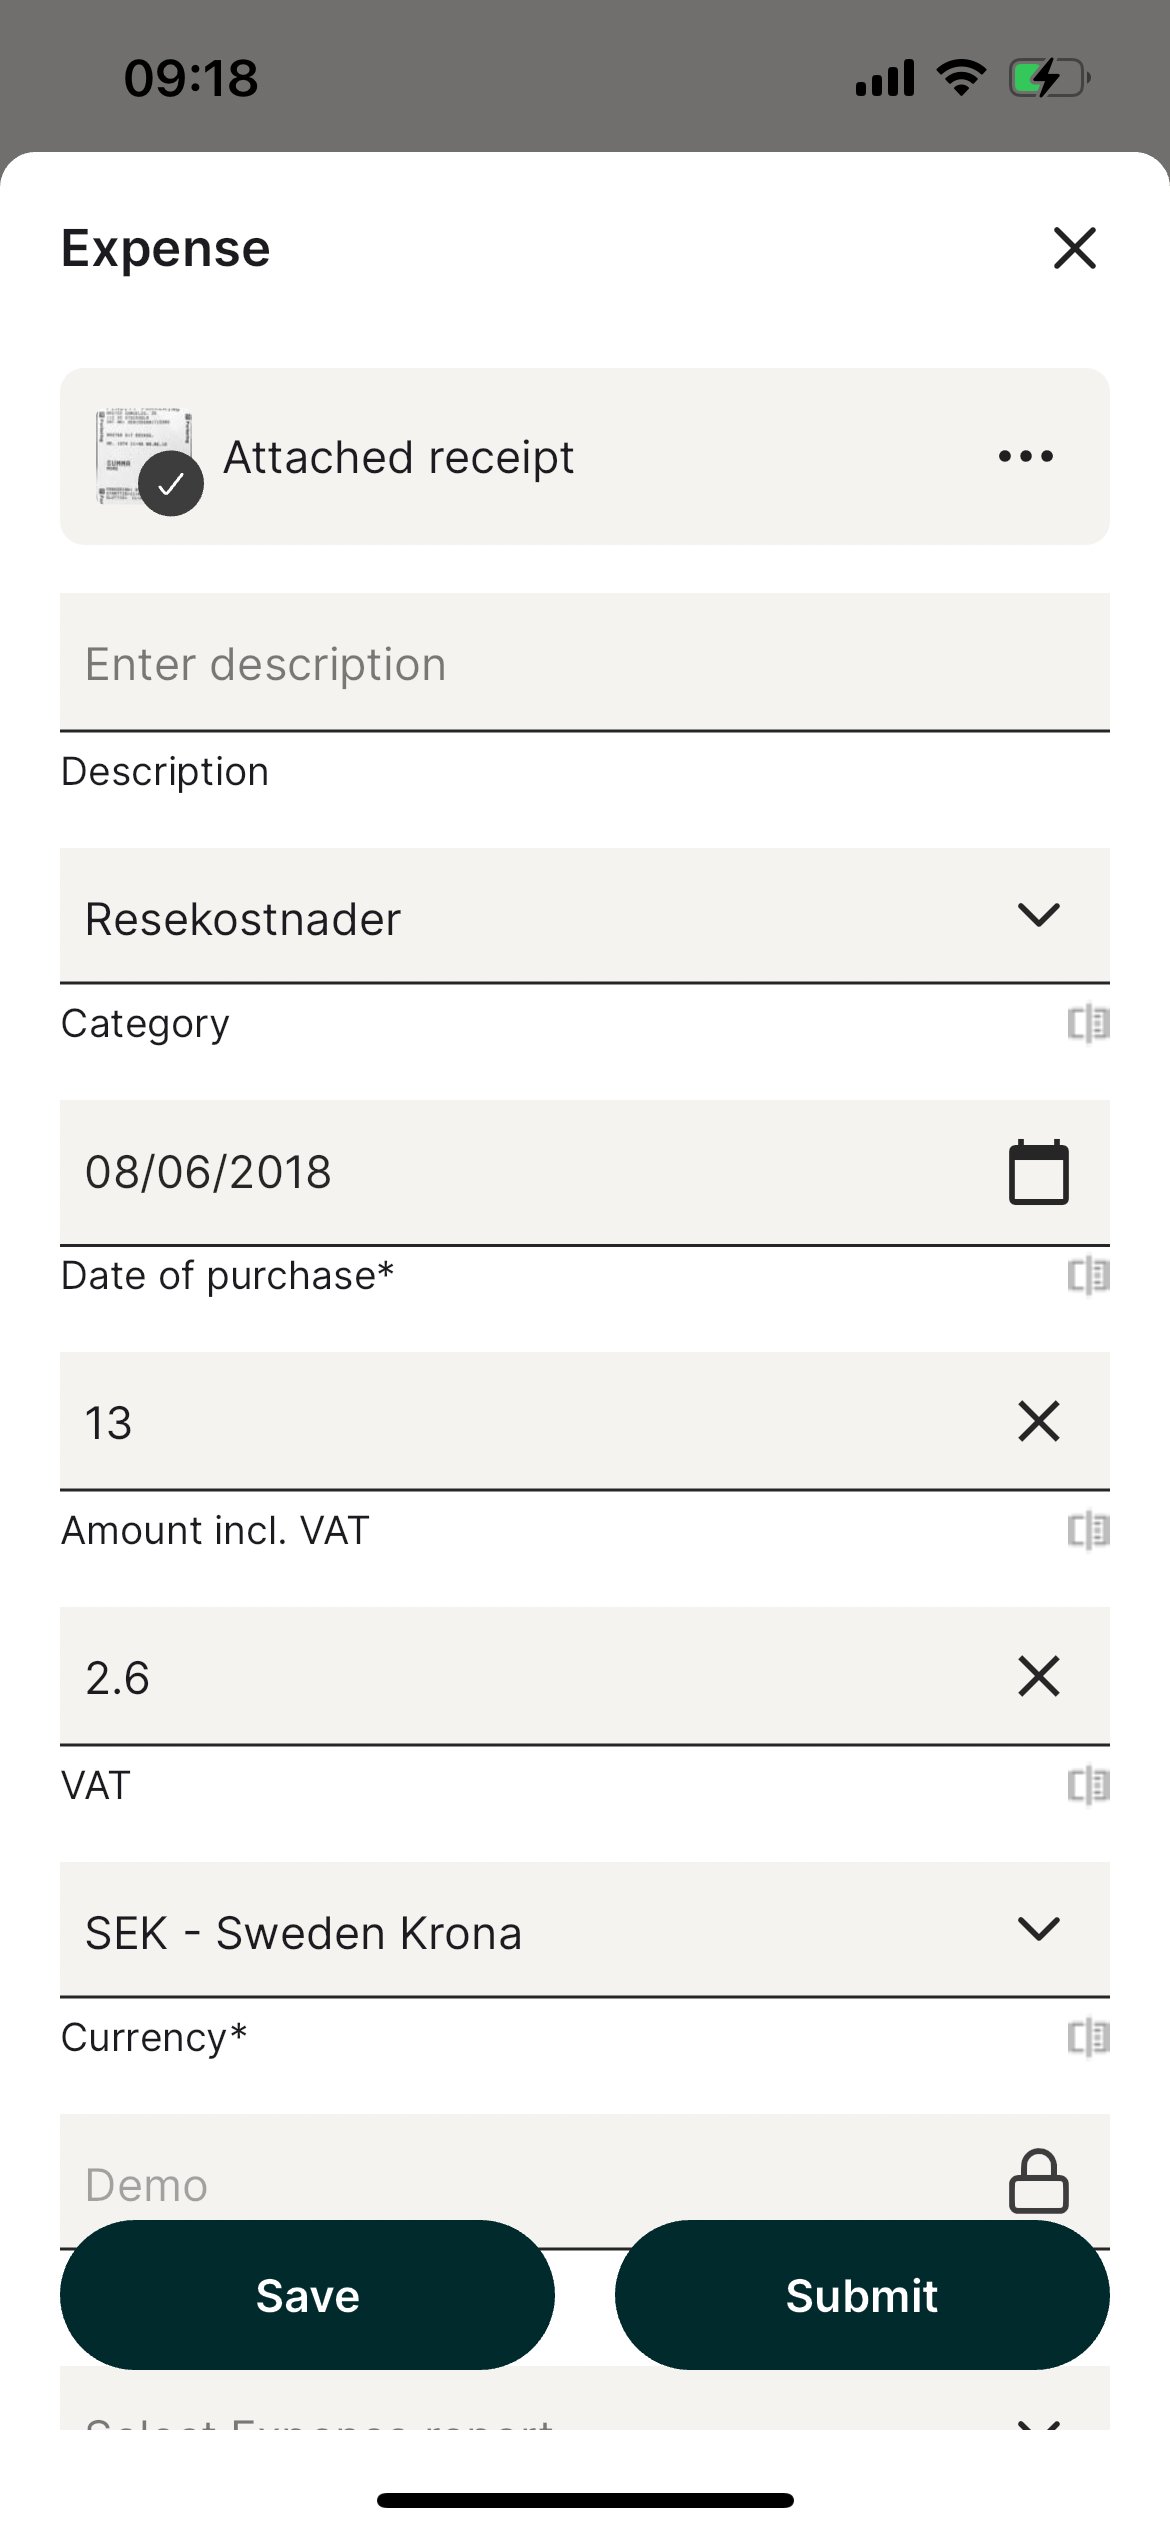
 Your camera will now open automatically. Take a photo of your receipt or add from photos or file. Fill in relevant fields and verify that *Category*, Purchase date, Amount, VATandCurrencyis correct (the fields will be filled automatically after the receipt is scanned). Please note that what visible fields might differ due to your organisation's settings.
Choose to *Save* when you are done.
Your camera will now open automatically. Take a photo of your receipt or add from photos or file. Fill in relevant fields and verify that *Category*, Purchase date, Amount, VATandCurrencyis correct (the fields will be filled automatically after the receipt is scanned). Please note that what visible fields might differ due to your organisation's settings.
Choose to *Save* when you are done.
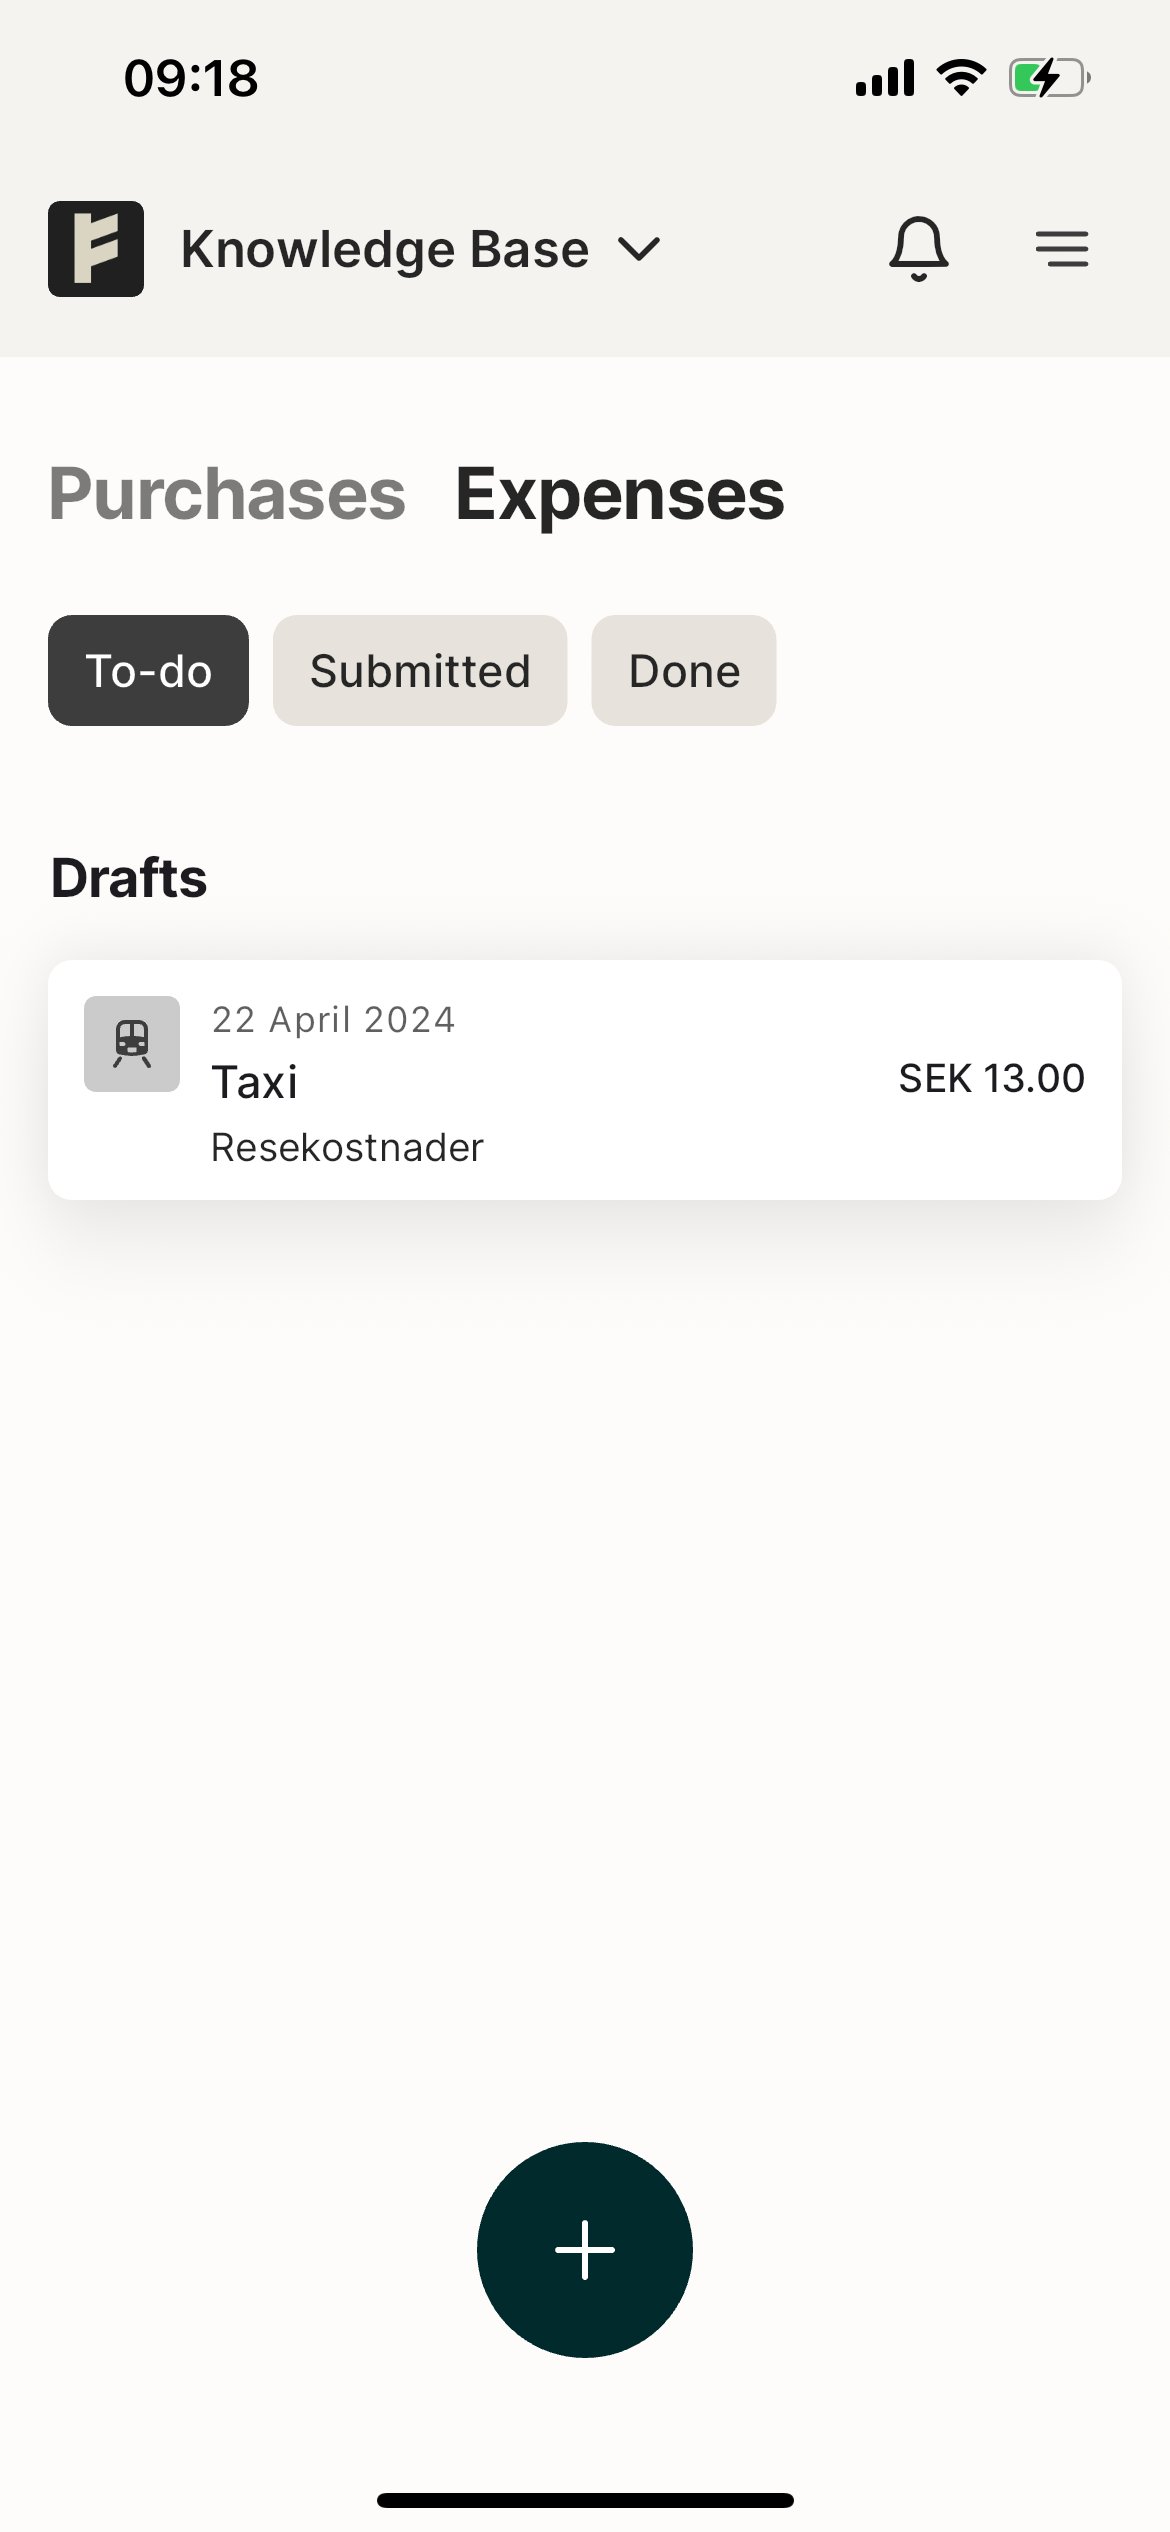
 Your expense till now be saved under your *To-Do* tab.
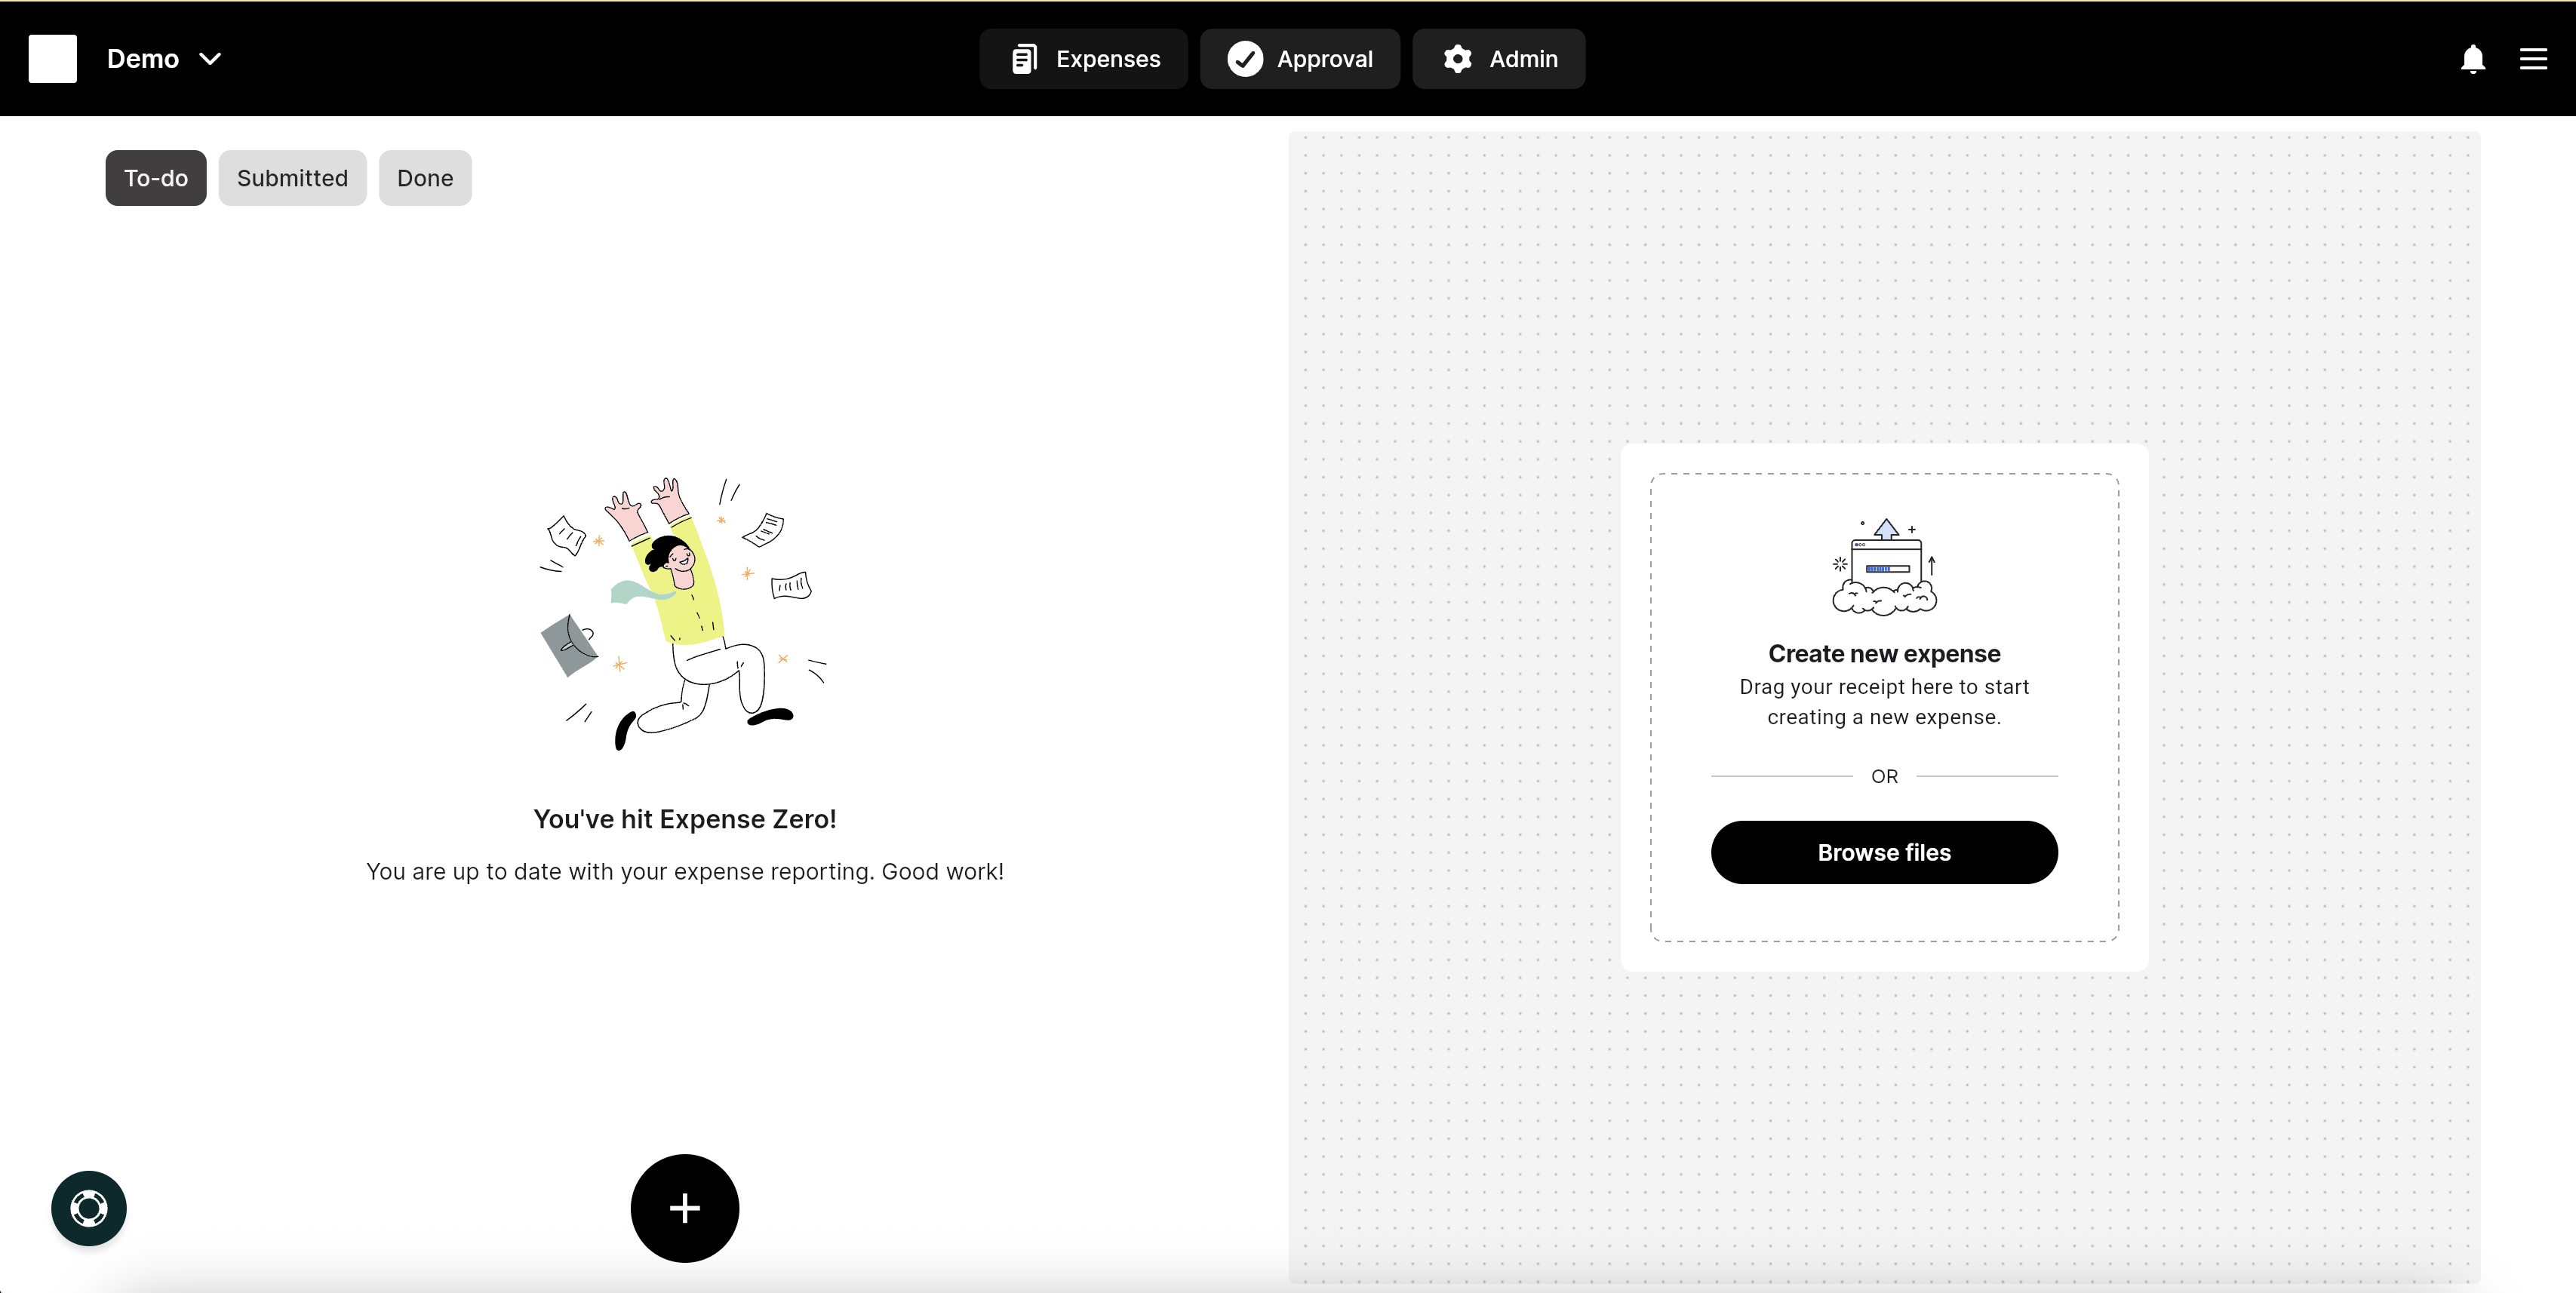
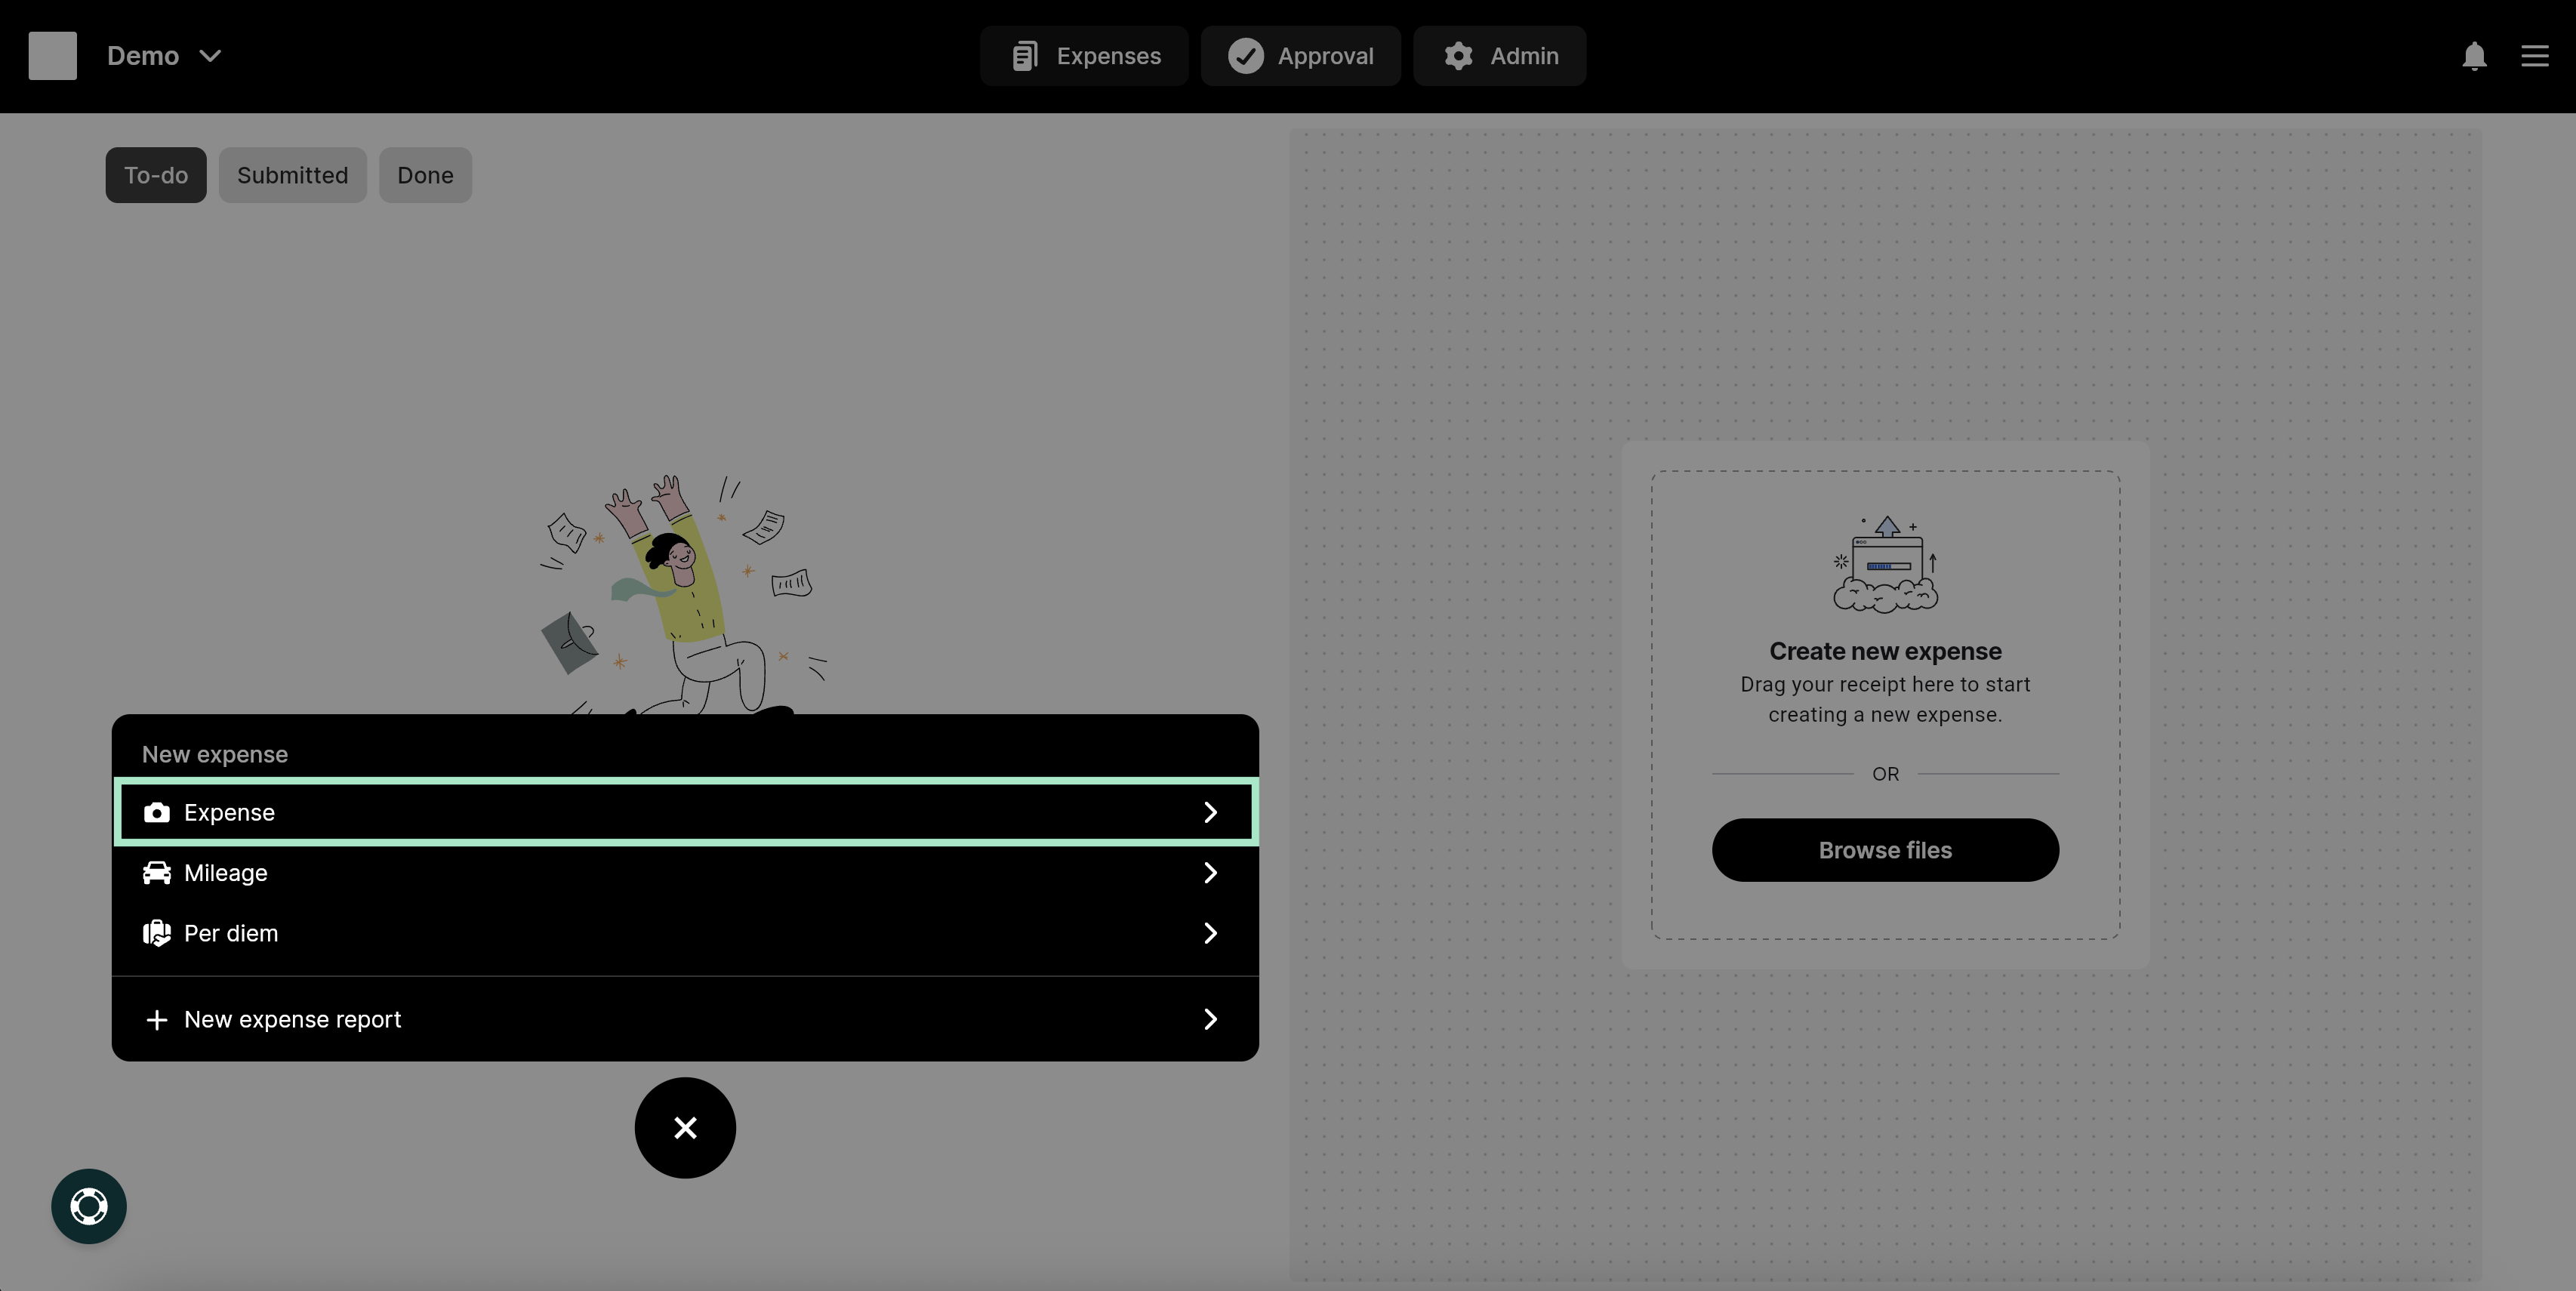
 Click the plus sign at the bottom to create a new expense (depending on your organization’s settings, the pop-up window may have different options).
Select to create a new expense.
Click the plus sign at the bottom to create a new expense (depending on your organization’s settings, the pop-up window may have different options).
Select to create a new expense.
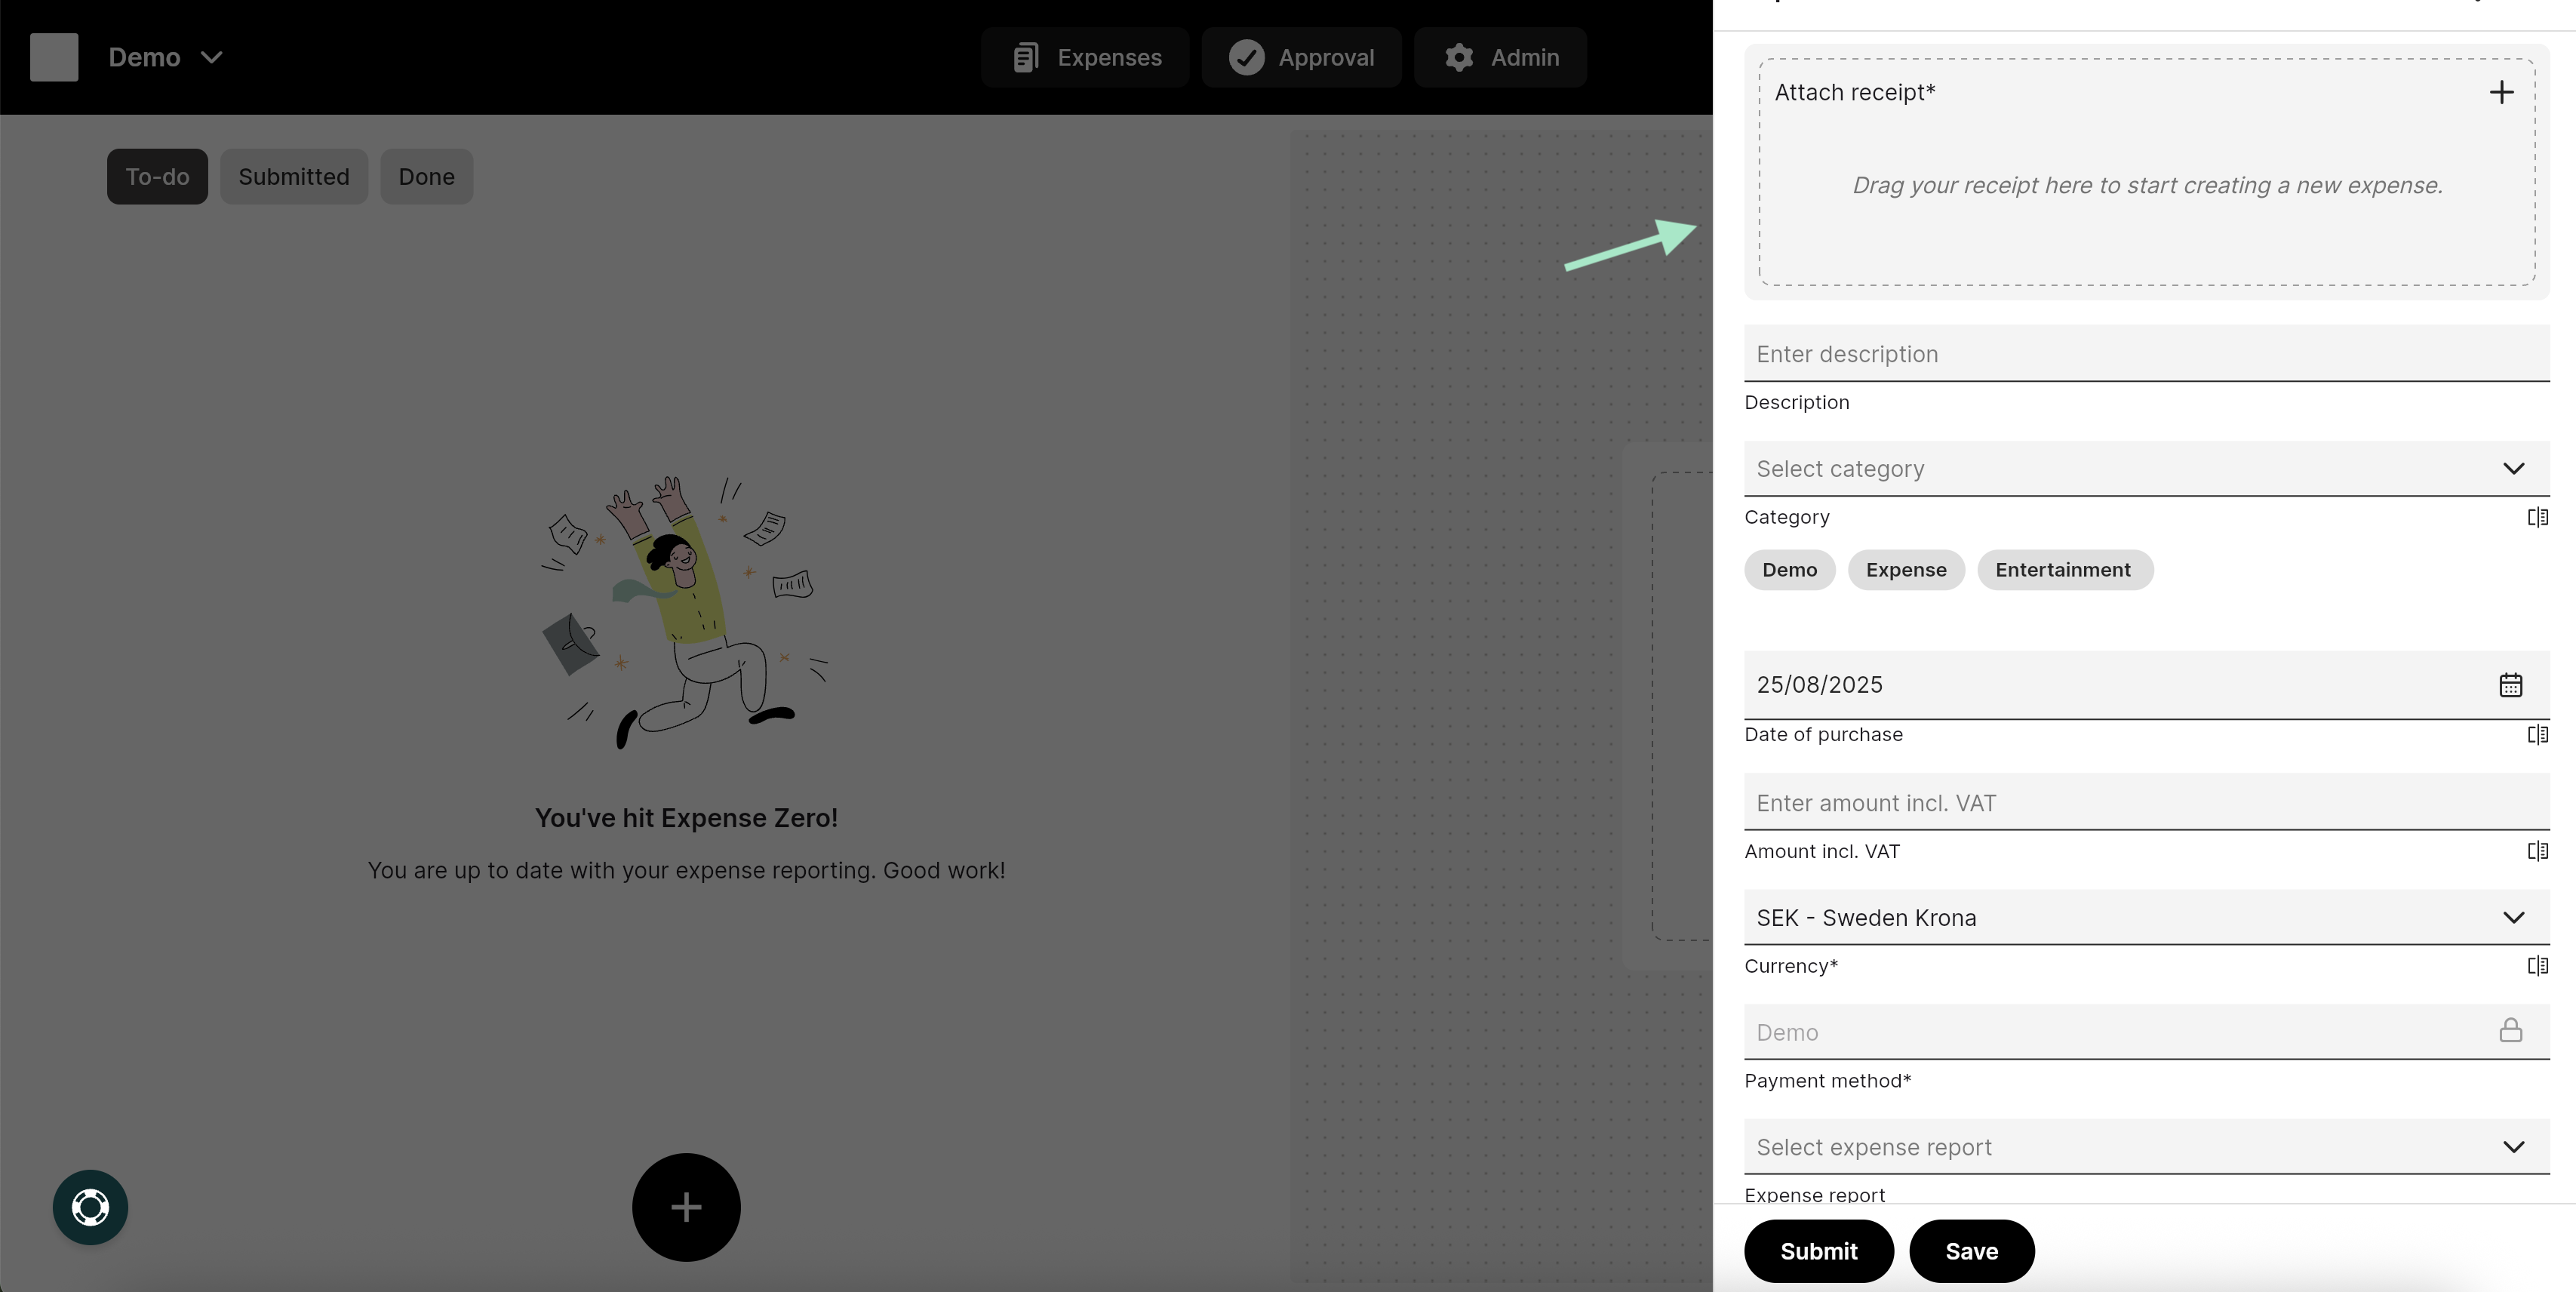
 Attach your receipt image by dragging and dropping the file into the box on the right, or click in the box and select your saved receipt image.
Fill in the relevant fields and verify that Category, Purchase Date, Amount, VAT, and *Currency* are correct (the fields will be filled in automatically after the receipt has been scanned). Please note that the visible fields may vary depending on your organization’s settings.
Select Save when you are finished.
Attach your receipt image by dragging and dropping the file into the box on the right, or click in the box and select your saved receipt image.
Fill in the relevant fields and verify that Category, Purchase Date, Amount, VAT, and *Currency* are correct (the fields will be filled in automatically after the receipt has been scanned). Please note that the visible fields may vary depending on your organization’s settings.
Select Save when you are finished.
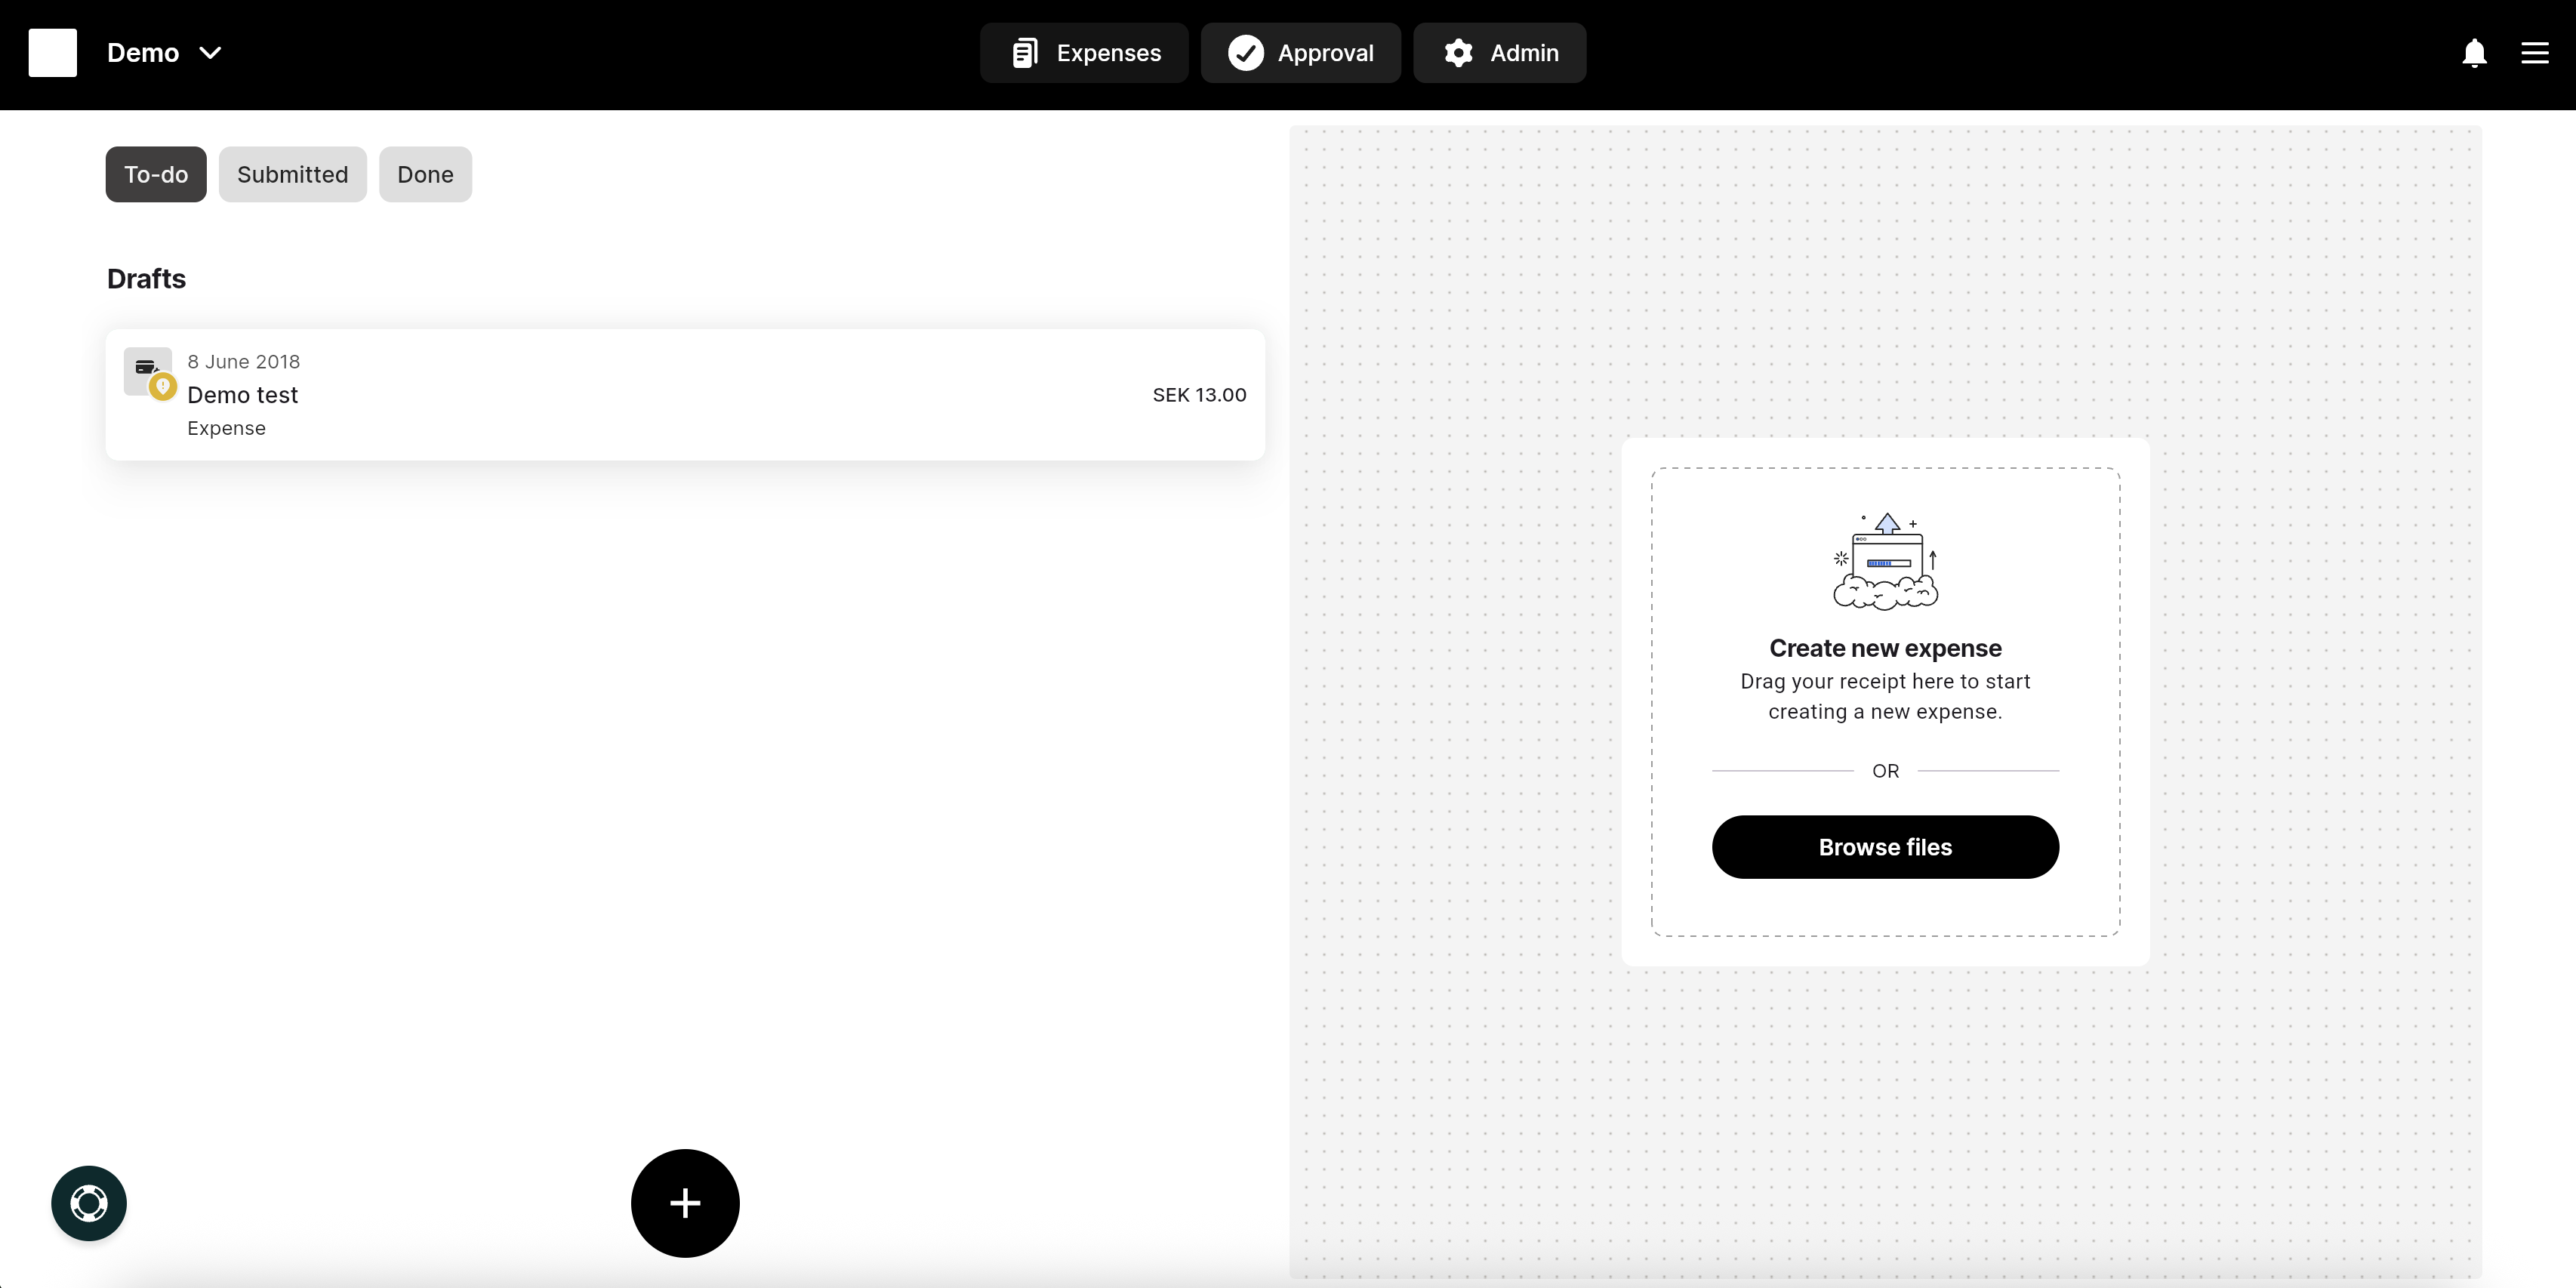
 Your expense has now been saved under the **To-do** tab.
 ## Related articles
* [I made a mistake in my expense report, how can I get my report back so I can make the changes?](/en/expense-and-reports-users/i-made-a-mistake-in-my-expense-report-how-can-i-get-my-report-back-so-i-can-make-the-changes)
* [I have registered my receipt in the wrong organisation, can I move that to another organisation?](/en/expense-and-reports-users/i-have-registered-my-receipt-in-the-wrong-organisation-can-i-move-that-to-another-organisation)
* [Can I email my receipts to the service?](/en/expense-and-reports-users/can-i-email-my-receipts-to-the-service)
* [Can I split an expense into two separate expenses?](/en/expense-and-reports-users/can-i-split-an-expense-into-two-separate-expenses)
* [How can I add an attachment to my expense in the system?](/en/expense-and-reports-users/how-can-i-add-an-attachment-to-my-expense-in-the-system)
## Related articles
* [I made a mistake in my expense report, how can I get my report back so I can make the changes?](/en/expense-and-reports-users/i-made-a-mistake-in-my-expense-report-how-can-i-get-my-report-back-so-i-can-make-the-changes)
* [I have registered my receipt in the wrong organisation, can I move that to another organisation?](/en/expense-and-reports-users/i-have-registered-my-receipt-in-the-wrong-organisation-can-i-move-that-to-another-organisation)
* [Can I email my receipts to the service?](/en/expense-and-reports-users/can-i-email-my-receipts-to-the-service)
* [Can I split an expense into two separate expenses?](/en/expense-and-reports-users/can-i-split-an-expense-into-two-separate-expenses)
* [How can I add an attachment to my expense in the system?](/en/expense-and-reports-users/how-can-i-add-an-attachment-to-my-expense-in-the-system)